
Webhooks
With FastComments it's possible to invoke an API endpoint whenever a comment gets added, updated, or removed from our system.
We accomplish this with asynchronous webhooks over HTTP/HTTPS.
What are Webhooks 
A Webhook is a mechanism, or an integration, between two systems where the "producer" (FastComments) fires an event that the "consumer" (You) consumes via an API call.
Supported Events & Resources
FastComments supports webhooks for the Comment resource only.
We support webhooks for comment creation, removal, and on update.
Each of these are considered separate events in our system and as such have different semantics and structures for the webhook events.
Any number of endpoints can subscribe to the same event, from the dashboard or through the API (see Managing Webhooks via the API). Each webhook is delivered independently.
Local Development Setup
For Local development, use a tool like ngrok.
In order to simplify keeping the system secure, local development follows the same process as setting up and securing other environments.
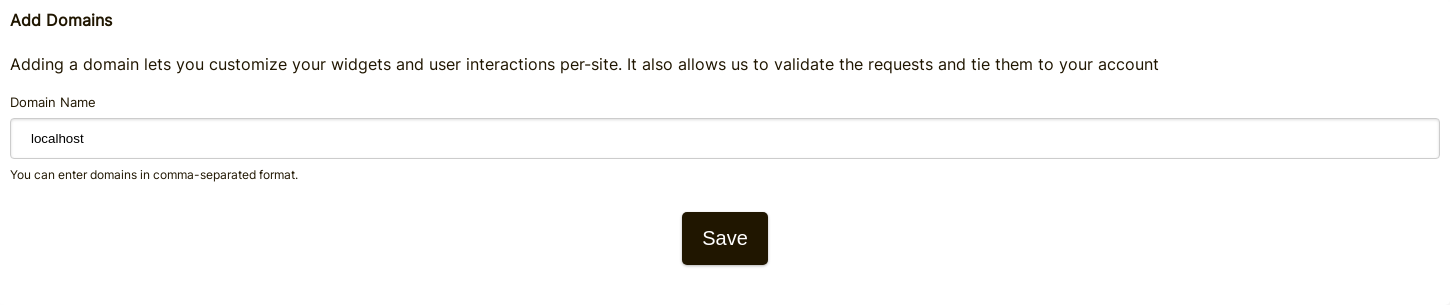
Step 1: Add "localhost" to domains in your account.
Add "localhost" as a domain here.

Step 2: Pick an API Key
We're going to be adding webhook configuration for your domain, so we'll need an API key. You can do that here.

Under "Associate with domain" - select your "localhost" domain.
NOTE: Alternatively, you can use one API Secret for all testing activity and staging environments. Simply add an API Secret for "All Domains", and give it a name like "test".
Ensure you have an API Secret defined for your production domain(s). Events for all other domains will use the wildcard (testing) secret.
Step 3: Add Your Webhook
While running ngrok or similar tool, set the value for "localhost" here.
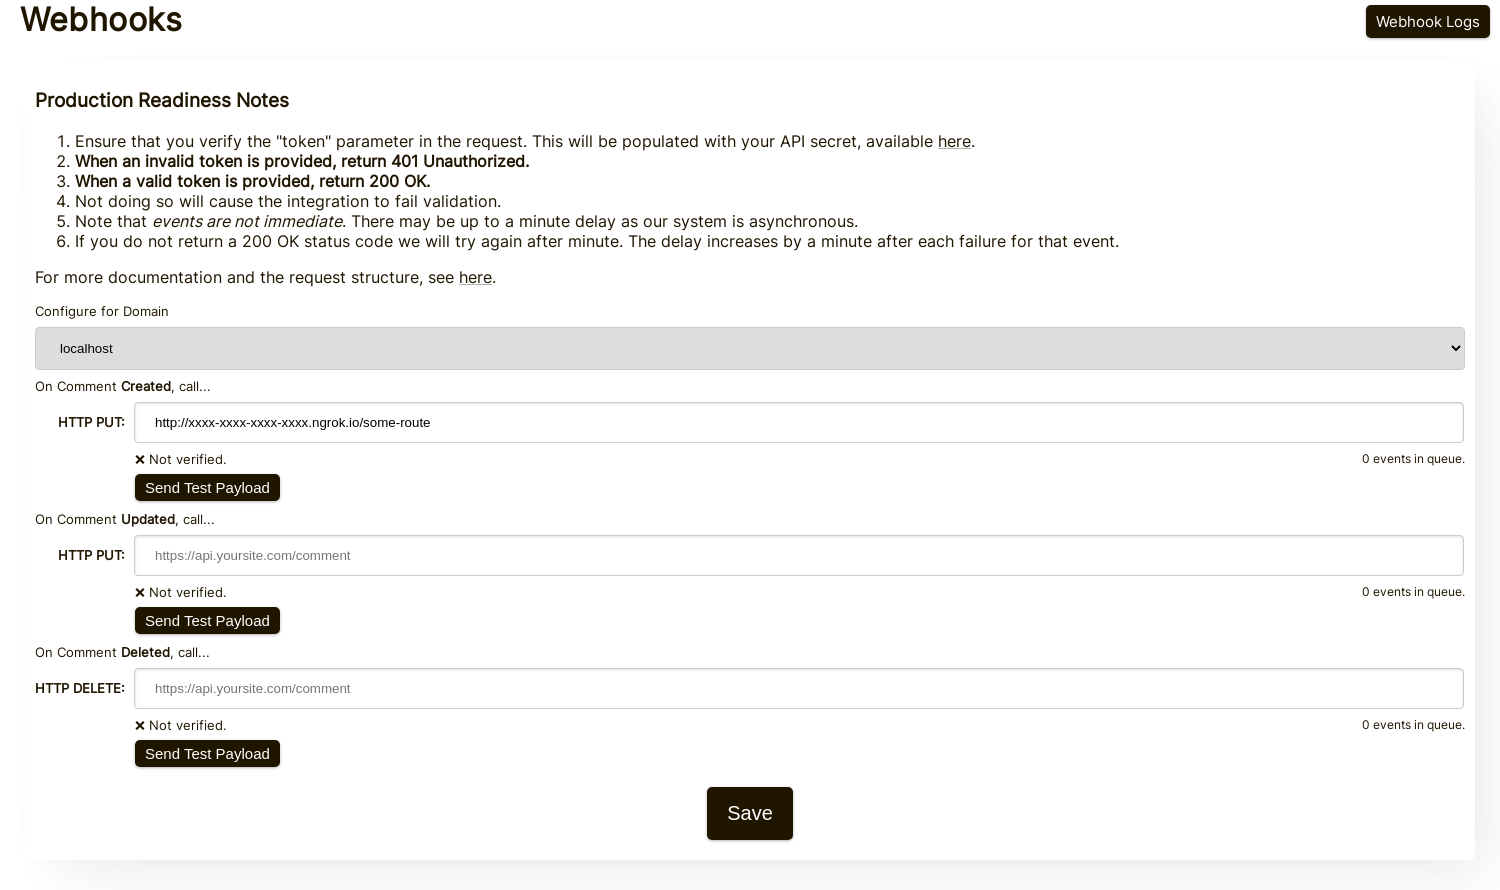
When clicking Send Test Payload, we will send two test events to check that you validate the API key.
Once it validates, hit Save.
Step 4: Add A Comment
Now you can add, edit, or delete comments and should see us call your local development machine with the events, using your testing API key. There may be up to 30 seconds delay for the events to reach your machine.
Setup
Follow the same steps for localhost as you would production. Ensure you have production domains and API Secrets setup.
First, navigate to the Webhooks admin. This is accessible via Manage Data -> Webhooks.
The page lists every webhook on your account:
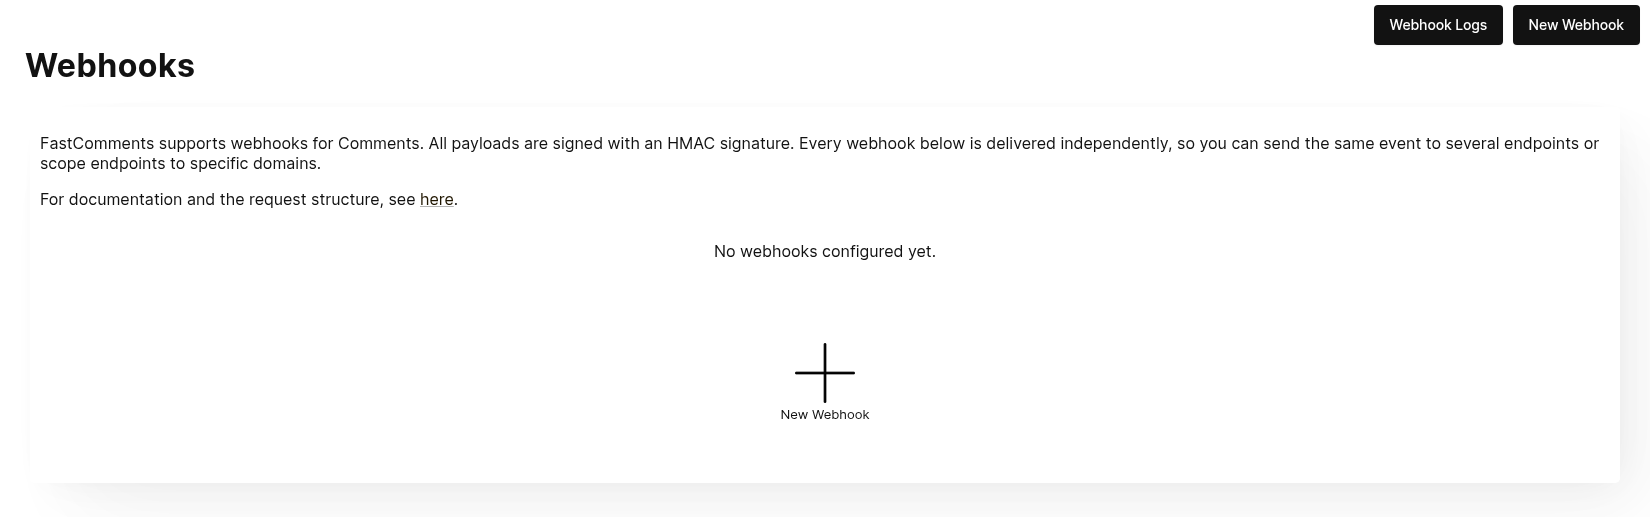
Click New Webhook to add one. Each webhook has a URL, one comment event (created, updated or deleted), a domain, and an HTTP method:
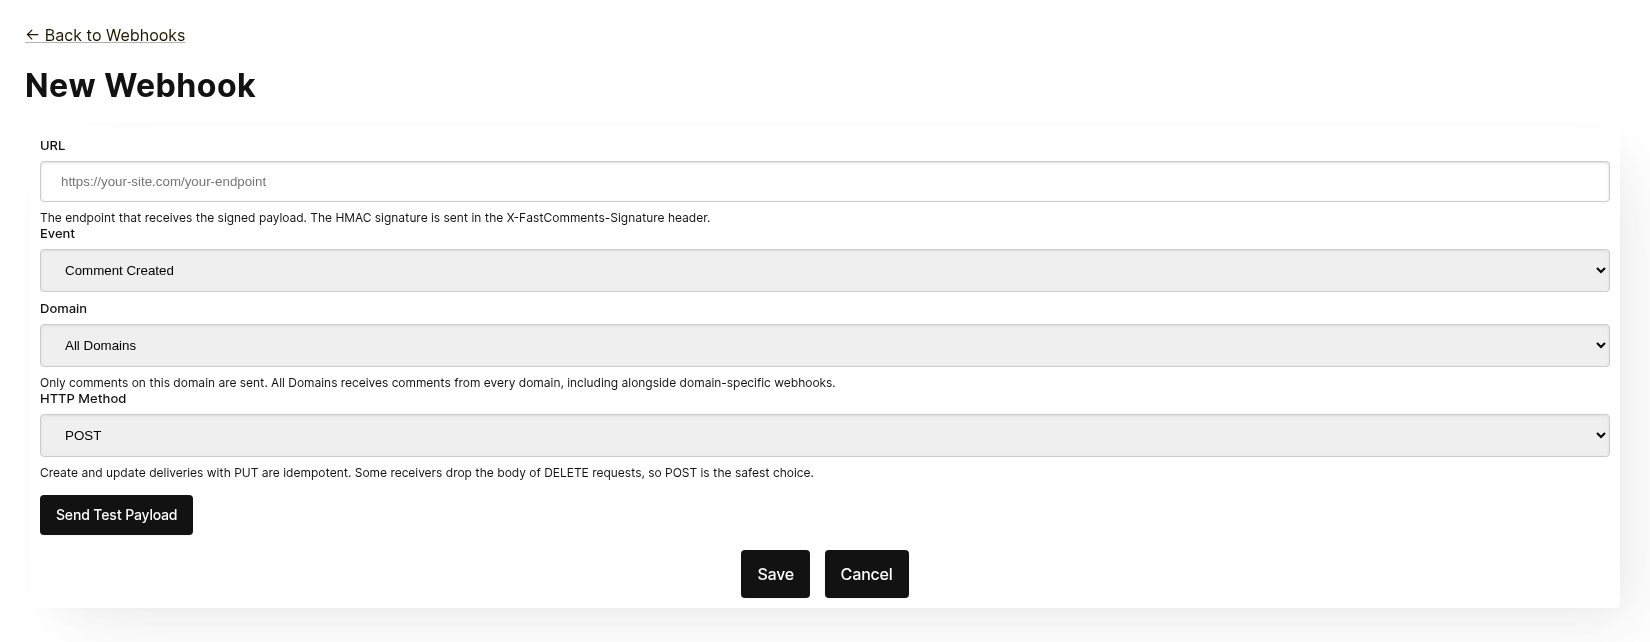
Every webhook is delivered independently. You can send the same event to several endpoints, and a webhook scoped to All Domains receives comments from every domain even when a domain-specific webhook exists for the same event. The same URL, event and domain cannot be added twice.
Before saving, click Send Test Payload to check the endpoint accepts a signed request. See the next section, "Testing", for details.
From the list you can edit, disable, re-enable or delete a webhook. Disabling keeps queued events until the webhook is re-enabled; deleting discards them.
Webhooks can also be created through the API, for example by Zapier. Those appear in the same list with the source API. See Managing Webhooks via the API.
Testing
The new and edit webhook pages have a Send Test Payload button that sends a request to the URL currently in the form, whether or not it has been saved. The Create and Update events send a dummy WebhookComment object, while testing Delete will send a dummy request body with just an ID.
Verifying Payloads
When testing your webhook integration, verify the incoming requests include the following headers:
X-FastComments-Timestamp- Unix timestamp (seconds)X-FastComments-Signature- HMAC-SHA256 signature
Webhooks created before the signature scheme was introduced also receive a token header containing your API Secret. New webhooks do not.
Use the HMAC signature verification to ensure payloads are authentic.
Testing Tools
You can use tools like webhook.site or ngrok to inspect incoming webhook payloads during development.
Event Types
- Create Event: Triggered when a new comment is created.
- Update Event: Triggered when a comment is edited.
- Delete Event: Triggered when a comment is deleted.
Each webhook is tied to one event and one HTTP method (POST, PUT or DELETE). Each event includes the full comment data in the request body (see Data Structures for the payload format).
Data Structures
The only structure sent via webhooks is the WebhookComment object, outlined in TypeScript below.
The WebhookComment Object Structure
The "Create" Event Structure
The "create" event request body is a WebhookComment object.
The "Update" Event Structure
The "update" event request body is a WebhookComment object.
The "Delete" Event Structure
The "delete" event request body is a WebhookComment object.
Change as of Nov 14th 2023
Previously the "delete" event request body only contained the comment id. It now contains the full comment at the time of deletion.
Every key is always present in the body. When the comment has no value for a field the body carries null
(or false for booleans and [] for lists), so the shape of a delivery never varies from one comment to the next.
 Run
Run When users are tagged in a comment, the information is stored in a list called mentions. Each object in that list
has the following structure.
Run HTTP Methods
You can configure the HTTP method for each webhook event type in the admin panel:
- Create Event: POST or PUT (default: PUT)
- Update Event: POST or PUT (default: PUT)
- Delete Event: DELETE, POST, or PUT (default: DELETE)
Since all requests contain an ID, Create and Update operations are idempotent by default (PUT). Repeating the same Create or Update request should not create duplicate objects on your side.
Request Headers
Each webhook request includes the following headers:
| Header | Description |
|---|---|
Content-Type | application/json |
token | Your API Secret |
X-FastComments-Timestamp | Unix timestamp (seconds) when the request was signed |
X-FastComments-Signature | HMAC-SHA256 signature (sha256=<hex>) |
See Security & API Tokens for information on verifying the HMAC signature.
Security & API Tokens
FastComments webhook requests include multiple authentication mechanisms for security.
Headers Sent
| Header | Description |
|---|---|
token | Your API Secret (for backwards compatibility) |
X-FastComments-Timestamp | Unix timestamp (seconds) when the request was signed |
X-FastComments-Signature | HMAC-SHA256 signature of the payload |
HMAC Signature Verification (Recommended)
We strongly recommend verifying the HMAC signature to ensure webhook payloads are authentic and haven't been tampered with.
Signature Format: sha256=<hex-encoded-signature>
How the signature is computed:
- Concatenate:
timestamp + "." + JSON_payload_body - Compute HMAC-SHA256 using your API Secret as the key
- Hex-encode the result
Example Verification (Node.js)
const crypto = require('crypto');

function verifyWebhookSignature(req, apiSecret) {
    const timestamp = req.headers['x-fastcomments-timestamp'];
    const signature = req.headers['x-fastcomments-signature'];

    if (!timestamp || !signature) {
        return false;
    }

    // Verify timestamp is recent (within 5 minutes)
    const now = Math.floor(Date.now() / 1000);
    if (Math.abs(now - parseInt(timestamp, 10)) > 300) {
        return false;  // Replay attack prevention
    }

    // Verify signature
    const payload = JSON.stringify(req.body);
    const expectedSignature = crypto
        .createHmac('sha256', apiSecret)
        .update(`${timestamp}.${payload}`)
        .digest('hex');

    return signature === `sha256=${expectedSignature}`;
}
Example Verification (Python)
import hmac
import hashlib
import time
import json

def verify_webhook_signature(headers, body, api_secret):
    timestamp = headers.get('X-FastComments-Timestamp')
    signature = headers.get('X-FastComments-Signature')

    if not timestamp or not signature:
        return False

    # Verify timestamp is recent
    now = int(time.time())
    if abs(now - int(timestamp)) > 300:
        return False

    # Verify signature
    payload = json.dumps(body, separators=(',', ':'))
    message = f"{timestamp}.{payload}"
    expected = hmac.new(
        api_secret.encode(),
        message.encode(),
        hashlib.sha256
    ).hexdigest()

    return signature == f"sha256={expected}"
Example Verification (PHP)
function verifyWebhookSignature($headers, $body, $apiSecret) {
    $timestamp = $headers['X-FastComments-Timestamp'] ?? null;
    $signature = $headers['X-FastComments-Signature'] ?? null;

    if (!$timestamp || !$signature) {
        return false;
    }

    // Verify timestamp is recent (within 5 minutes)
    $now = time();
    if (abs($now - intval($timestamp)) > 300) {
        return false;
    }

    // Verify signature
    $payload = json_encode($body, JSON_UNESCAPED_SLASHES);
    $message = $timestamp . '.' . $payload;
    $expectedSignature = 'sha256=' . hash_hmac('sha256', $message, $apiSecret);

    return hash_equals($expectedSignature, $signature);
}
Legacy Authentication
The token header containing your API Secret is still sent for backwards compatibility. However, we recommend migrating to HMAC verification for improved security as it protects against replay attacks.
Managing Webhooks via the API
Webhooks can also be managed through the REST API. This is how integrations such as Zapier subscribe to comment events without touching the dashboard, and it follows the REST Hooks pattern: subscribe, receive events, unsubscribe.
API subscriptions live alongside the webhooks configured in the dashboard. A comment event is delivered to every webhook that matches its domain, each as its own delivery, whichever way the webhook was created.
Authentication
Every request needs your API Key in the x-api-key header (or the API_KEY query parameter) and
your tenant ID in the tenantId query parameter. Both are shown on the API Secret page in the dashboard.
Subscribe
POST https://fastcomments.com/api/v1/webhooks?tenantId=YOUR_TENANT_ID
x-api-key: YOUR_API_KEY
Content-Type: application/json

{
    "url": "https://hooks.zapier.com/hooks/catch/123/abc",
    "event": "comment-created"
}| Field | Required | Description |
|---|---|---|
url | Yes | An absolute http or https URL. |
event | Yes | comment-created, comment-updated or comment-deleted. |
domain | No | A domain from your account configuration. Defaults to *, which receives events for every domain. |
method | No | POST (default), PUT or DELETE. |
The response contains the subscription:
{
    "status": "success",
    "webhook": {
        "id": "66f1c4c1e7a2b3d4f5a6b7c8",
        "url": "https://hooks.zapier.com/hooks/catch/123/abc",
        "event": "comment-created",
        "domain": "*",
        "method": "POST",
        "source": "api",
        "enabled": true,
        "createdAt": "2026-09-08T12:00:00.000Z"
    }
}
Subscribing the same URL to the same event and domain again returns the existing subscription rather than creating a duplicate, so a client can safely retry. Each tenant can have up to 50 API subscriptions.
List
GET https://fastcomments.com/api/v1/webhooks?tenantId=YOUR_TENANT_IDReturns every webhook for the tenant, including those managed in the dashboard ("source": "dashboard").
Filter with event, domain or source.
Unsubscribe
DELETE https://fastcomments.com/api/v1/webhooks/SUBSCRIPTION_ID?tenantId=YOUR_TENANT_IDDeleting a subscription also discards any events still queued for it. Only subscriptions created
through the API can be deleted this way; a dashboard webhook, or an id that does not exist on your
account, answers 404 with code not-found. Dashboard webhooks are edited on the Webhooks page.
Payloads and signing
Deliveries use the same payload as dashboard webhooks (see Data Structures) and are signed with the same
HMAC scheme (see Security & API Tokens). API subscriptions never receive the legacy token header, so
verify the X-FastComments-Signature header instead.
Sample payloads
GET https://fastcomments.com/api/v1/webhooks/sample-payloads?tenantId=YOUR_TENANT_ID&event=comment-created&limit=3Returns the account's most recent comments in exactly the shape a delivery carries, so an integration can
show real sample data before the first event arrives. event is optional and only validated, since every
event delivers the same comment object. limit defaults to 3 and accepts 1 to 10. Costs 2 API credits.
{
    "status": "success",
    "payloads": [
        {
            "id": "66f1c4c1e7a2b3d4f5a6b7c8",
            "urlId": "https://example.com/blog/hello-world",
            "commenterName": "Jane Reader",
            "comment": "Great article!",
            "date": "2026-09-08T12:00:00.000Z",
            "approved": true
        }
    ]
}
Responding with 410 Gone
If an API subscription's endpoint responds with HTTP 410 Gone, FastComments treats that as an
unsubscribe: the subscription is deleted along with its queued events, and no further deliveries are
attempted. Webhooks configured in the dashboard are never deleted automatically; for them a 410 is an
ordinary failure. Any other failure status is retried and eventually disables the webhook, as described
in How it Works & Handling Retries.
Dashboard
API subscriptions appear in the Webhooks list with the source API, where an administrator can edit, disable, re-enable or delete them.
How it Works & Handling Retries
All changes to the Comment object in the system fire an event which ends up on a queue.
The initial webhook event is usually sent within six seconds of the event source occurring.
You can monitor this queue in the Webhooks admin in the event that your API goes down.
If a request to your API fails, we'll re-queue it on a schedule.
That schedule is 1 Minute * the retry count. If the call fails once, it'll try again in
a minute. If it fails twice, it'll then wait two minutes, and so on. This is so that we
don't overload your API if you are going down to load related reasons.
Webhooks can be cancelled from the logs page.
In Conclusion
This concludes our Webhooks documentation.
We hope you find the FastComments Webhook integration easy to understand and fast to set up.
If you feel you have identified any gaps in our documentation, let us know below.