
Add Comments to Godaddy Sites
With FastComments we can easily add live commenting to any site built with Godaddy.
Note that this tutorial requires a FastComments account. It's recommended that you sign up first and then come back here. You can create an account here.
We'll be covering adding FastComments to a blog built with Godaddy, but the same general instructions apply to any site.
Step 1: Add a Code Area 
To add FastComments to our Godaddy site we're going to add an area to put the FastComments.com widget code.
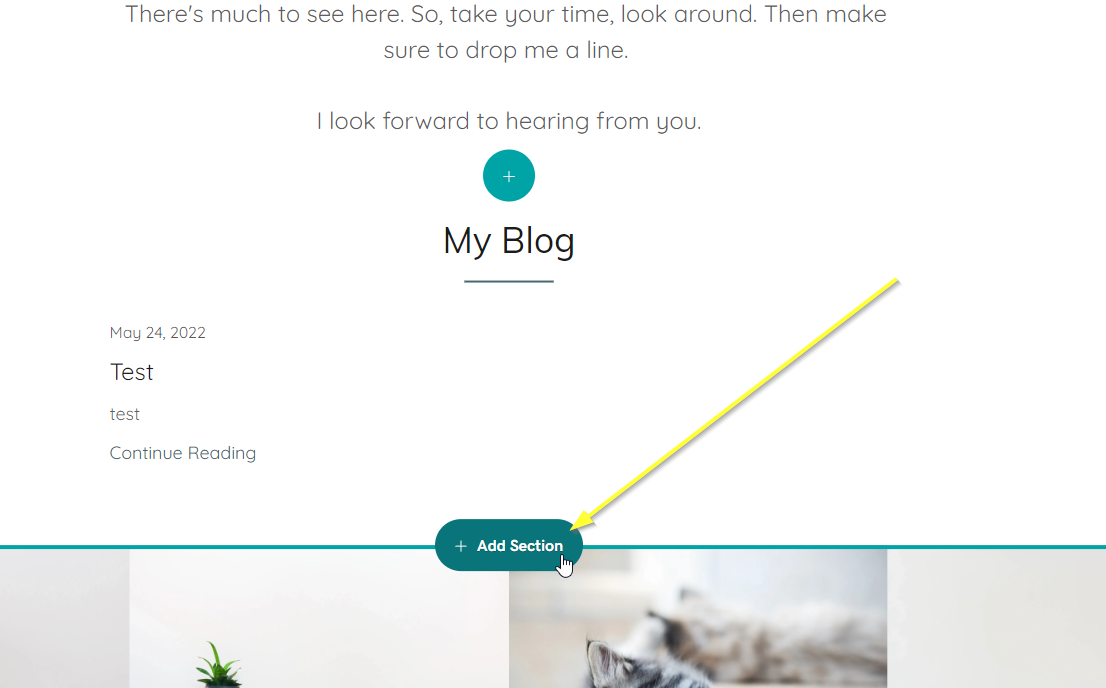
Note! Ensure you have added a blog section and at least one blog post to your site before continuing.
Let's add an HTML code area by moving our mouse below the blog post in the site editor, and clicking Add Section as follows:
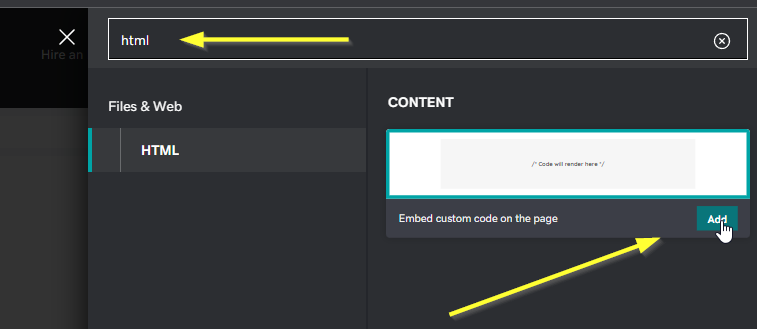
Now search for HTML. Once the "Embed custom code on the page" box shows up, click Add.
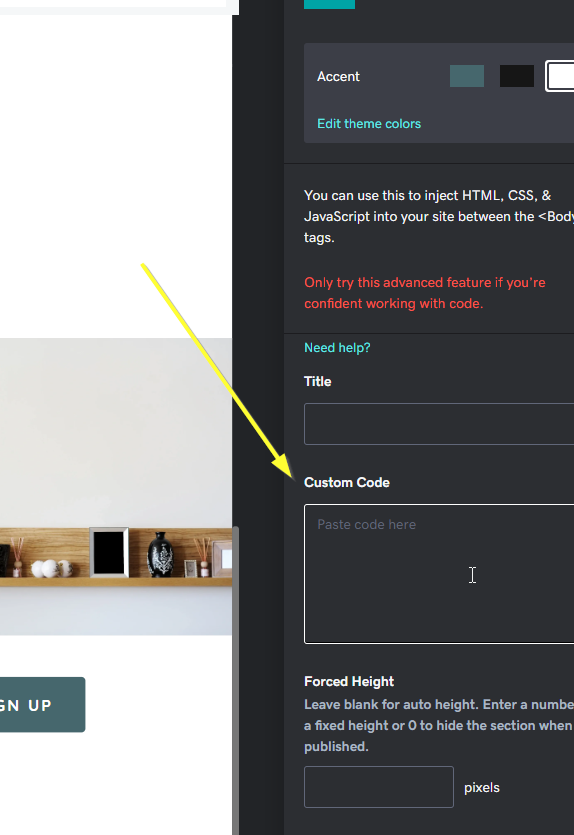
You should now see an empty code area in the editor.

Click on the empty code area you've added. On the bottom right you'll now see a Custom Code input field.
That's it for step one! In step two we will be adding our custom Godaddy-specific code.
Step 2: Add FastComments.com Code
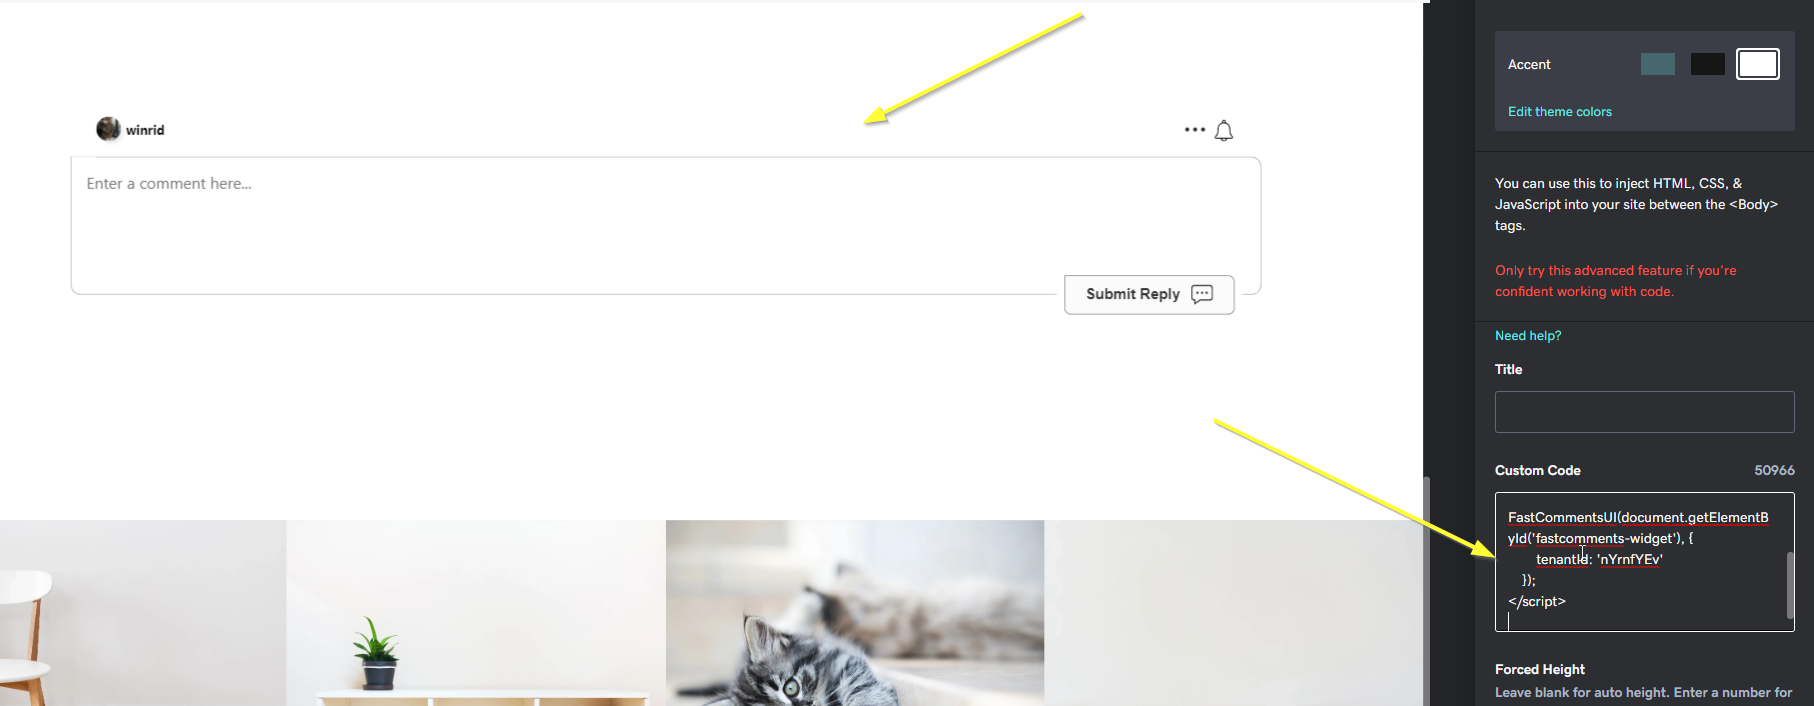
Now that you've added a custom HTML block, we can add the FastComments widget code.
Use the following code for Godaddy, not code from other tutorials. This code is Godaddy-specific.
Copy the following code:

This specific code snippet is designed to be compatible with Godaddy, and will also only show on your blog posts - not the homepage.
Now paste the code into the Custom Code area mentioned in Step One.
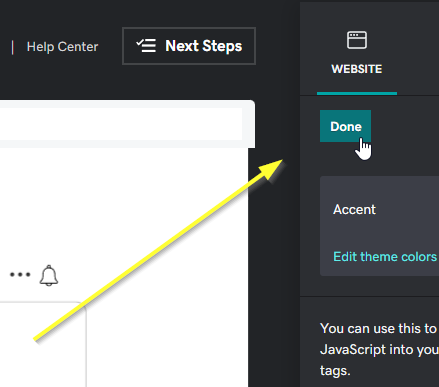
Hit Done in the top right:
That's it for step two!
Step 3: Publish
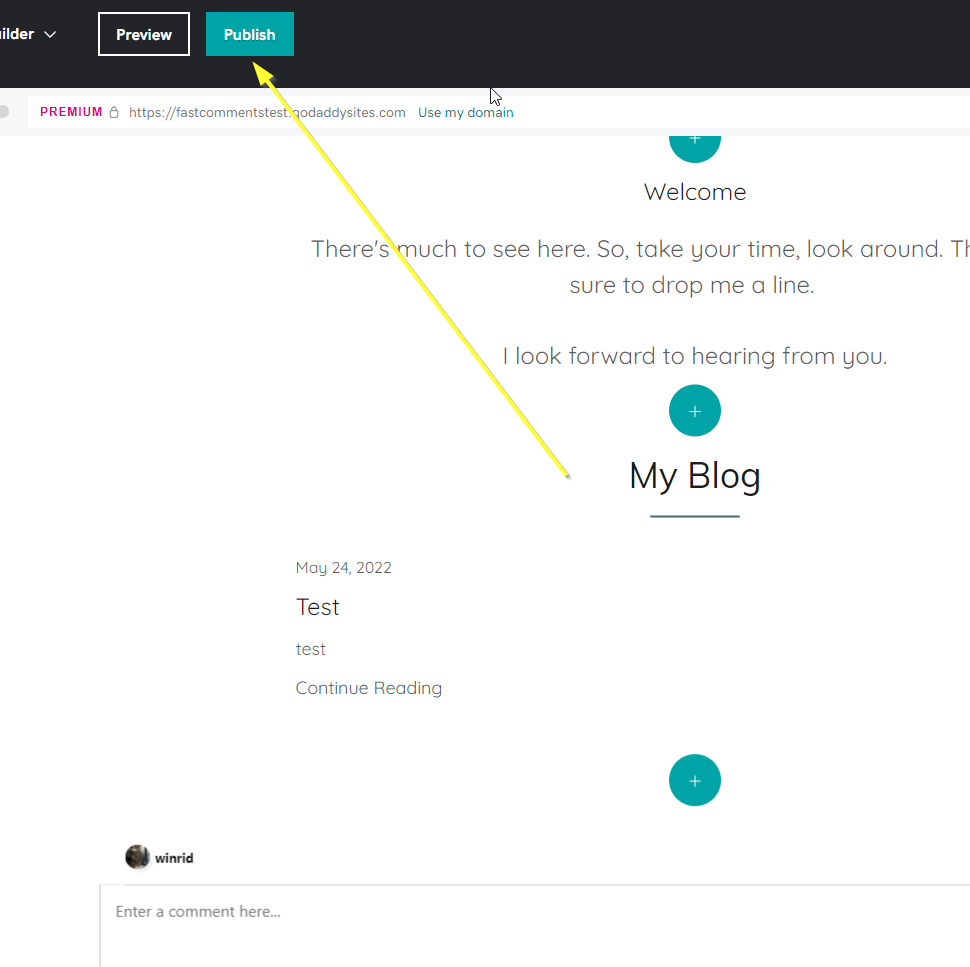
Finally, we can publish our changes.
At the top of the page hit the Publish button:
Success
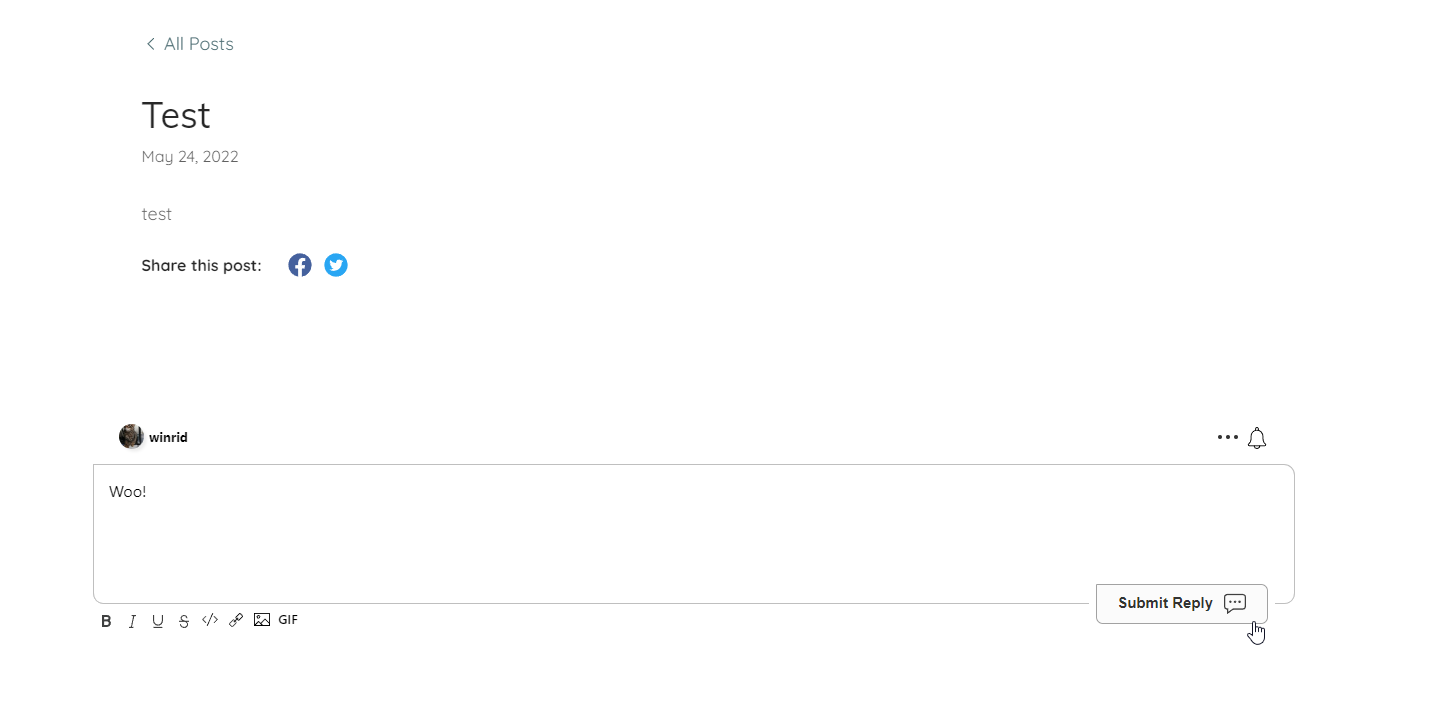
When visiting your site you should now see the FastComments comment box visible on blog posts:
Congratulations on setting up FastComments with Godaddy! If you've run into a Domain Error, or would like to learn how to customize the comment area, read on!
Domain Errors
You may get an authorization error, like the following:

This is because FastComments doesn't know it's supposed to allow your account to be used on this domain.
In this case, the fix is simple. You just have to add your site to your FastComments.com account.
Customization
FastComments is designed to be customized to match your site.
If you'd like to add custom styling, or tweak configuration, Checkout our Customization Documentation to learn how.