
Language 🇺🇸 English
GoHighLevel Member Site Installation
GoHighLevel Site Installation
Add Comments to GoHighLevel Sites
With FastComments we can easily add live commenting to any site built with GoHighLevel.
Note that this tutorial requires a FastComments account. It's recommended that you sign up first and then come back here. You can create an account here.
Signing in first will ensure the generated code snippets are already tied to your account.
GoHighLevel Membership Sites and Other Sites
This tutorial is split between two categories: Membership Sites and regular GoHighLevel Sites.
We start with the instructions for Membership Sites.
Step 1: Edit Course 
First, we're going to edit the settings for our course.
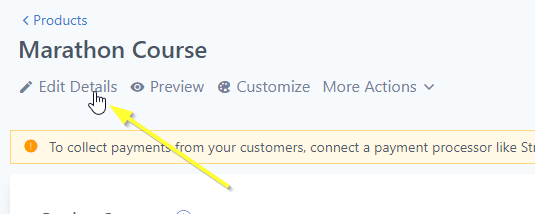
To do this, open the course, and click Edit Details.
Step 2: Open Advanced Settings 
Next, we need to open the Advanced settings:
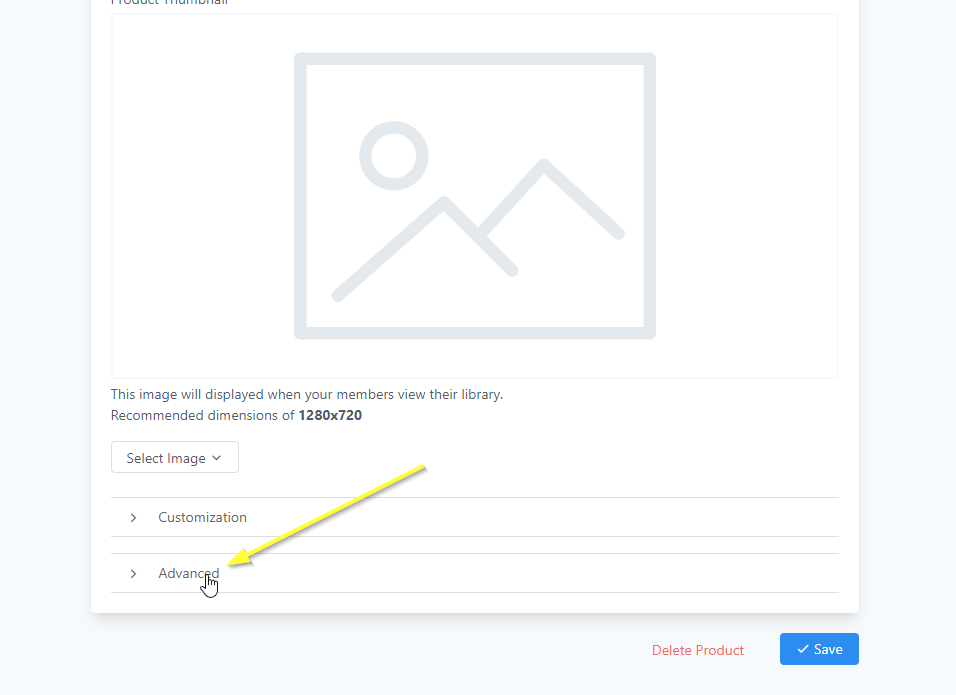
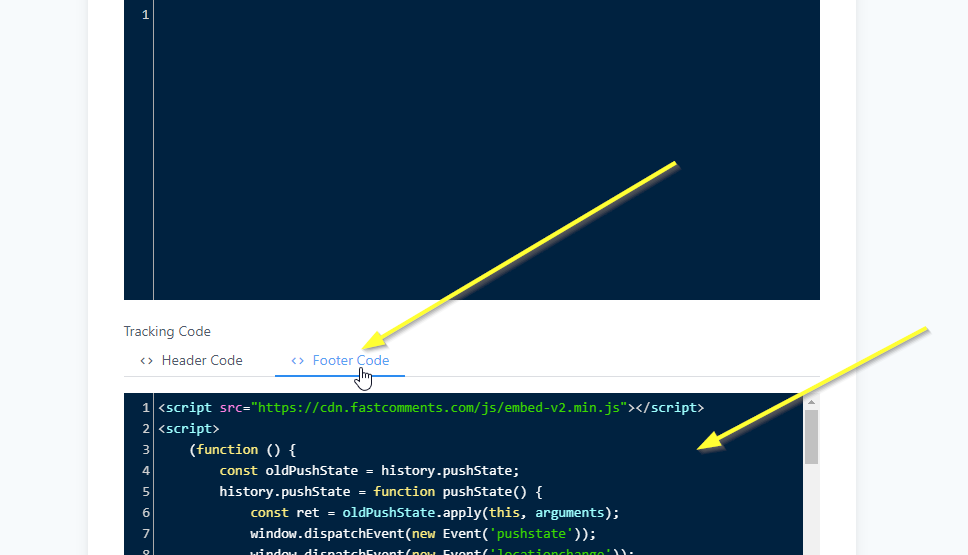
We'll be adding our code to the Tracking Code section. Go to that section and click Footer Code.
Step 3: Copy Code 
Now we're going to generate your custom FastComments code. Use the wizard below to configure how you want FastComments to work on your GoHighLevel site:
FastComments Configuration Wizard
Your Generated Code:
Additional Step Required:
Since you chose custom placement, you also need to add this HTML element where you want the comments to appear:
Different Comment Box Types
You can configure the TYPE = 'commenting' line to switch the product used (for example you can change it to live for streaming chat or collab for collab chat).
Putting The Comment Box Where You Want
Let's say you want to put comment boxes on specific parts of the page and not the default locations. Change this line:
const TARGET_ELEMENT_ID = ''; // set to use target div modeTo:
const TARGET_ELEMENT_ID = 'fc_box'; // set to use target div modeThen in the GHL editor, click the "code" button and add where you want the comments to go:

Different Comment Box Type Per-Page
Let's say you want users to highlight and discuss pieces of text, or use the streaming chat UI instead.
First follow the steps above in "Putting The Comment Box Where You Want".
Note in that small snippet there's type="commenting".
If you want to enable collab chat for example change type to type="collab".
Only Show On Specific Pages
If you don't set don't set TARGET_ELEMENT_ID, you can instead configure the VALID_PATTERNS variable, to set which URL routes the comments should show. By default, it will show
on pages that contain /post in the URL.
Configuring Collab Chat
You can tell collab chat to only add collaborative functionality around HTML inside a specific area, for example, let's say you add the footer code above and then add this div in the post/page content to enable collab chat:

Then the paragraph element inside the <div> will have collab chat enabled, and nothing else on the page. If you don't
put any content in the <div> then it will enable collab chat on the entire post body.
Step 4: Paste Code 
Now that we've copied our snippet, paste it in the Footer Code section as shown:
Member Site Success 
That's it! You should now have live commenting added to your GoHighLevel course.
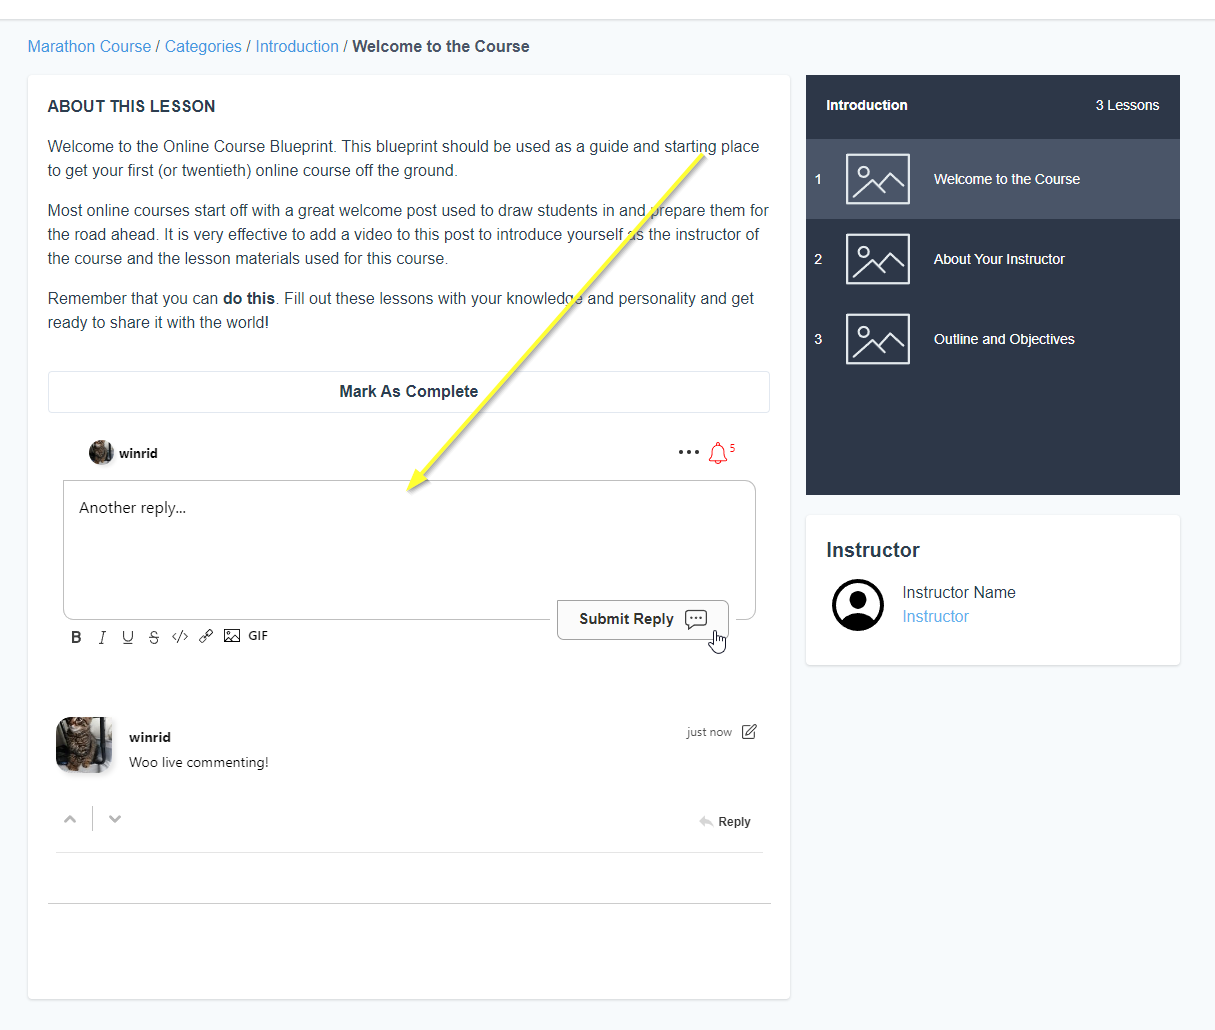
If you've run into a permission denied error, or would like to customize FastComments, read on.
Member Site Domain Errors 
You may get an authorization error, like the following:
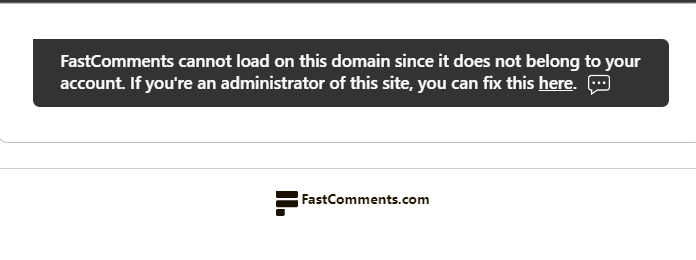
This is because FastComments doesn't know it's supposed to allow your account to be used on this domain.
In this case, the fix is simple. You just have to add your site to your FastComments.com account.
Go here to add your site to your account.
Now you should have fast, live, commenting added to your site!
Member Site Customization 
FastComments is designed to be customized to match your site.
If you'd like to add custom styling, or tweak configuration, Checkout our Customization Documentation to learn how.
Step 1: Add Custom Code Element 
First, we're going to open the editor for the page of our site we want to add comments to.
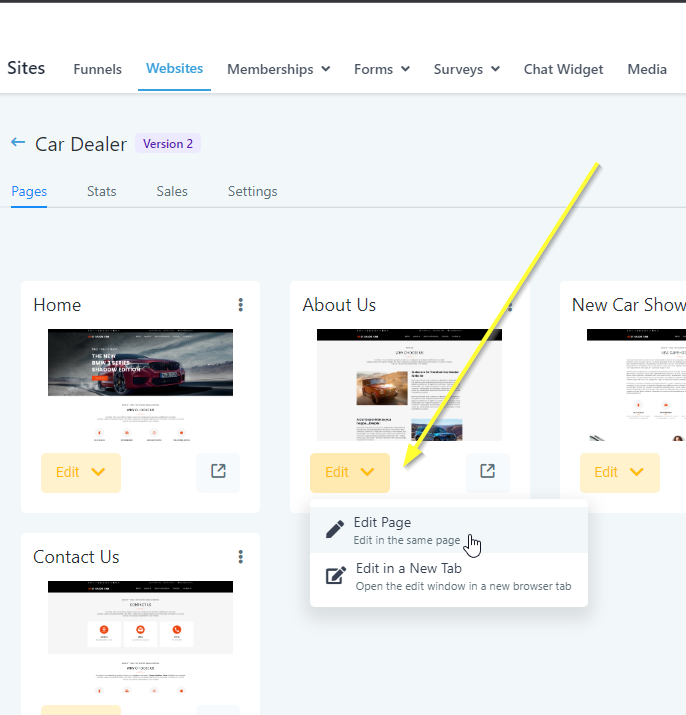
Now find the place on the page where you want to add comments. Move your mouse toward the end of that area. A + icon will appear:
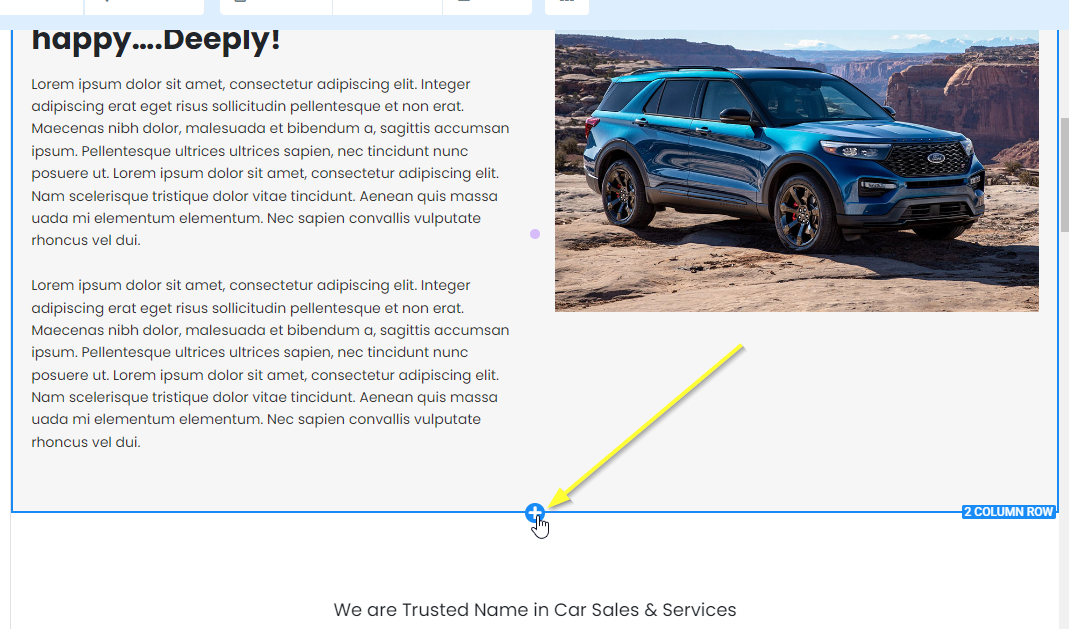
If we click that it asks us how many columns should the new section be. We'll select 1 COLUMN:
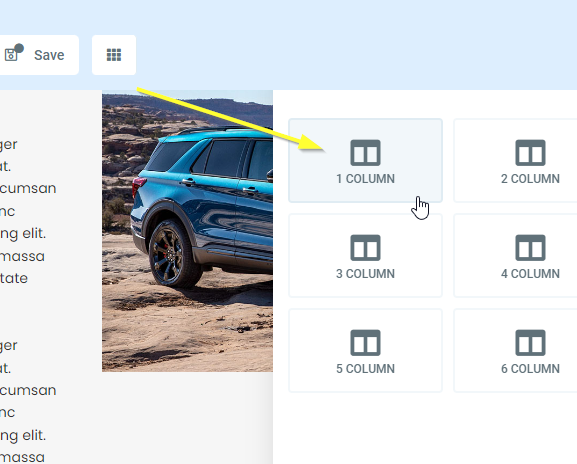
Now if you move your mouse over the new 1-column-row you'll have the option to add an element. Click that:

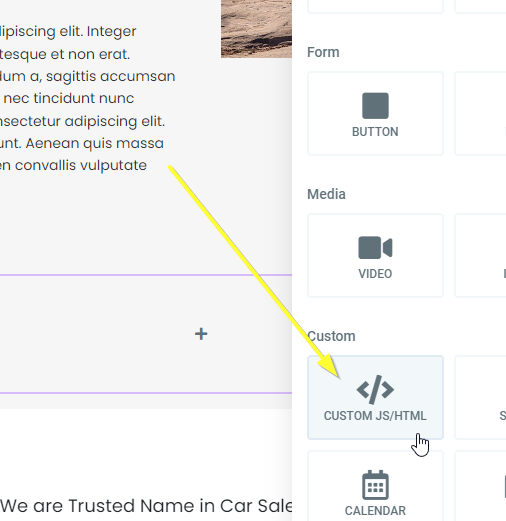
Scroll down and pick CUSTOM JS/HTML:
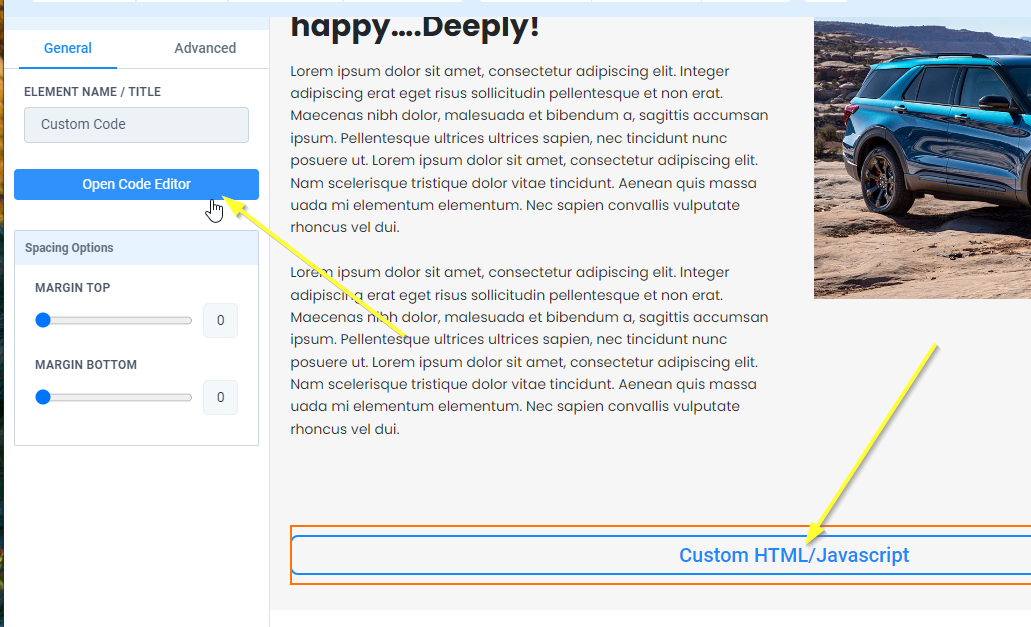
Now select our new element and click Open Code Editor on the left:
Step 2: Copy and Paste Code 
It's time to copy our code. Copy the following code:

Paste that in the editor window we opened:
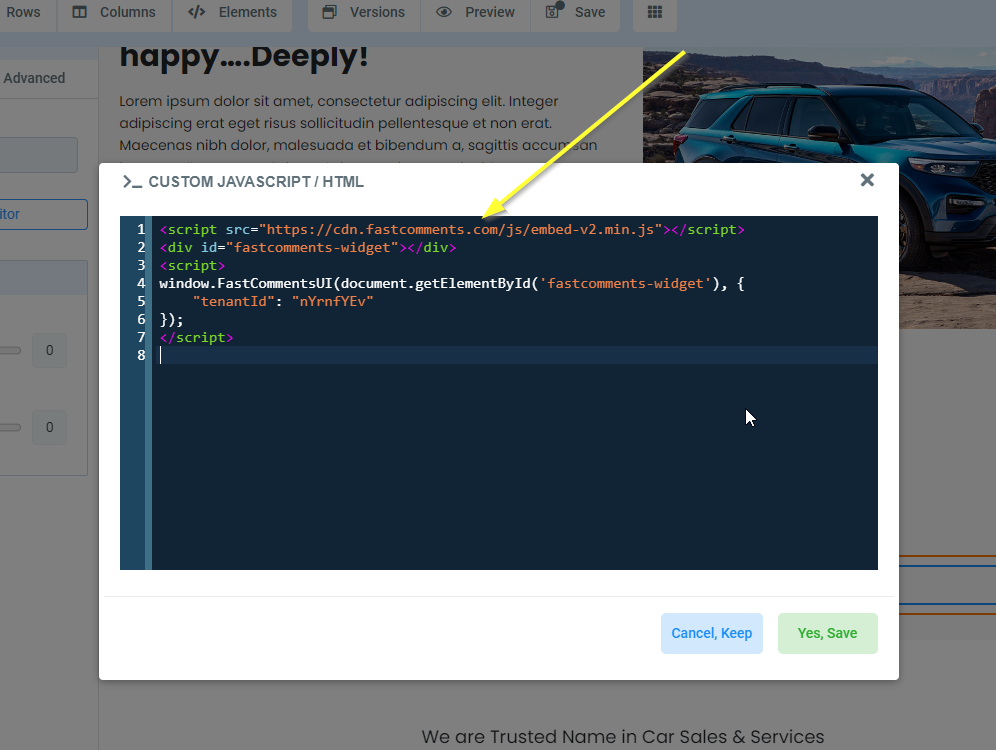
We can now click Yes, Save on the bottom right of that window.
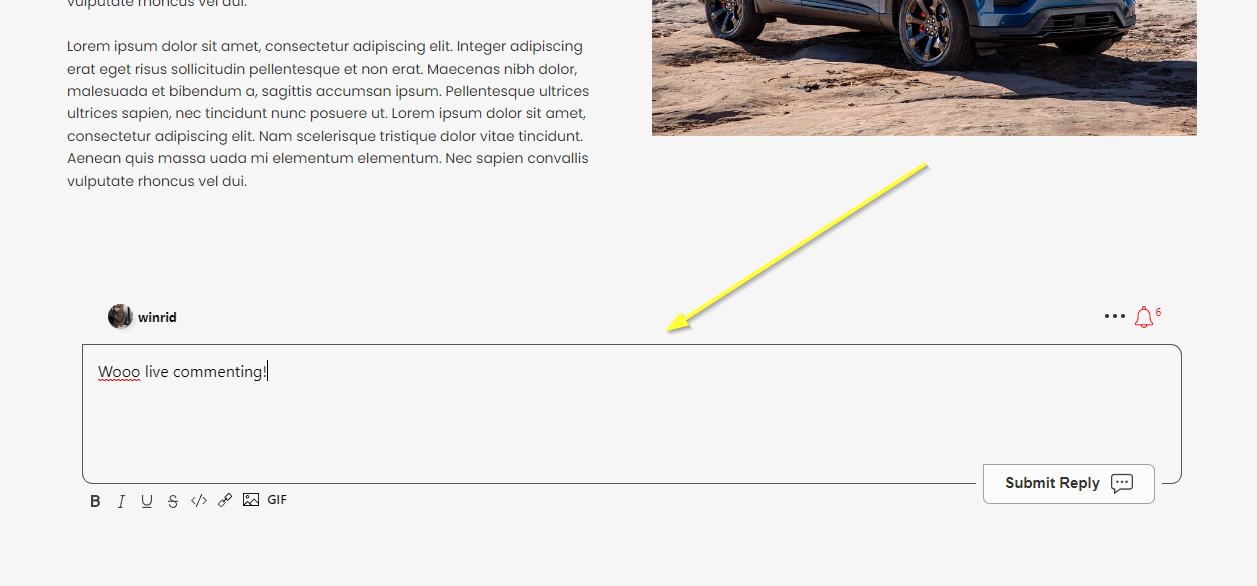
At the top of the page now click Save and then Preview.
Site Success 
That's it! You should now have live commenting added to your GoHighLevel site.
If you've run into a permission denied error, or would like to customize FastComments, read on.
Site Domain Errors 
You may get an authorization error, like the following:

This is because FastComments doesn't know it's supposed to allow your account to be used on this domain.
In this case, the fix is simple. You just have to add your site to your FastComments.com account.
Go here to add your site to your account.
Now you should have fast, live, commenting added to your site!
Site Customization 
FastComments is designed to be customized to match your site.
If you'd like to add custom styling, or tweak configuration, Checkout our Customization Documentation to learn how.
In Conclusion
If for any reason the provided steps or code is not working, please let us know.