
Language 🇺🇸 English
Shopify Installation
Add Comments to Shopify Sites
With FastComments we can easily add live commenting to any Shopify site.
The instructions below are for a blog built on Shopify, but the embed code can also be manually added to any page by editing other theme files. FastComments Support can also assist with this.
Note that this tutorial requires a FastComments account. It's recommended that you sign up first and then come back here. You can create an account here.
Step 1: Import Existing Comments 
FastComments can run a tool on your blog to import your existing comments. However, this must be done before you disable them in step 2, otherwise they are not available when we run the tool.
Please create a support ticket for this step. Usually the import completes in less than a day.
If you don't care about retaining your existing comments, move on to Step 2.
Step 2: Disable Default Commenting System 
The first step to using FastComments with Shopify is disabling Shopify's system.
Note FastComments Support can assist you in migrating over existing comment threads.
To replace the Shopify comment system, we'll go to our store dashboard and click Blog posts in the bottom left:
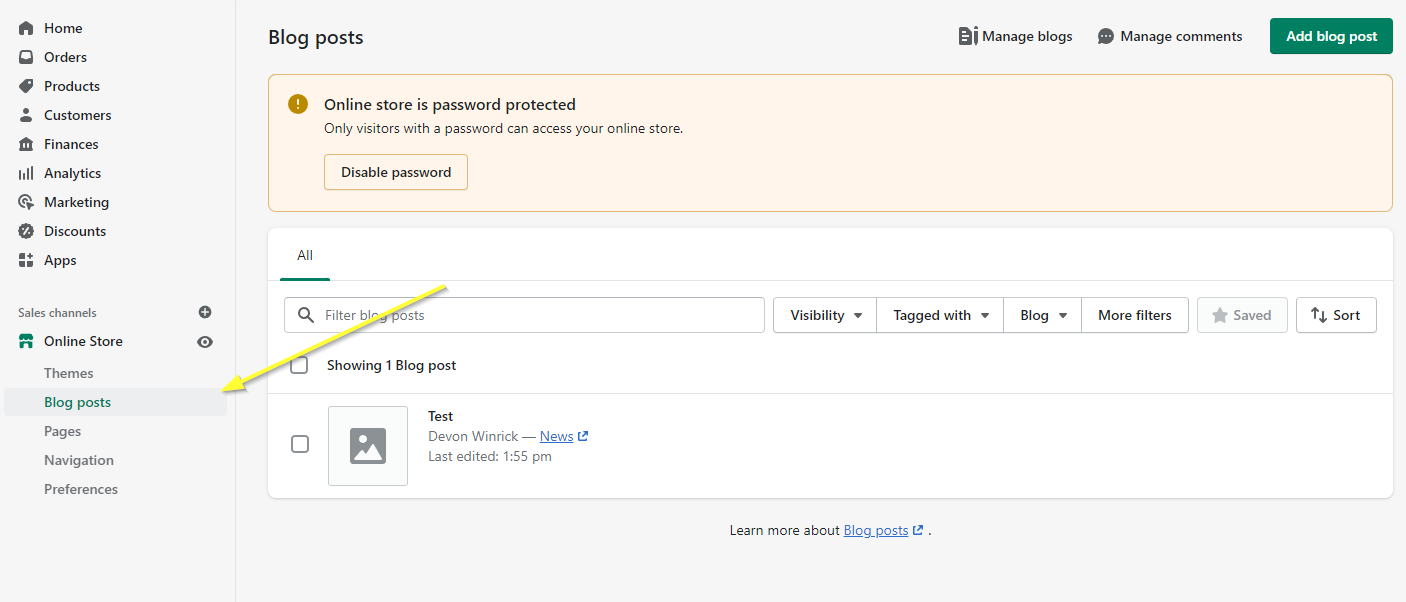
Then we will click Manage blogs in the top right:

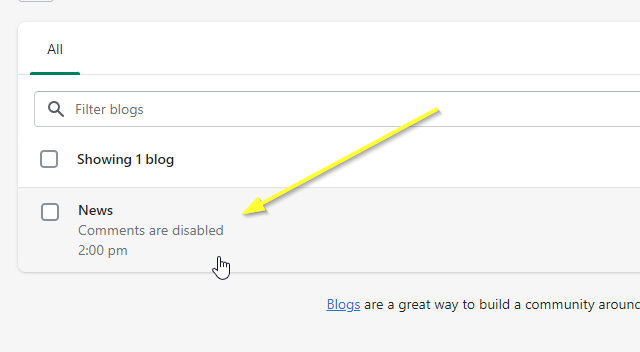
Click on the blog we want to manage. If it says Comments are disabled you can skip this step and move to Step Two.
If not, select the blog and ensure Comments are disabled is selected in the right panel:
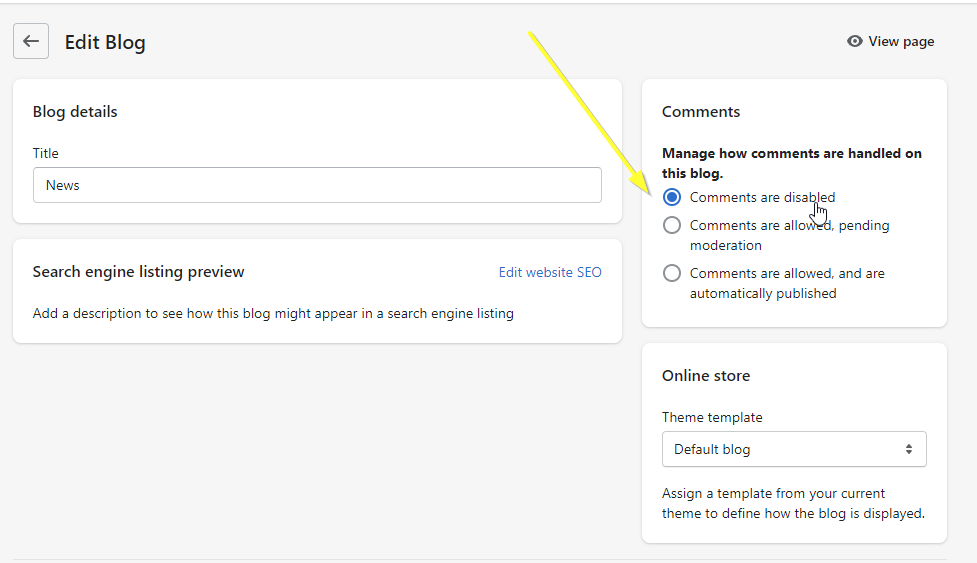
Now click save.
Step 3: Open The Blog Theme Template 
Now we're going to edit our store's theme to add FastComments.
In the left panel, open Themes:
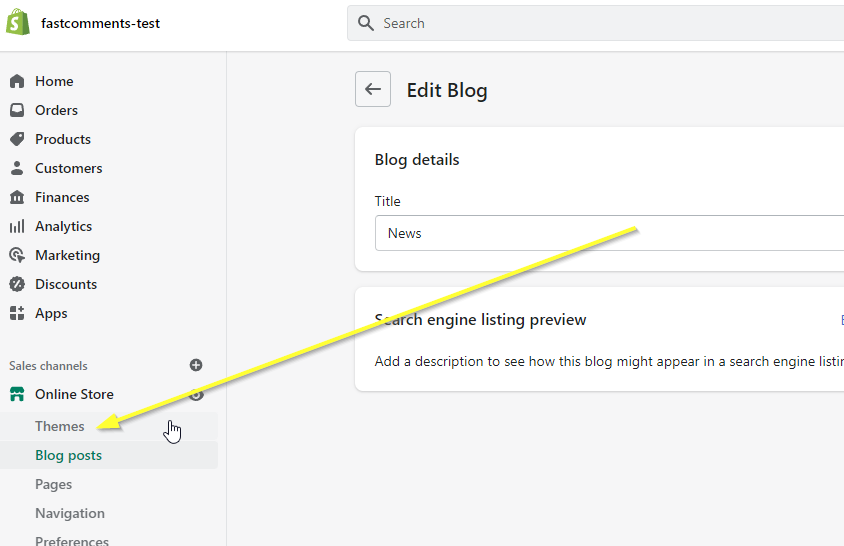
Under Current theme, select Actions and then Edit code:
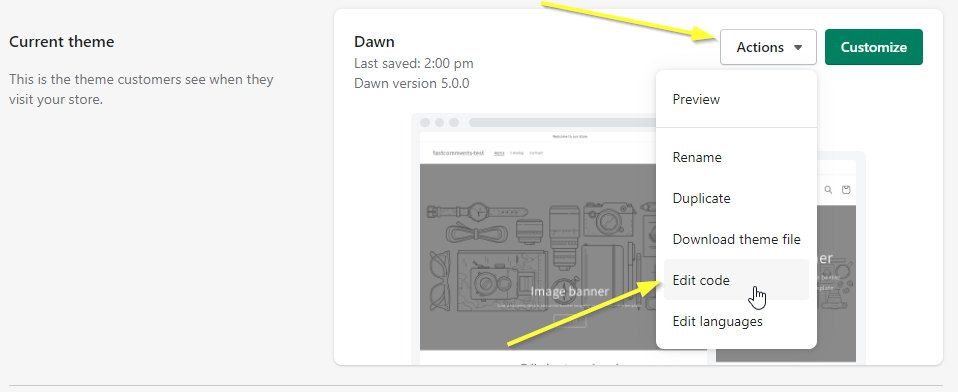
This will open up a code editor, with a file browser on the left and the code on the right.
All we need to do is copy a small piece of code that adds FastComments and paste it on the right line in the right file.
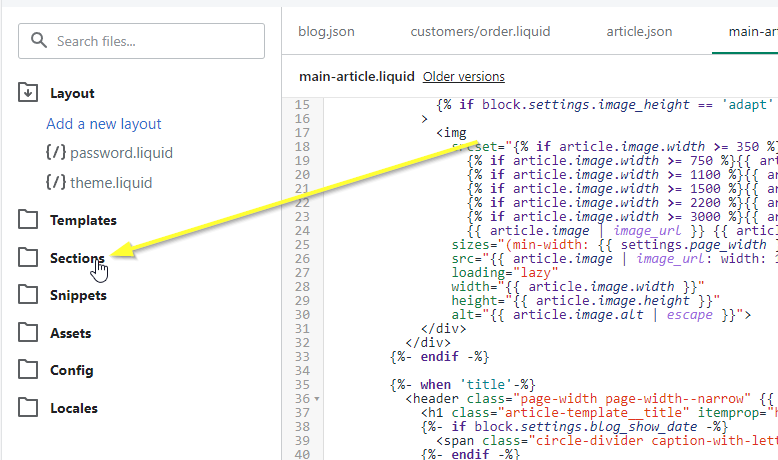
In the file browser on the left, scroll down and click Sections:
Now we're going to scroll down and select main-article.liquid:
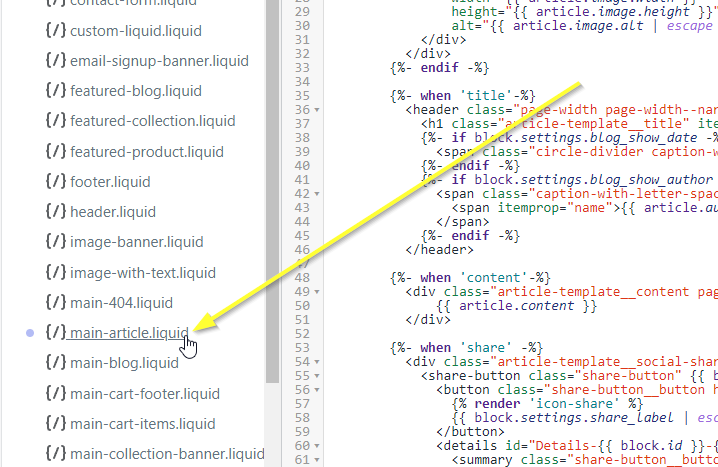
This will open the theme template used to render a single blog article.
You should now see something similar to the following, with main-article.liquid selected at the top:
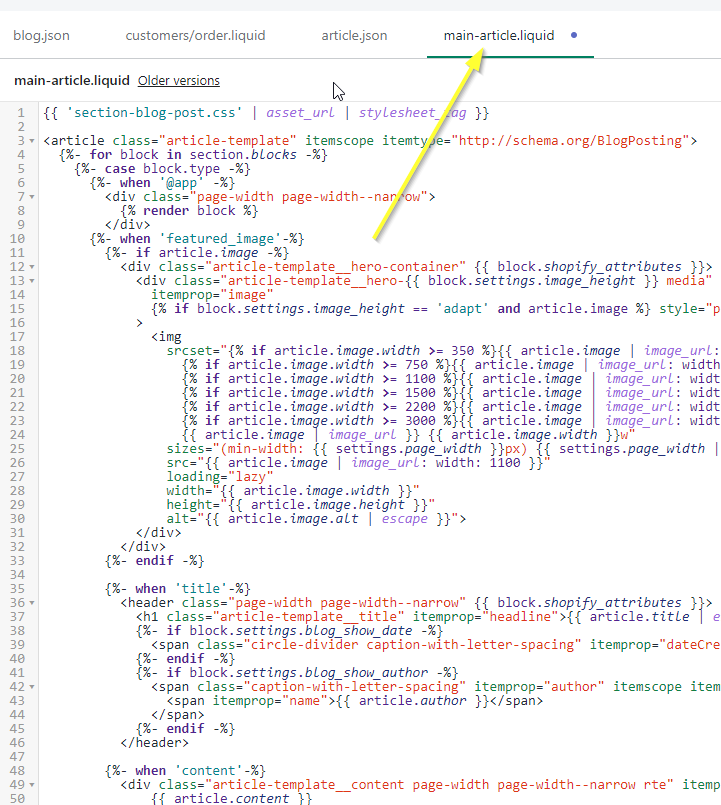
Step 4: Add The FastComments.com Code 
Next we're going to scroll down to line 100:
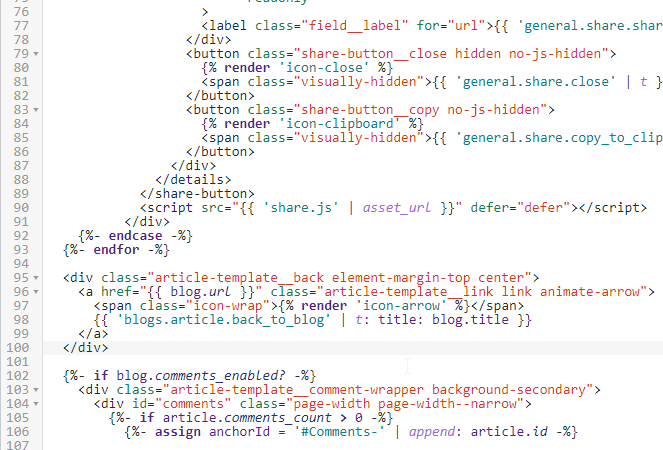
Now copy the following code snippet, which is designed specifically for Shopify - do not use code snippets from other tutorials:

Now we want to put our cursor on line 101 - right after the </div> - and paste. You should have something like this:
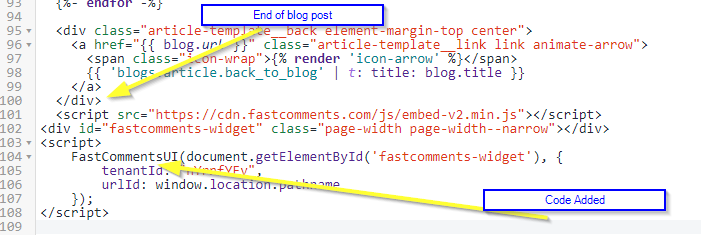
Now we can save:
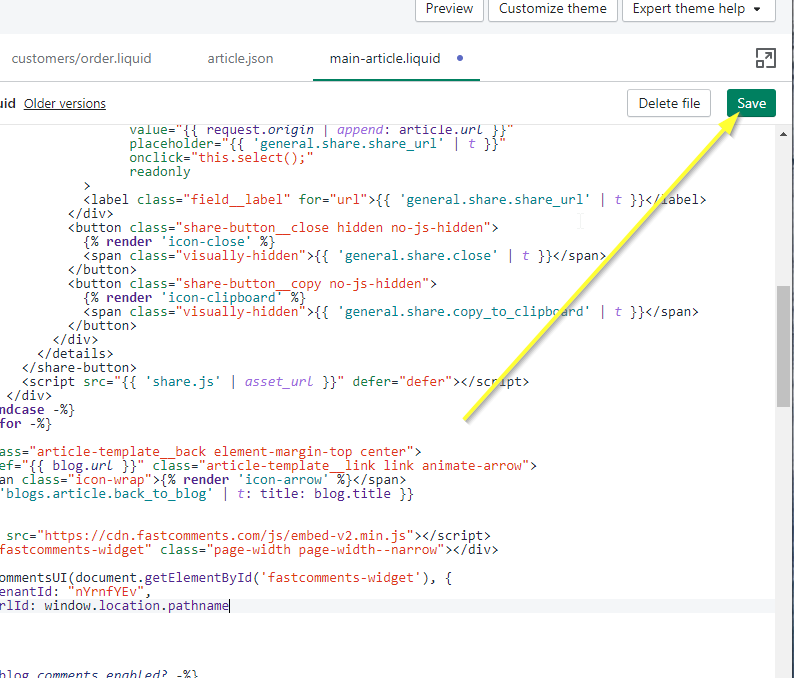
Success 
Now if we view a blog post, we should see FastComments!
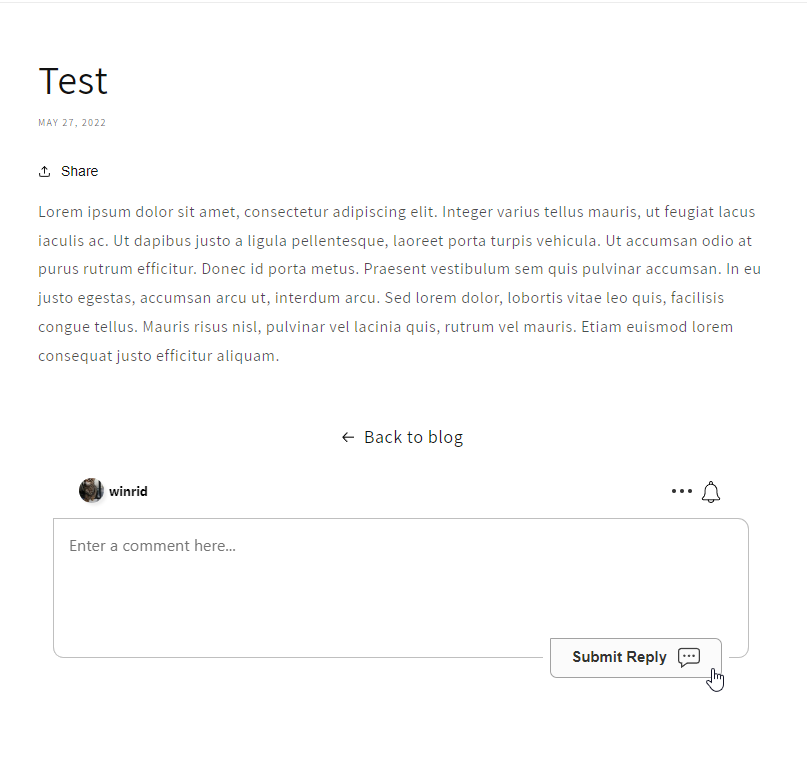
Congratulations on setting up FastComments with Shopify! If you've run into a Domain Error, or would like to learn how to customize the comment area, read on!
Domain Errors 
You may get an authorization error, like the following:
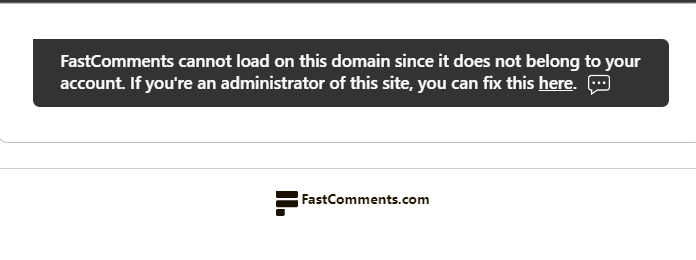
This is because FastComments doesn't know it's supposed to allow your account to be used on this domain.
In this case, the fix is simple. You just have to add your site to your FastComments.com account.
Customization 
FastComments is designed to be customized to match your site.
If you'd like to add custom styling, or tweak configuration, Checkout our Customization Documentation to learn how.