
Add Live Discussions to Super.So Sites
FastComments Collab Chat brings Super.so sites to the next level by adding live inline discussions. Users can highlight and comment on pieces of text collaboratively, together - live!
Here we'll cover the installation steps which should only take a few minutes.
Step 1: Open Settings 
First we need to open the code editor. If you want to add FastComments to all pages, just select Code in the bottom left:
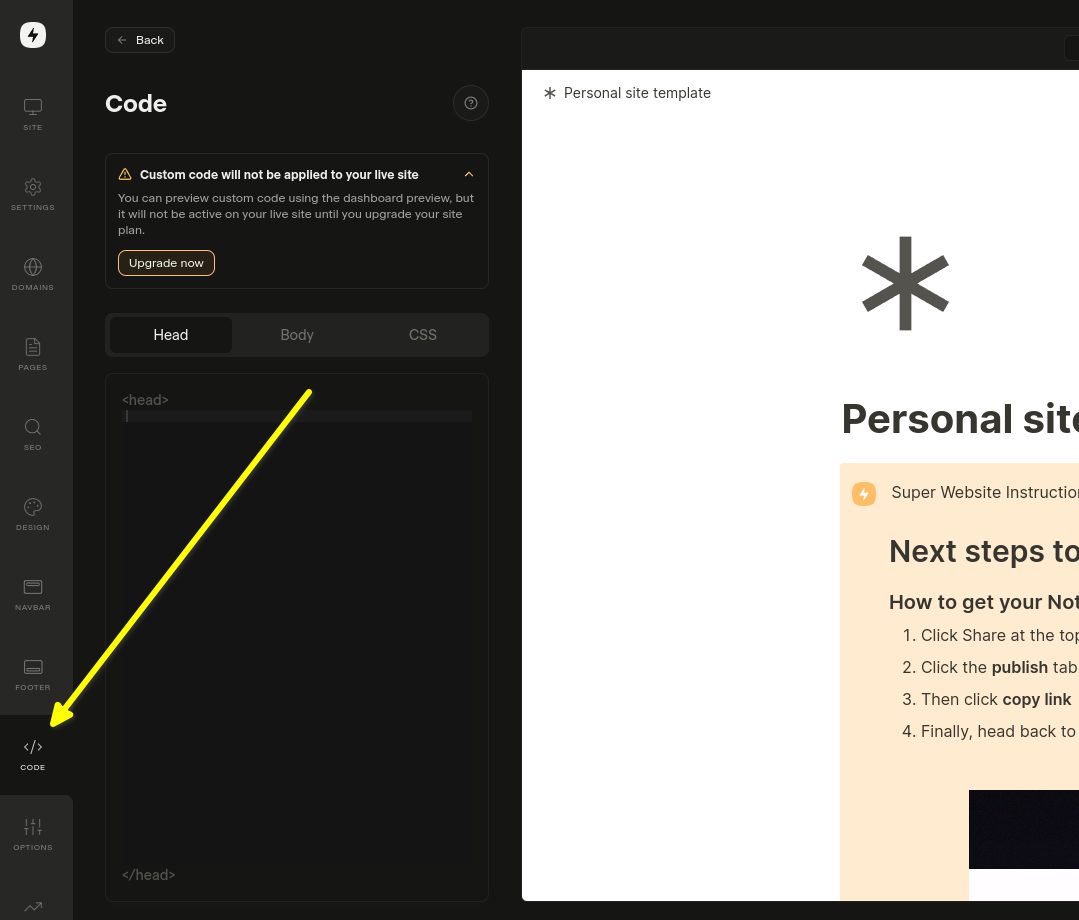
If you want to add it to a specific page, then select Edit Custom Code in that page's settings.
Now let's select the Body tab. This is important!. Installing the code snippet in Head does not work.
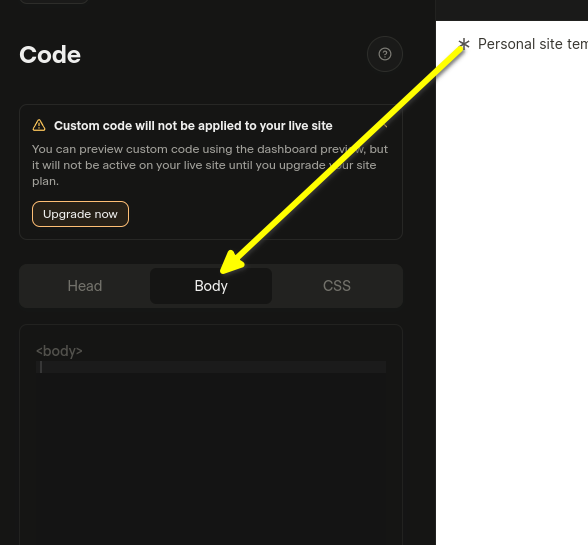
Now you're ready for step 2.
Step 2: Add Pre-Made Code
In this next step you need to copy the pre-made widget code below.
As long as you're logged into FastComments.com the below code snippet will already have your account information. Let's copy it:

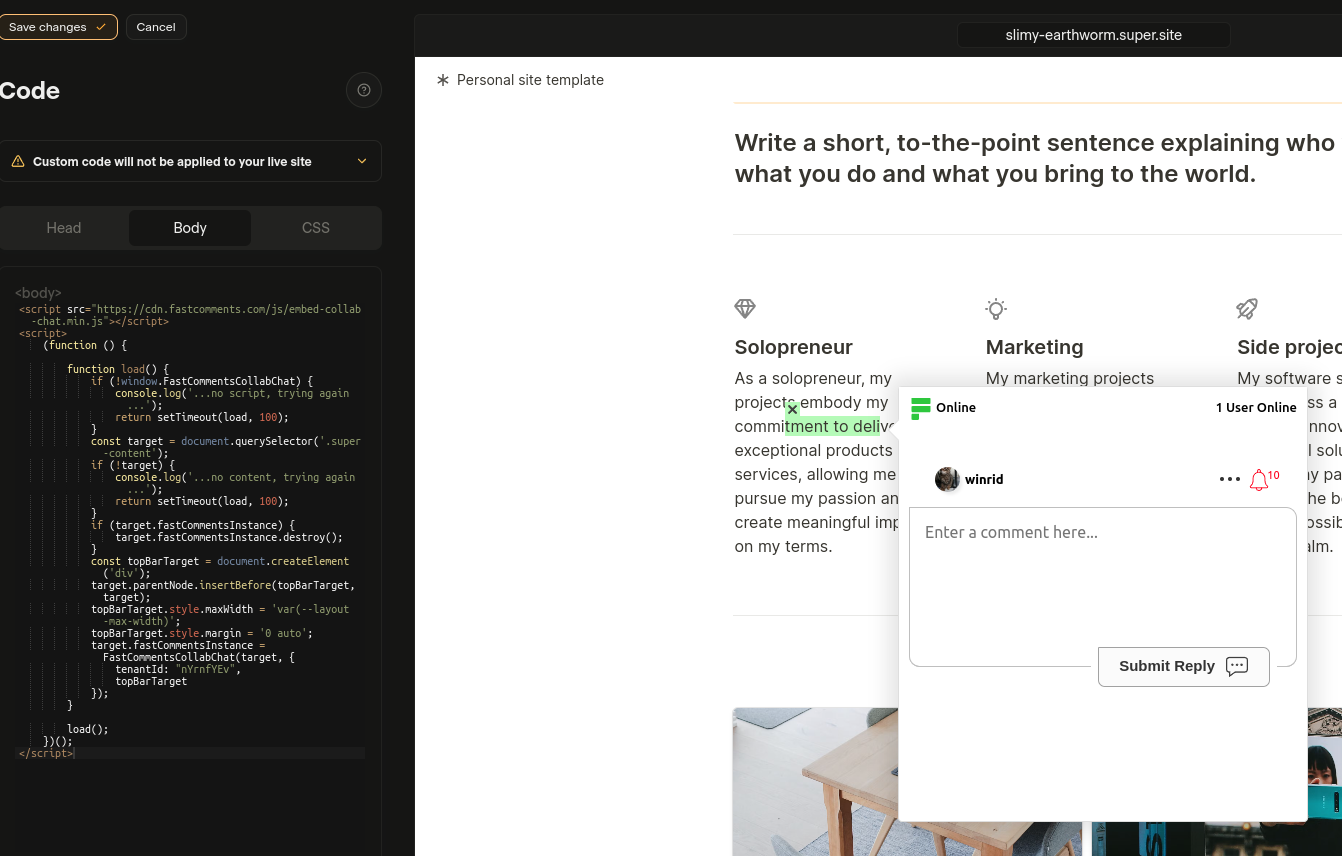
Now paste in the Body area:
If you see a "this is a demo message" after pasting the code:
- Ensure you're logged into your fastcomments.com account.
- Ensure you have 3rd party cookies enabled.
- Then refresh this page and copy the code snippet again. It should have
tenantIdpopulated with your tenant's identifier.
See Also: Regular Comment Widget
Adding a Live Comment Widget to Your Super.so Notion Articles
In addition to Collab Chat, you can add a traditional comment widget to the bottom of your Notion articles. This allows readers to leave comments and have discussions about the entire article.
Installation Steps
Copy the following code and paste it in the Body section of your Super.so site settings:
Important Notes
- The comment widget will appear at the bottom of your Notion articles
- Each page gets its own unique comment thread based on the URL path
- Make sure to replace
"demo"with your actual tenant ID from your FastComments account - The widget automatically handles Super.so's dynamic page loading
Success
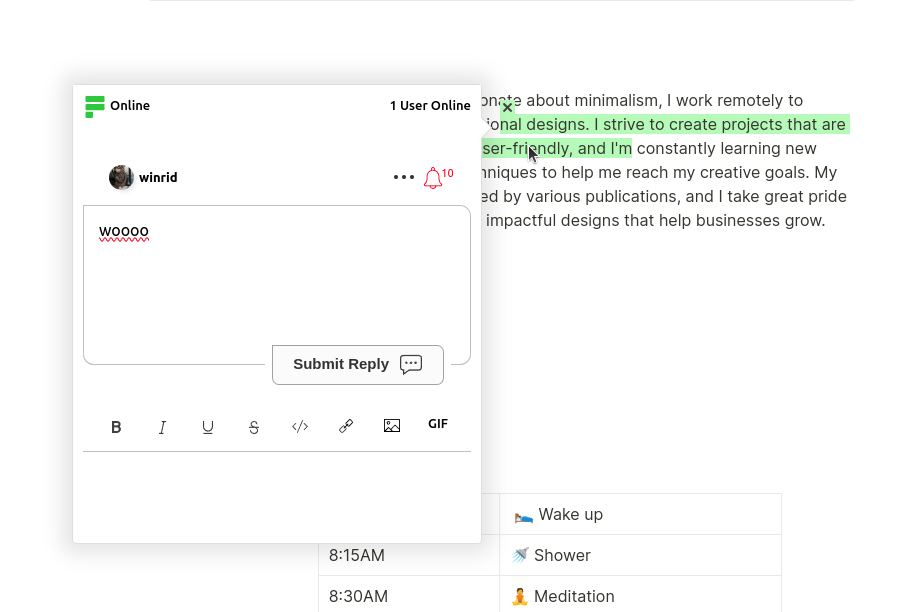
Success! You should now see the FastComments installed.
This is how it should look - you should be able to select some text to discuss it. If not, or you'd like to change how it looks, please reach out to support.
Congratulations on setting up FastComments with Super! If you've run into a Domain Error, or would like to learn how to customize the comment area, read on!
Domain Errors
You may get an authorization error, like the following:

This is because FastComments doesn't know it's supposed to allow your account to be used on this domain.
In this case, the fix is simple. You just have to add your site to your FastComments.com account.
Customization
FastComments is designed to be customized to match your site.
If you'd like to add custom styling, or tweak configuration, Checkout our Customization Documentation to learn how.