
Add Comments to Canvas LMS via LTI 1.3
FastComments integrates with Canvas LMS via the LTI 1.3 standard. This adds live commenting and collaborative chat directly to your Canvas courses - no plugin to install on your server.
Comments appear automatically below assignments, and instructors can embed FastComments in Pages, Quizzes, and Announcements via the Rich Content Editor. SSO is handled automatically through the LTI launch - students comment with their Canvas accounts without a separate login. The integration supports threaded comments, real-time collaborative chat with text highlighting, and automatic role mapping.
Pricing 
The FastComments LTI 1.3 integration is included on the Flex and Pro plans at no additional cost.
Quick Start
- Go to your FastComments LTI Config.
- Enter a Configuration Name and your Platform URL (e.g.
https://yourschool.instructure.com). Choose which Placements to enable (Assignment View and/or Editor Button — both are on by default). Click Create Configuration. The wizard advances to Step 2 and shows your Configuration URL. - In Canvas, go to Admin > Developer Keys > + Developer Key > LTI Key. Set Method to "Enter URL" and paste the Configuration URL. Save the key, then set its State to ON and click Allow when prompted.
- Copy the Client ID number from the Developer Keys table in Canvas. Back in FastComments, paste it into the Client ID field and click Save & Continue.
- Review the configuration summary and click Enable Integration to go live.
- Install the External App in Canvas (Admin > Settings > Apps > + App > By Client ID). Comments will automatically appear below assignments, and instructors can embed FastComments in Pages, Quizzes, and Announcements via the Rich Content Editor toolbar button.
FastComments Dashboard Setup
Navigate to LTI Config
Go to your FastComments LTI Config.
The setup page uses a guided wizard that walks you through each step. You will start at Step 1: Create.
Create a New LTI Configuration
Fill in the following fields:
- Configuration Name - an optional label to identify this configuration (useful if you connect multiple Canvas instances).
- Platform URL - your Canvas instance URL (e.g.
https://yourschool.instructure.com). This field is required.
Choose Placements
Below the Platform URL, you can choose where FastComments appears in your Canvas courses. Both placements are enabled by default:
- Assignment View - comments appear automatically below assignments.
- Rich Content Editor Button - instructors can embed FastComments in Pages, Quizzes, and Announcements using the toolbar button in the Rich Content Editor.
You can enable one or both. At least one placement must be enabled.
Click Create Configuration.
Copy the Configuration URL
After creating the configuration, the wizard advances to Step 2: Connect. A prominent Configuration URL is displayed at the top of the page with a Copy button.
Copy this URL. You will need it in the next step to create a Developer Key in Canvas.
The page also shows numbered instructions for what to do in Canvas, plus fields to enter the Client ID and optional Deployment ID once you have them.
Canvas Developer Key
Open Developer Keys in Canvas
Log in to Canvas as an administrator. Go to Admin (in the left sidebar) > select your account > Developer Keys.
Create an LTI Developer Key
Click + Developer Key and select LTI Key.
In the configuration form:
- In the Redirect URIs field (left side), paste the Launch URL from the FastComments setup page.
- On the right, set Method to Enter URL.
- Paste the Configuration URL you copied from FastComments into the JSON URL field.
- Canvas will load the LTI configuration automatically.
- Give the key a name (e.g. "FastComments").
- Click Save.
Enable the Developer Key
After saving, the new key will appear in the Developer Keys table with its State set to OFF. Click the toggle to set it to ON. Canvas may prompt you to confirm — click Allow to enable the key.
Copy the Client ID
The Developer Keys table shows a numeric Client ID in the Details column (e.g. 17000000000042). Copy this number - you will need it in the next step.
Complete the Connection
Enter the Client ID in FastComments
Go back to your FastComments LTI Config. The wizard should be on Step 2: Connect.
Paste the Client ID you copied from Canvas into the Client ID field. Optionally enter the Deployment ID if your LMS provides one.
Click Save & Continue.
Enable the Integration
The wizard advances to Step 3: Go Live. A summary of your configuration is shown (name, platform URL, Client ID, and deployment ID).
Review the details, then click Enable Integration to activate the LTI connection.
After enabling, the wizard shows the Management View where you can edit your configuration, view all LTI URLs, or add additional deployments.
Install the External App in Canvas
In Canvas, go to Admin > select your account > Settings > Apps tab.
Click + App and configure:
- Set Configuration Type to By Client ID.
- Paste the Client ID from the Developer Keys table.
- Click Submit.
- Confirm the installation when prompted.
FastComments is now installed at the account level and available to all courses.
Add to a Course
How Comments Appear in Your Courses
Once the LTI integration is enabled and the External App is installed, FastComments works automatically based on the placements you configured:
Assignment View
If the Assignment View placement is enabled, comments appear automatically below every assignment in the course. Students and instructors see a threaded comment section when they view an assignment — no extra setup is needed per assignment.
Each assignment gets its own separate comment thread.
Rich Content Editor Button
If the Editor Button placement is enabled, instructors can embed FastComments into any content that uses the Rich Content Editor:
- Edit a Page, Quiz, or Announcement.
- In the Rich Content Editor toolbar, click the FastComments button.
- FastComments is automatically embedded into the content.
- Save the page.
When students view the page, the embedded FastComments widget loads with a comment thread unique to that page.
Automatic SSO
In both placements, students are signed in via their Canvas account automatically. Names, emails, and avatars are synced through the LTI launch, no separate login is needed.
Lock Down Public Access (Recommended)
By default, FastComments comment data is publicly readable. Anyone who can guess a thread's URL or API endpoint can view its comments, even outside Canvas. For course discussions you almost certainly want to restrict viewing to enrolled students only.
Open your widget customization page and create a rule with Require SSO To View Comments enabled, then set the security level to Secure SSO so threads can only be loaded through the signed LTI launch.
See Protecting Comment Threads With Single-Sign-On for the full walkthrough, including how to scope the rule to a single domain or page.
Commenting Styles
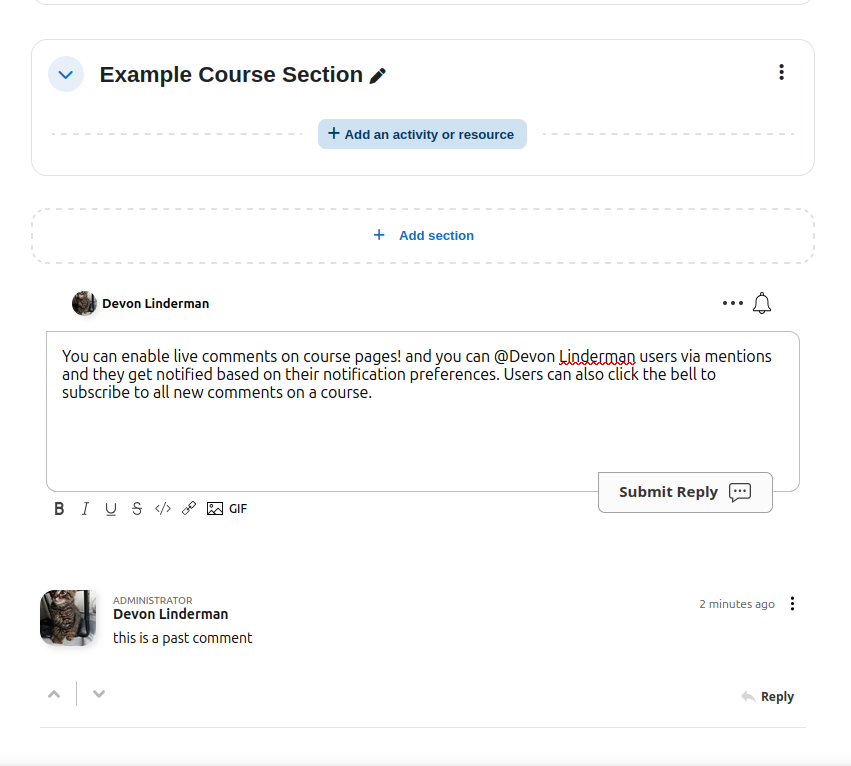
FastComments adds threaded comments to your Canvas courses. The standard FastComments widget appears on the page. Users can post threaded comments, reply, vote, and use all standard features.
Comments are attached to each course page or resource link, so discussions stay organized per page, assignment, or module.
Role Mapping
Canvas roles are automatically mapped to FastComments roles during the LTI launch. No manual configuration is needed.
Role Mapping
| Canvas Role | FastComments Role | Permissions |
|---|---|---|
| Administrator | Admin | Full account access, manage all comments and settings |
| Instructor | Moderator | Edit and delete comments, pin threads, manage discussions |
| Learner | Commenter | Post comments, reply, vote, and use mentions |
How It Works
When a user launches FastComments from Canvas, the LTI 1.3 protocol includes their Canvas role. FastComments reads this role and assigns the appropriate permissions automatically.
If a user has multiple roles (e.g. an Instructor who is also an Admin), the highest-privilege role is used.
Customization
FastComments is designed to be customized to match your site.
If you'd like to add custom styling, or tweak configuration, Checkout our Customization Documentation to learn how.
Domain Errors
You may get an authorization error, like the following:

This is because FastComments doesn't know it's supposed to allow your account to be used on this domain.
In this case, the fix is simple. You just have to add your Canvas instance domain to your FastComments account.
Go here to add your site to your account.
Add your Canvas domain (e.g. yourschool.instructure.com) and comments should load correctly.