
Add Comments to Squarespace Sites
With FastComments we can easily add live commenting to any Squarespace site.
The instructions below are divided into three sections, depending on what you want to do:
Note that this tutorial requires a FastComments account. It's recommended that you sign up first and then come back here. You can create an account here.
Adding Live Commenting to Your Blog 
In this section we'll learn how to add live commenting to your Squarespace blog.
You will only have to add the code once and the widget will automatically be added to any existing blog posts, and any blog posts you create in the future.
The comment threads will be unique to each blog post.
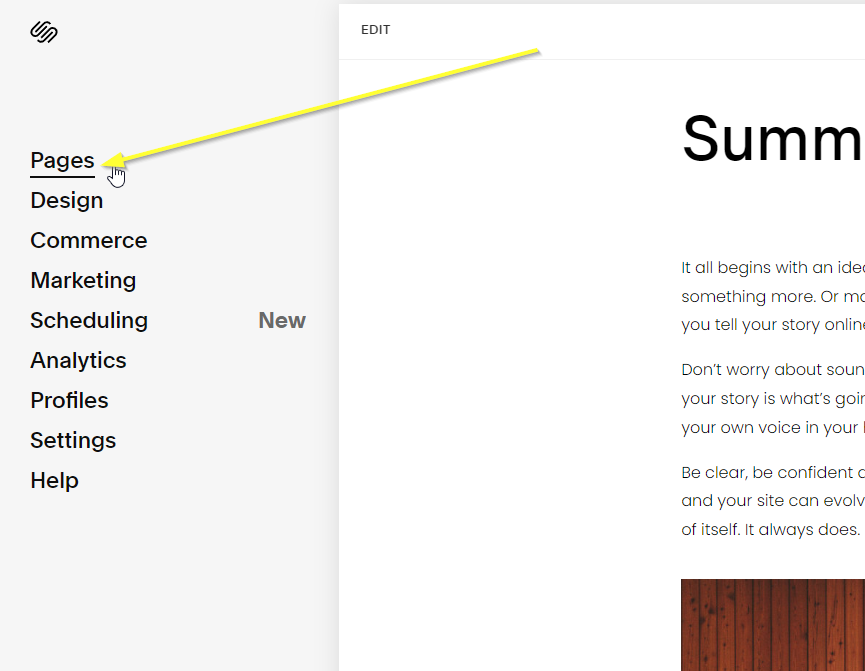
Step 1: Open Blog Settings
We'll start by opening Pages in the left, in the Editor:
In the bottom you should see Blog with a gear on the right. Click the gear to open the blog settings:

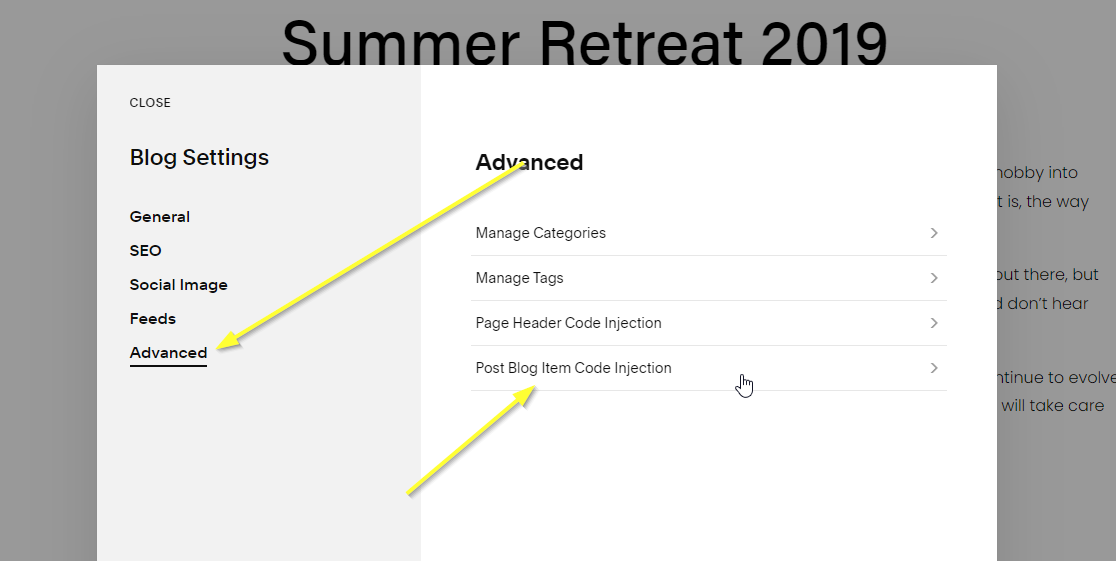
Now we'll go to Advanced and then Post Blog Item Code Injection:
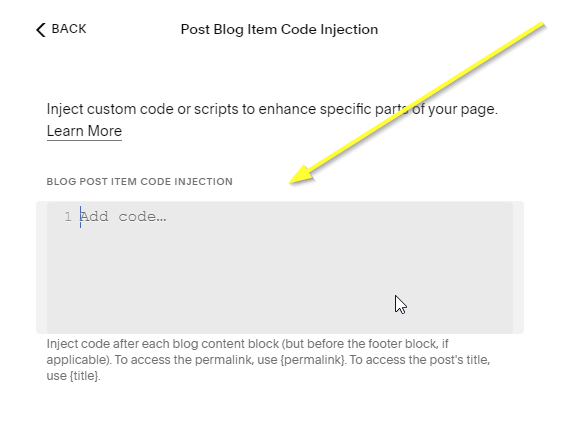
You should see a blank code area like the following:
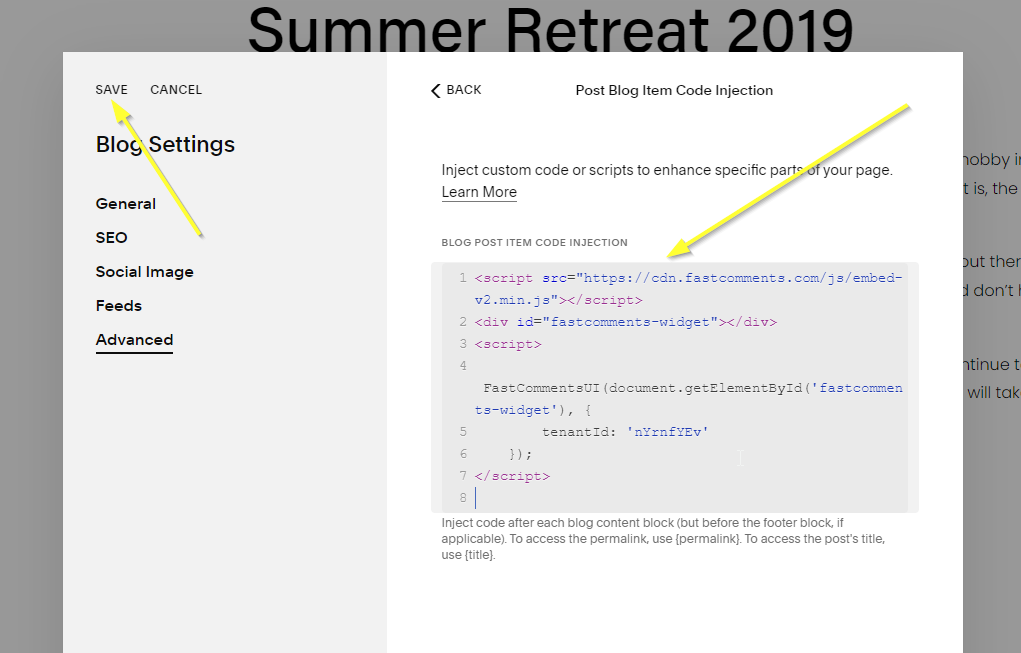
Step 2: Paste Your FastComments.com Code
Now we can copy the following code snippet (use the copy button in the top right of the snippet):

...then paste in the code area and click save:
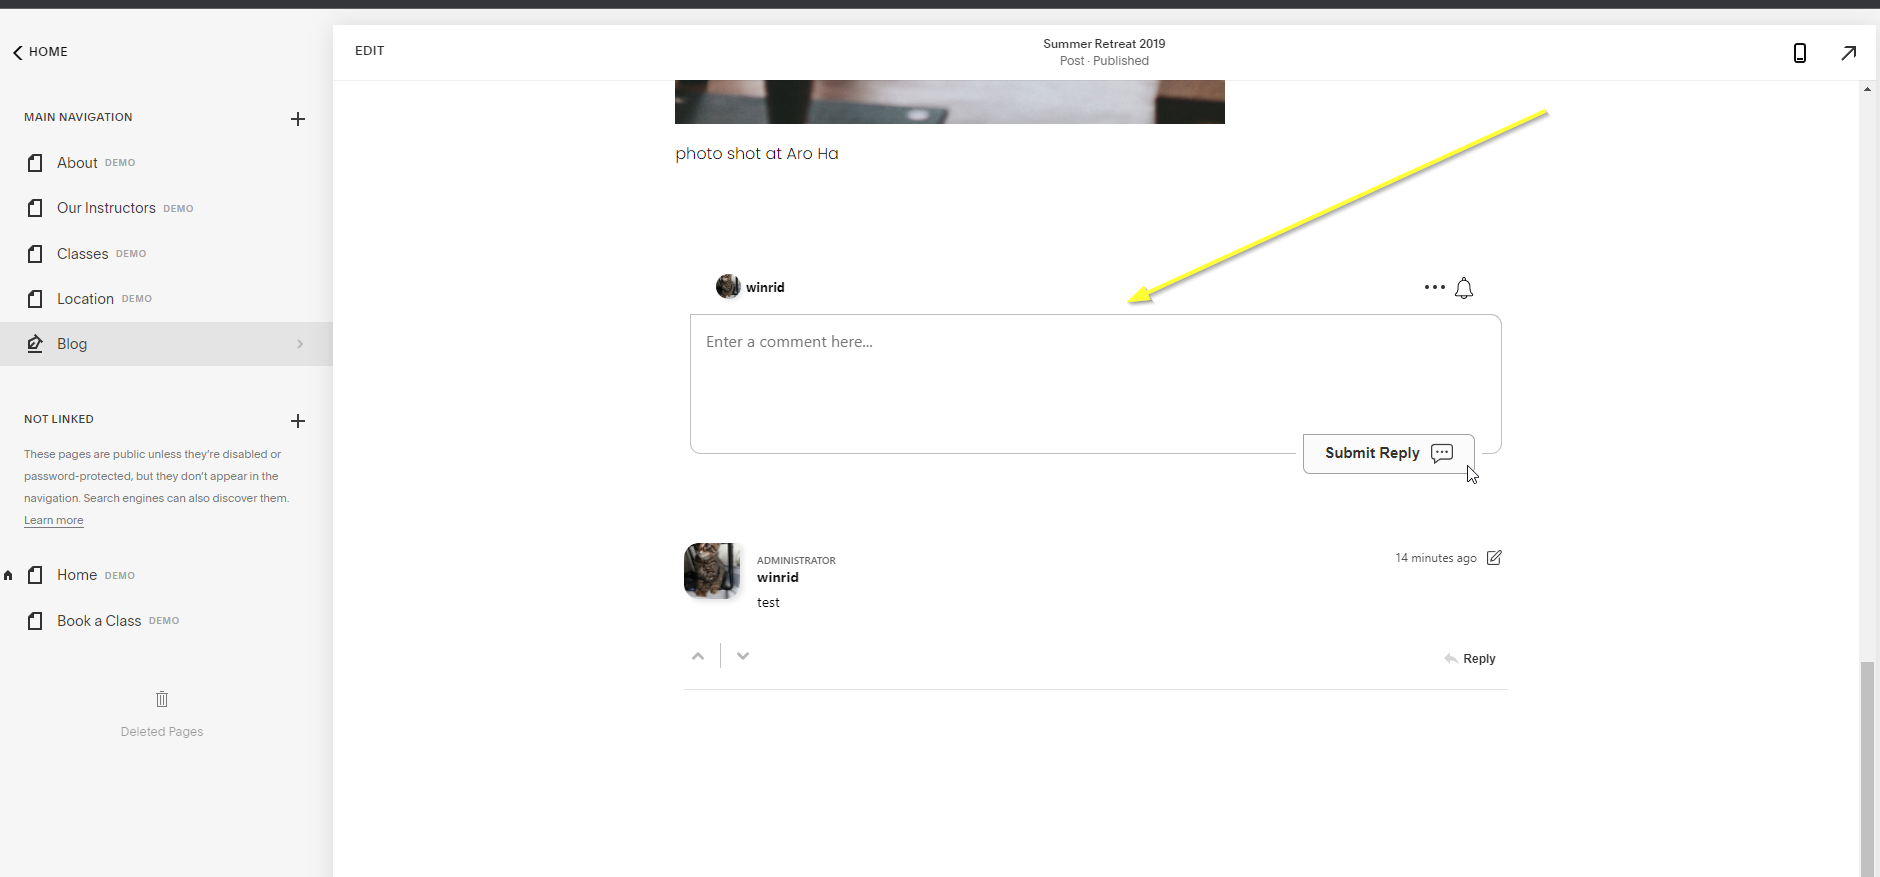
Success
Success! You should now see the FastComments Comment Widget on all of your blog posts.
Congratulations on setting up FastComments with Squarespace! If you've run into a Domain Error, or would like to learn how to customize the comment area, read on!
Add Live Commenting to All Pages
In this section we'll learn how to add live commenting to all pages in your Squarespace site.
You will only have to add the code once and the widget will automatically be added to any existing pages, and any pages you create in the future.
The comment threads will be unique to each page.
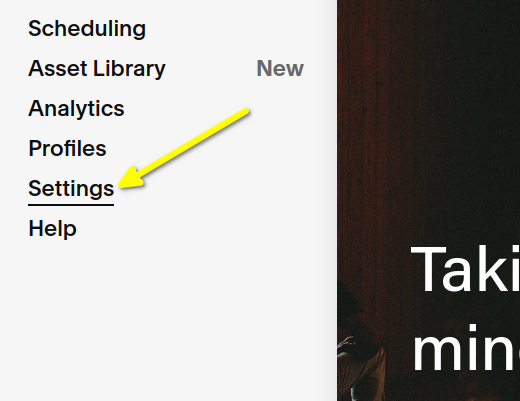
Step 1: Open Developer Tools
We'll start by opening Settings in the left, in the Editor:
In the bottom you should see Developer Tools. Click on this:
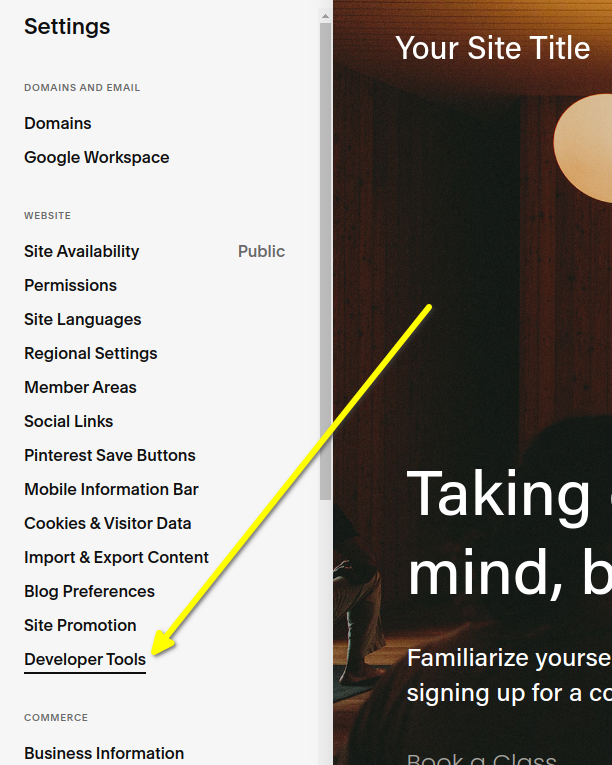
Now we'll go to Code Injection:

Now you should see two areas where we can add code, one labeled HEADER and one labelled FOOTER. We'll be adding our code to the FOOTER area:
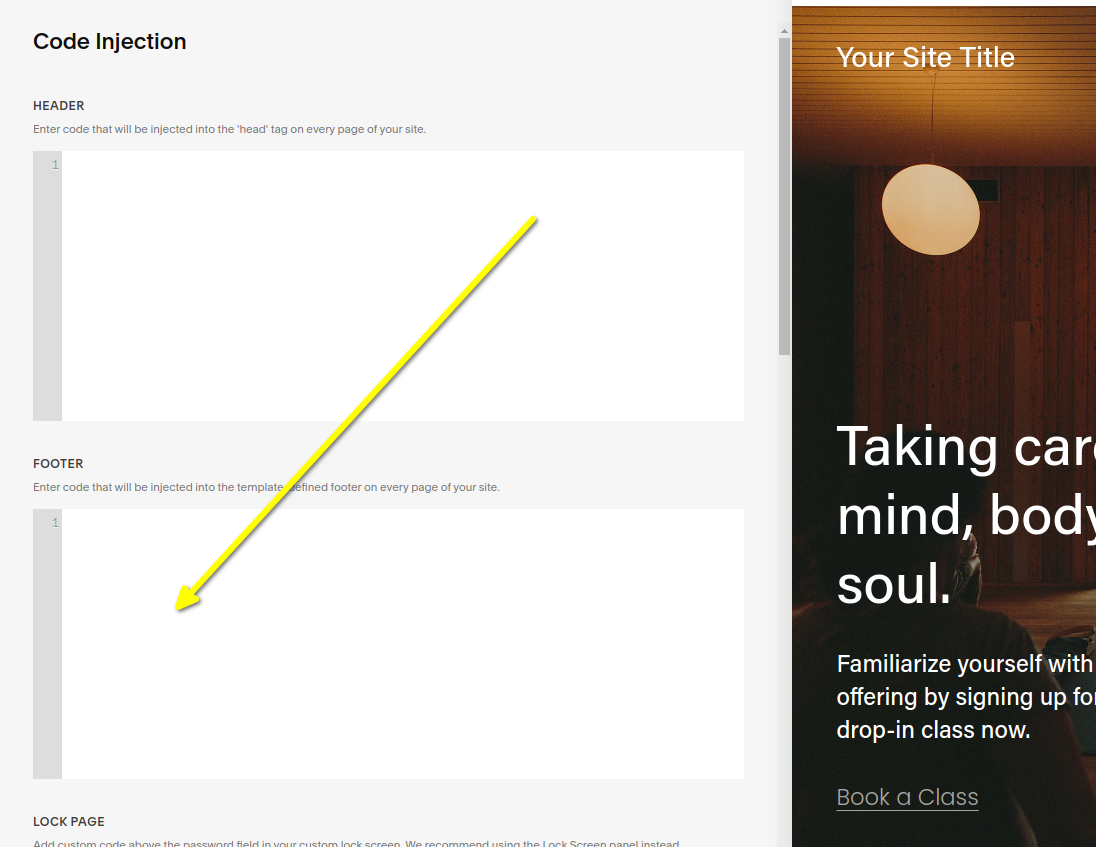
In the next step we'll copy our code and add it.
Step 2: Paste Your FastComments.com Code
Now we can copy the following code snippet. Use the copy button that appears in the top right of the snippet.
There are a few things you can configure in the code, see lines 4 through 7.
...then paste in the code area and click save. It should look like this, with the code in the FOOTER block:
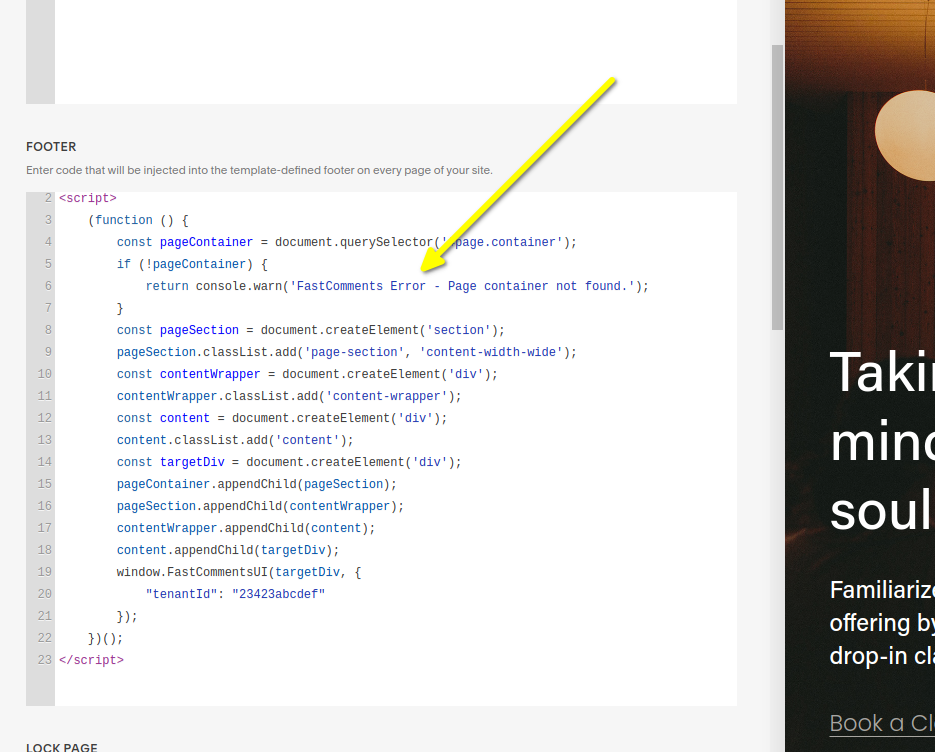
If you're having issues, make sure near the bottom it doesn't say "tenantId": "demo". It should show your tenant id if you are logged in. If not, reach out to support.
Success
Success! You should now see the FastComments Comment Widget on all of your pages.
Congratulations on setting up FastComments with Squarespace! If you've run into a Domain Error, or would like to learn how to customize the comment area, read on!
Add Live Comment to Specific Page
In this section we'll learn how to add live commenting to a specific page of your Squarespace site.
With this approach you will have to add the code to each page you want to add the comment widget to.
The comment threads will be unique to each page.
Step 1: Add Code Block
When adding the comment widget to a specific page, we have a bit more control.
We can add the widget exactly where we want to, which is what we will do in this tutorial, by adding a custom code block.
First, open the page you want to add comments to, and click edit in the top left.
In this example we're going to add a section specifically for comments, but you could add them to an existing section on the page.
Let's add our section:
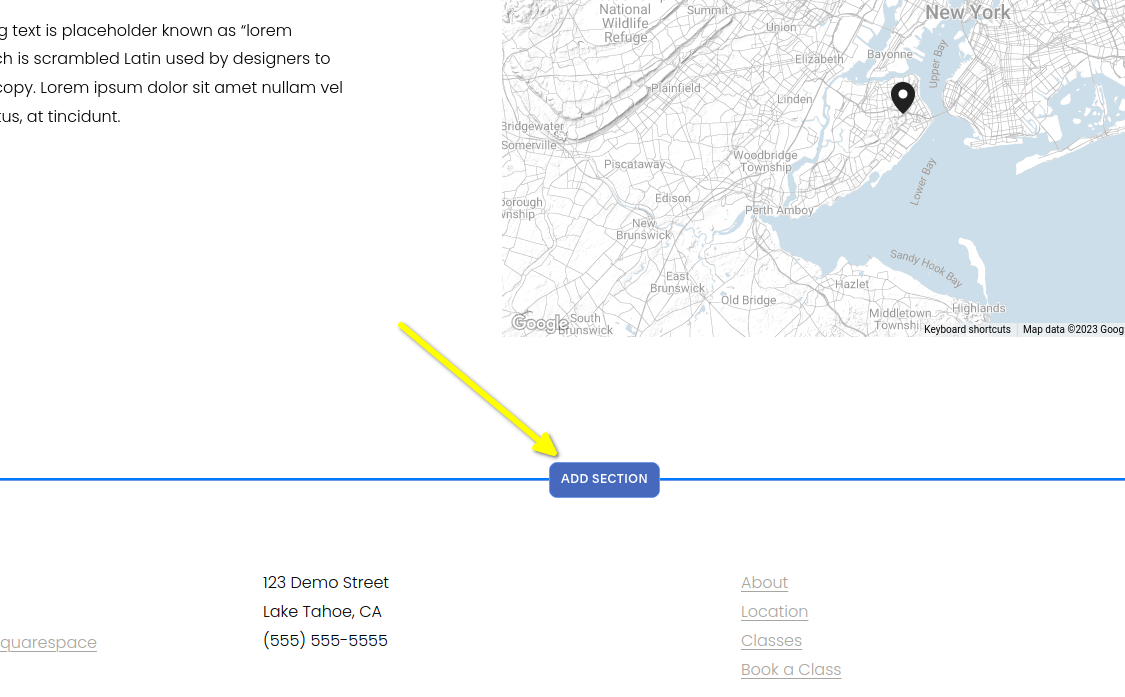
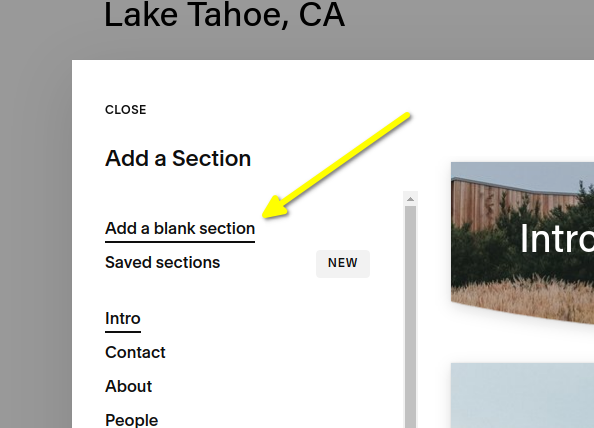
We're going to add a blank section:
You'll see a big blank area added. Click ADD BLOCK in the top left:
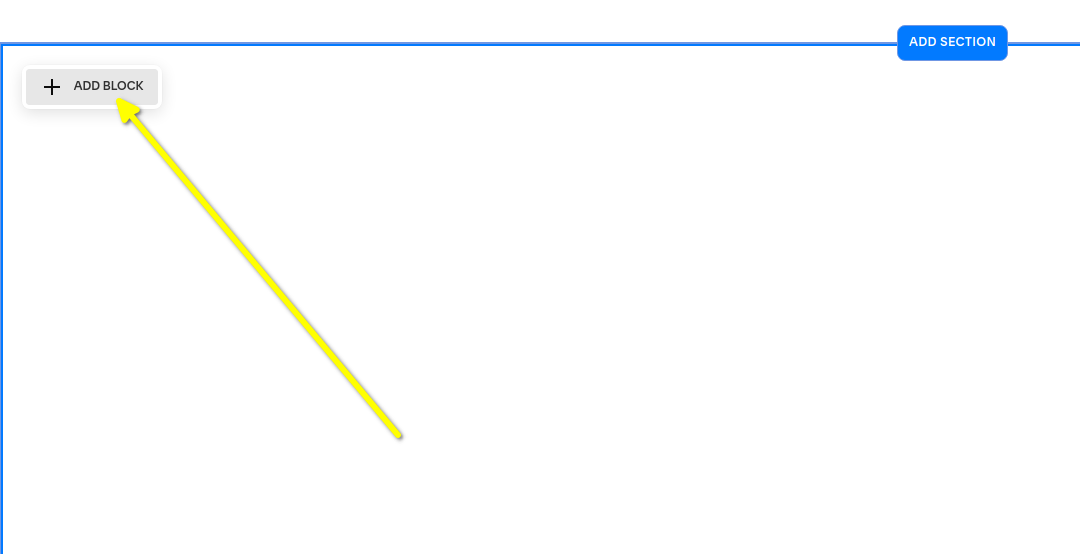
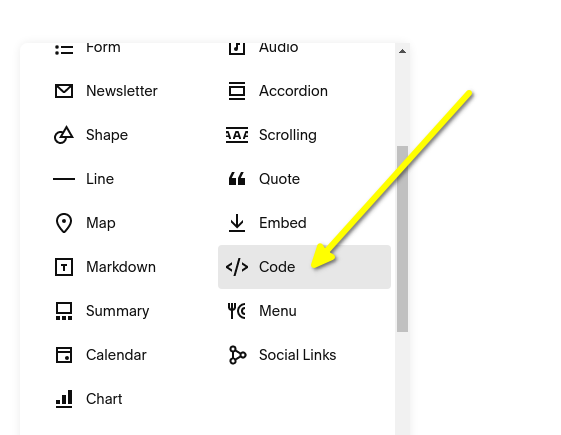
Scroll down until you find the Code option and click it:
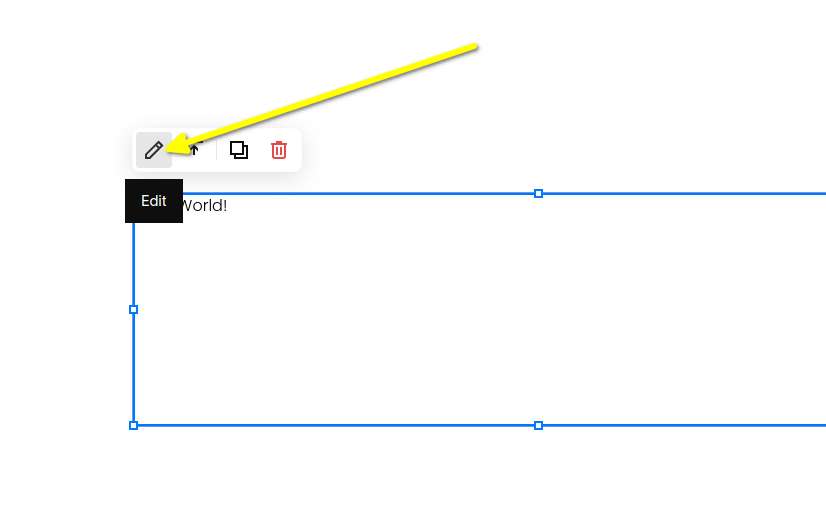
Position your code block like how you would want the comments widget to be positioned:

Edit the code block:
In the next step we'll copy our code and add it.
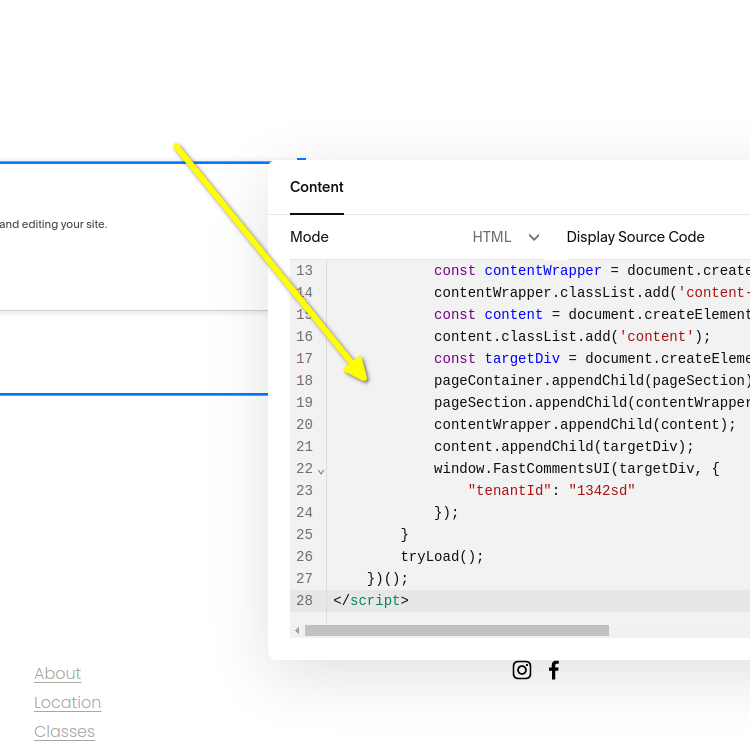
Step 2: Paste Your FastComments.com Code
Now we can copy the following code snippet. Use the copy button that appears in the top right of the snippet.
There are a few things you can configure in the code, see lines 4 through 7.
It should look like this:
Now click save in the top right.
Note that the Preview in Safe Mode option will not work, but the widget will appear when you visit your site.
If you're having issues, make sure near the bottom it doesn't say "tenantId": "demo". It should show your tenant id if you are logged in. If not, reach out to support.
Success
Success! You should now see the FastComments Comment Widget on your page.
Congratulations on setting up FastComments with Squarespace! If you've run into a Domain Error, or would like to learn how to customize the comment area, read on!
Domain Errors
You may get an authorization error, like the following:

This is because FastComments doesn't know it's supposed to allow your account to be used on this domain.
In this case, the fix is simple. You just have to add your site to your FastComments.com account.
Customization
FastComments is designed to be customized to match your site.
If you'd like to add custom styling, or tweak configuration, Checkout our Customization Documentation to learn how.