FastComments.com

Add Live Commenting to Bubble.io Sites

本指南涵盖的内容

本指南介绍如何在 Bubble.io 上使用 FastComments 设置实时评论。


1. 添加 HTML 区块 Internal Link

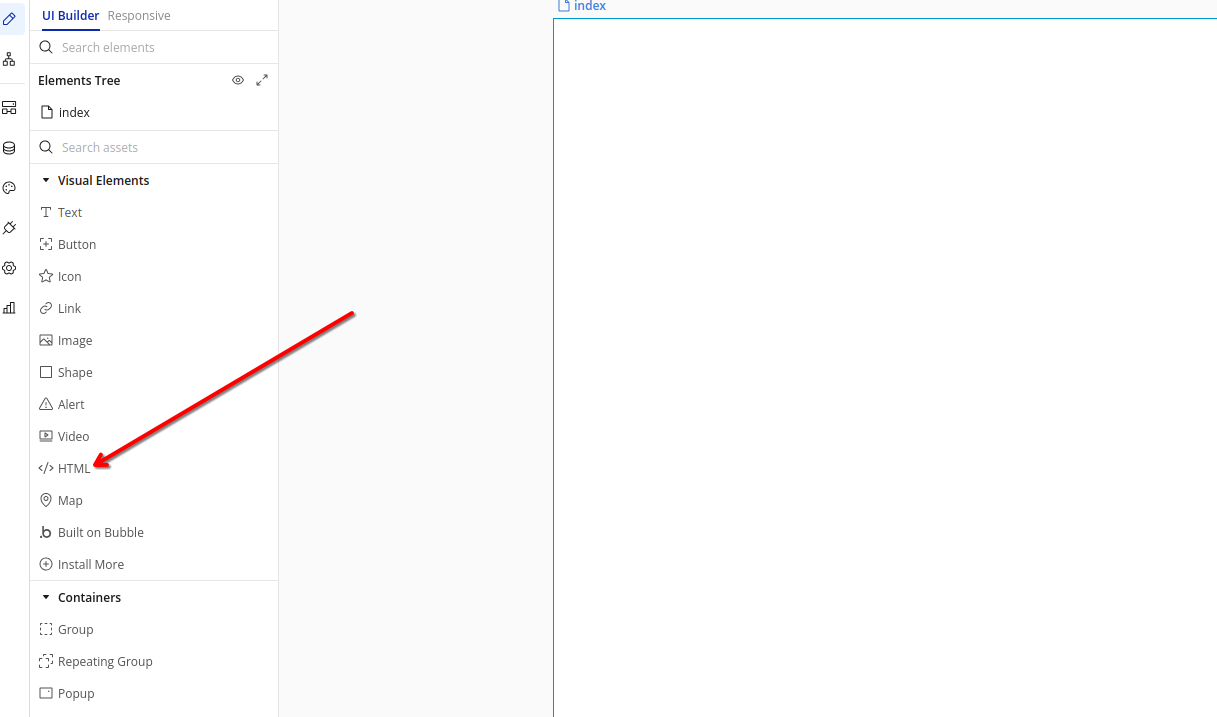
首先,导航到要添加 FastComments 的页面/布局。在 Bubble 编辑器中,从 Visual Elements 侧边栏将一个 HTML 元素拖放到页面上。

添加 HTML 元素
向 Bubble 页面添加 HTML 元素

该 HTML 元素允许我们将 FastComments 小部件直接嵌入到您的 Bubble 应用中。


2. 插入代码 Internal Link

单击你刚添加的 HTML 元素。在出现的属性编辑器中,将以下代码粘贴到 HTML 字段:

Bubble.io 实时评论 代码片段
Copy Copy
1
2<script src="https://cdn.fastcomments.com/js/embed-v2.min.js"></script>
3<div id="fastcomments-widget" style="width: 100%;height: 100%;"></div>
4<script>
5 (function fcLoad() {
6 function tryLoad() {
7 // Bubble 倾向于将代码片段更改为 async
8 const container = document.getElementById('fastcomments-widget');
9 if (!container) {
10 return waitRetry();
11 }
12 if (!window.FastCommentsUI) {
13 return waitRetry();
14 }
15 if (container.fastCommentsSetup) {
16 return;
17 }
18 window.FastCommentsUI(container, {
19 tenantId: 'demo',
20 pageTitle: top.document.title,
21 url: top.location.href,
22 urlId: top.location.pathname
23 });
24 container.fastCommentsSetup = true;
25 }
26 function waitRetry() {
27 setTimeout(tryLoad, 500);
28 }
29 tryLoad();
30 })();
31</script>
32
插入 FastComments 代码
将 FastComments 代码插入到 HTML 元素中

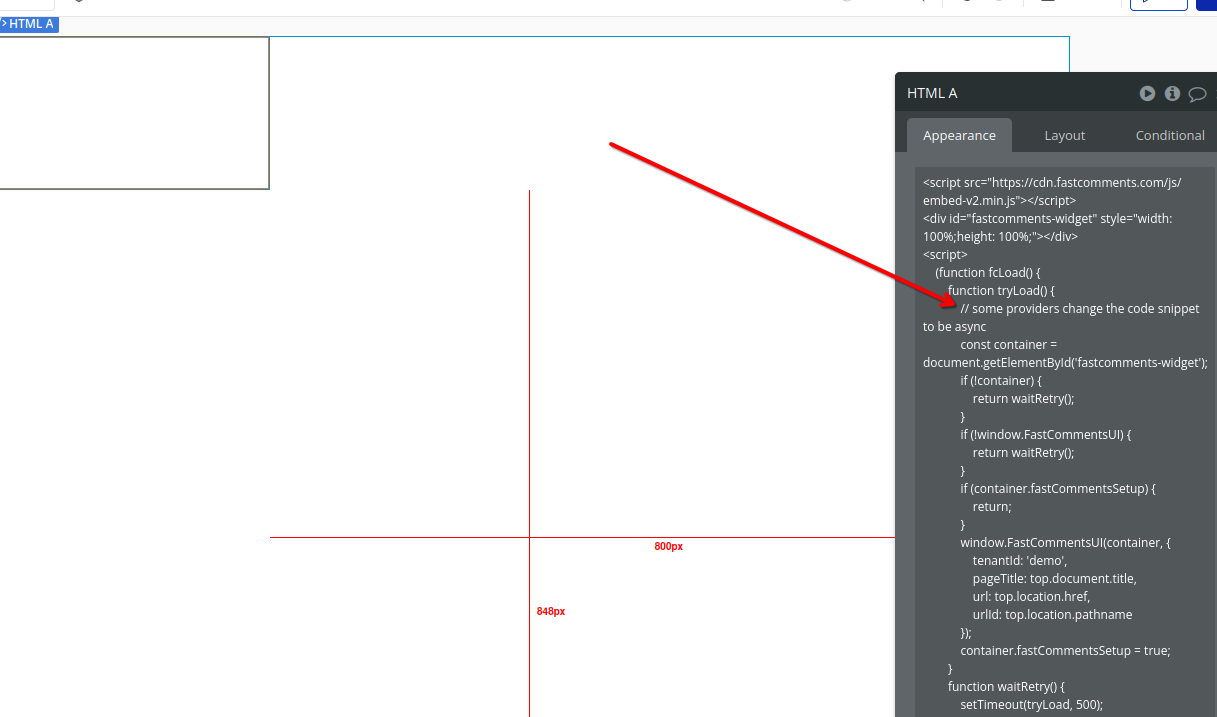
注意:此代码包含重试机制,以确保 FastComments 在 Bubble 的动态环境中正确加载。 其他代码片段将无法工作。

请记得在注册后将 'demo' 替换为您实际的 FastComments 租户 ID。如果您已登录 FastComments.com,它应该已经被替换。

3. 查找宽度设置 Internal Link


为确保评论小部件正确显示,我们需要调整 HTML 元素的宽度。请在该元素的属性编辑器中查找布局选项卡。

查找宽度设置
在布局选项卡中查找宽度设置

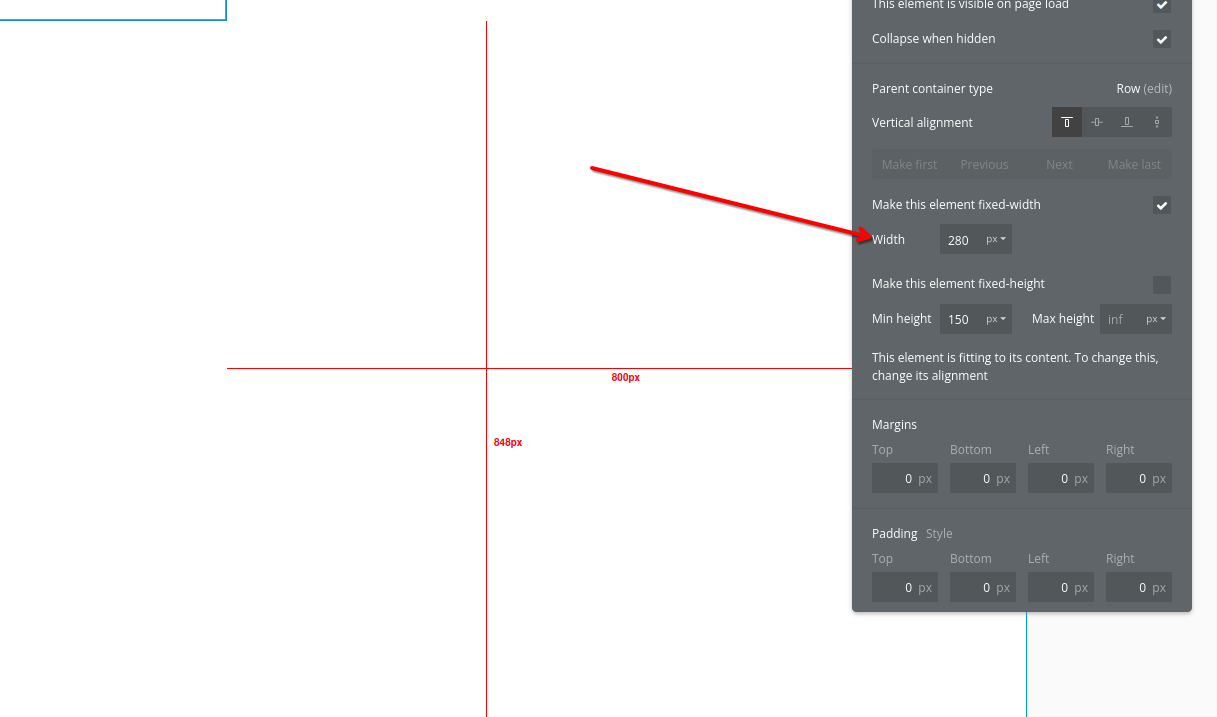
布局选项卡包含重要的尺寸选项,可帮助我们的评论小部件在不同屏幕尺寸下正确显示。


4. 调整布局 Internal Link

在“布局”选项卡中,将宽度设置为 100%。这可确保评论小部件占据其容器的全部宽度,并能对不同屏幕尺寸做出适当响应。

将宽度设置为 100%
Setting HTML Element Width to 100%

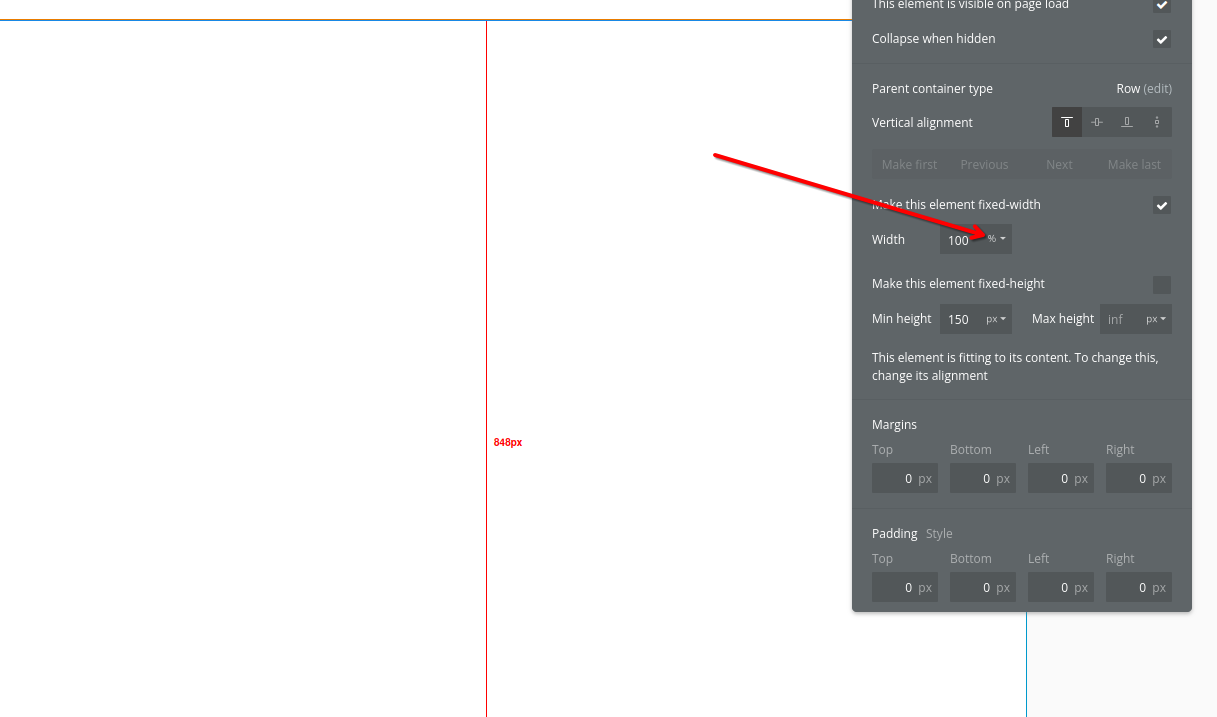
将输入值更改为 100(或所需的百分比)后,您需要点击数字旁边的下拉菜单,将单位从像素更改为百分比。

此外,设置一个最小高度(例如 400px),以确保评论小部件有足够的空间正确显示。

完成这些更改后,点击 预览 按钮以查看您的 FastComments 小部件的实际效果!

成功 Internal Link

干得好!您已向您的 Bubble.io 站点添加了实时评论。

如果您遇到权限被拒绝的错误,或想要自定义 FastComments,请继续阅读。

自定义 Internal Link


FastComments 旨在进行自定义以匹配您的网站。

如果您想添加自定义样式或调整配置,请查看我们的自定义和配置文档以了解如何操作。