
在 GoHighLevel 網站新增評論
使用 FastComments,我們可以輕鬆地為任何使用 GoHighLevel 建置的網站新增即時留言功能。
請注意,本教學需要 FastComments 帳戶。建議您先註冊,然後再回到這裡。您可以在此建立帳戶。
先登入可以確保產生的程式碼片段已與您的帳戶關聯。
GoHighLevel 會員網站與其他網站
本教學分為兩類:會員網站與一般 GoHighLevel 網站。
我們從會員網站的說明開始。
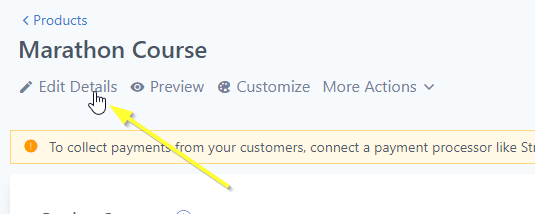
步驟 1:編輯課程 
首先,我們要編輯課程的設定。
為此,打開該課程,然後點擊 Edit Details。
步驟 2:開啟進階設定
接下來,我們需要打開 Advanced 設定:
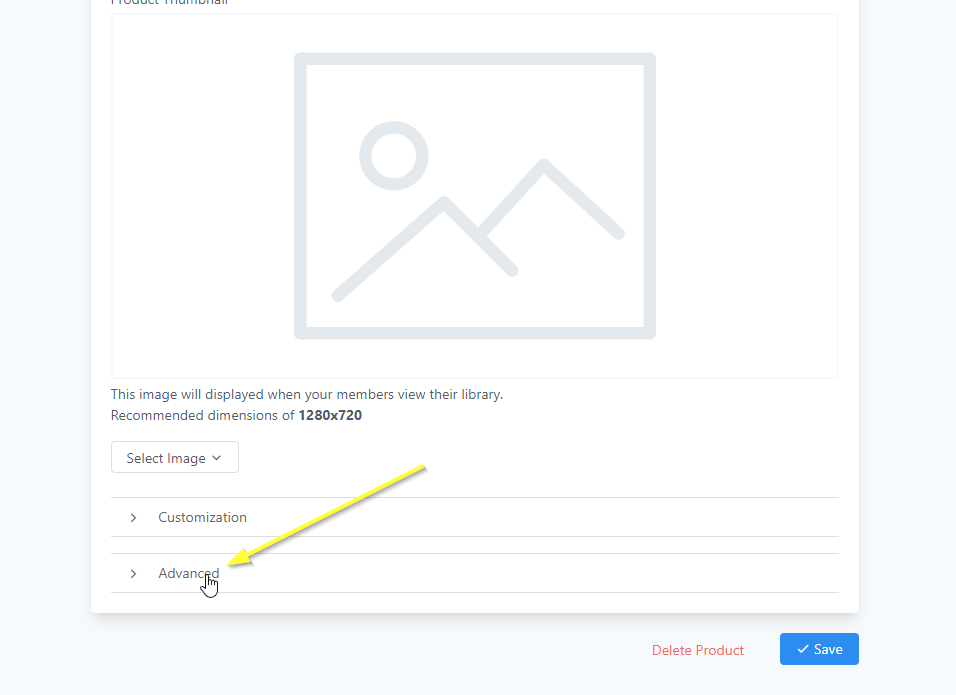
我們會將程式碼加入 Tracking Code 區段。前往該區段並點選 Footer Code。
步驟 3:複製程式碼
現在我們要為你產生自訂的 FastComments 程式碼。使用下面的精靈來設定 FastComments 在你的 GoHighLevel 網站上的運作方式:
FastComments Configuration Wizard
不同的留言框類型
你可以設定 TYPE = 'commenting' 這一行來切換所使用的產品(例如你可以改成 live 用於串流聊天,或 collab 用於協作聊天)。
將留言框放在你想要的位置
假設你想把留言框放在頁面中特定的位置,而不是預設位置。
將這一行改成:
const TARGET_ELEMENT_ID = ''; // 設為使用目標 div 模式改成:
const TARGET_ELEMENT_ID = 'fc_box'; // 設為使用目標 div 模式接著在 GHL 編輯器中,點選 "code" 按鈕,並加入你想要放置留言的位置:

每頁不同的留言框類型
假設你想讓使用者標註並討論部分文字,或改用串流聊天 UI。
首先請依照上面「將留言框放在你想要的位置」的步驟。
注意在那個小程式碼片段中有 type="commenting"。
例如若你想啟用 collab 聊天,將 type 改為 type="collab"。
僅在特定頁面顯示
如果你沒有設定 TARGET_ELEMENT_ID,你可以改為設定 VALID_PATTERNS 變數,用以設定留言應該顯示的 URL 路徑。預設情況下,它會在 URL 中包含 /post 的頁面顯示。
設定 Collab 聊天
你可以設定 collab 聊天僅在特定區域內的 HTML 周圍加入協作功能。例如,假設你在 footer 加上上述程式碼,然後在文章/頁面內容中加入此 div 來啟用 collab 聊天:
那麼 <div> 內的段落元素就會啟用 collab 聊天,而頁面上的其他部分則不會。如果你沒有在 <div> 中放任何內容,它就會在整個文章主體上啟用 collab 聊天。
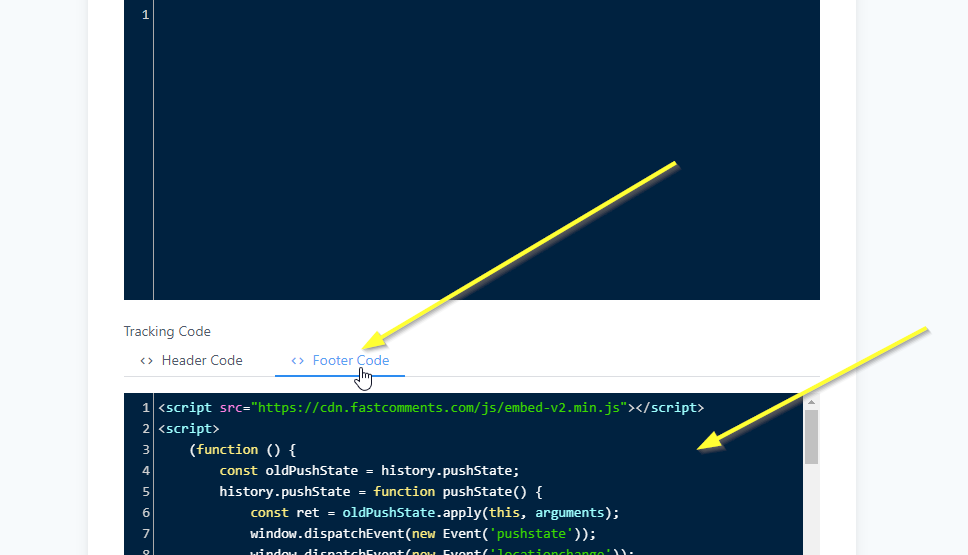
步驟 4:貼上程式碼
現在我們已經複製了程式碼片段,請如圖所示將其貼到 Footer Code 區段:
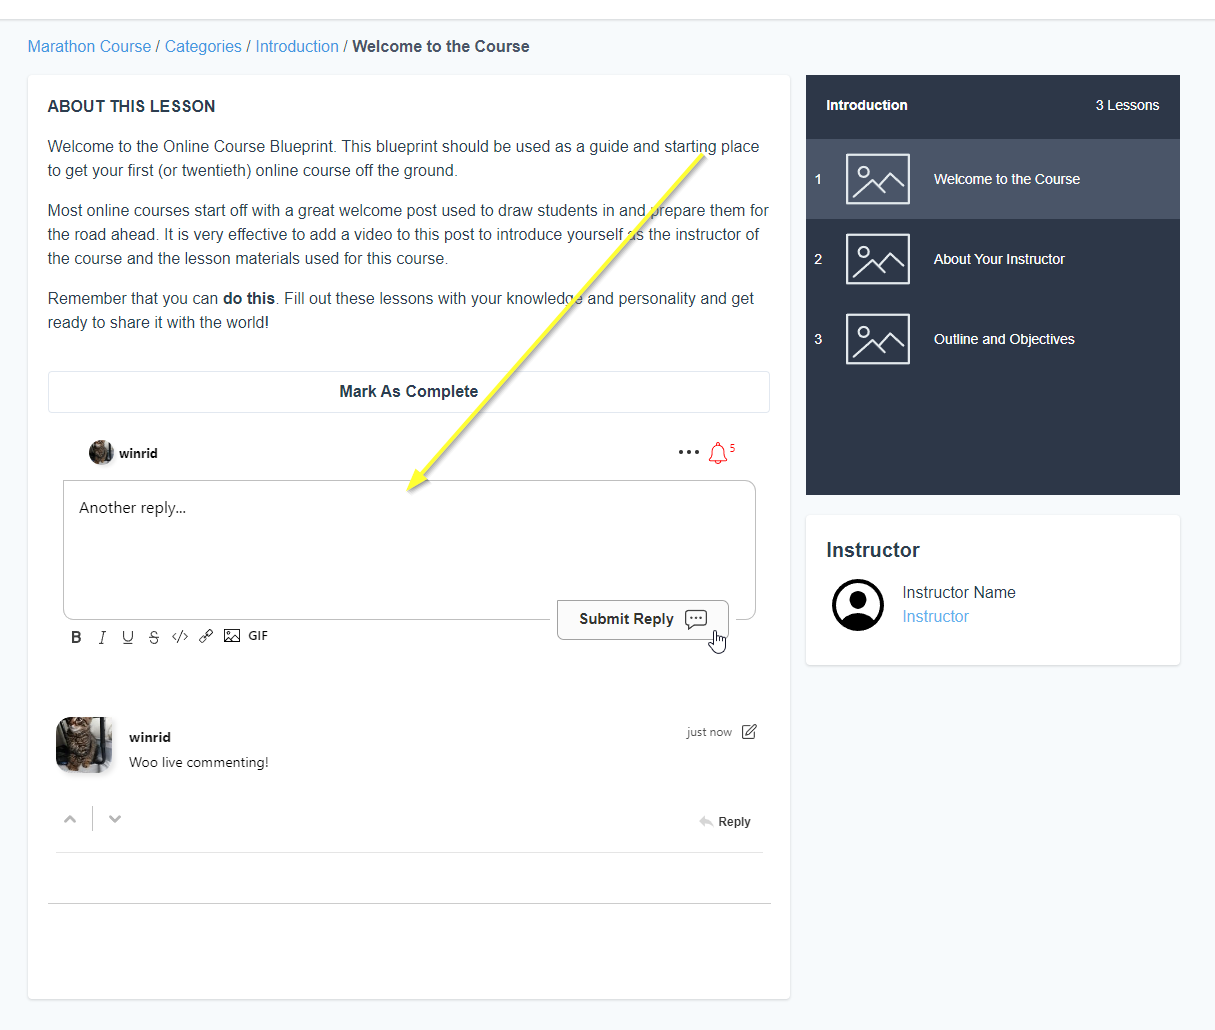
會員網站安裝成功
就是這樣!現在您應該已經在您的 GoHighLevel 課程中新增了即時評論功能。
如果您遇到「permission denied」權限錯誤,或想要自訂 FastComments,請繼續閱讀。
會員網站網域錯誤
您可能會遇到授權錯誤,如如下所示:

這是因為 FastComments 並不知道應該允許您的帳戶在此網域上使用。
在這種情況下,修正方法很簡單。您只需將您的網站新增到您的 FastComments.com 帳戶即可。
現在您應該已在網站上加入快速、即時的留言功能!
會員網站客製化
步驟 1:新增自訂程式碼元件
First, we're going to open the editor for the page of our site we want to add comments to.

Now find the place on the page where you want to add comments. Move your mouse toward the end of that area. A + icon will appear:

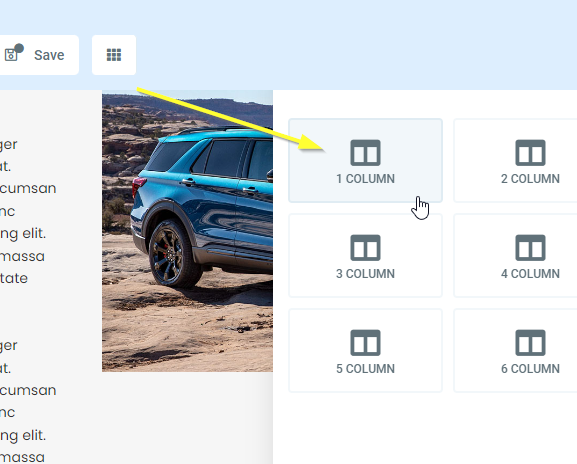
If we click that it asks us how many columns should the new section be. We'll select 1 COLUMN:
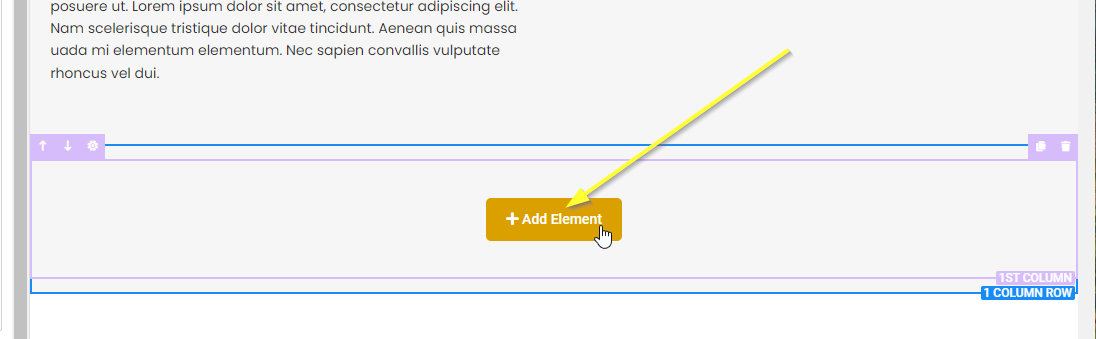
Now if you move your mouse over the new 1-column-row you'll have the option to add an element. Click that:
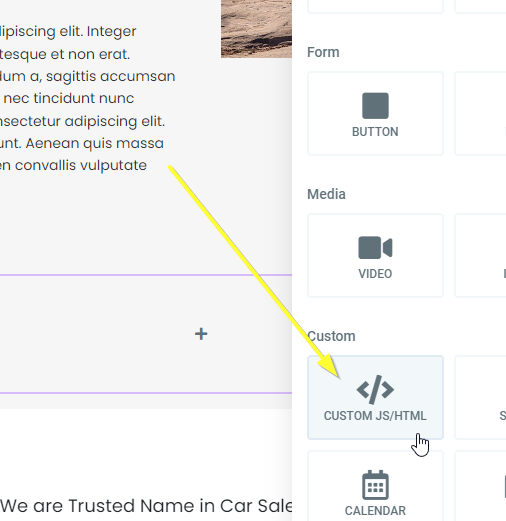
Scroll down and pick CUSTOM JS/HTML:
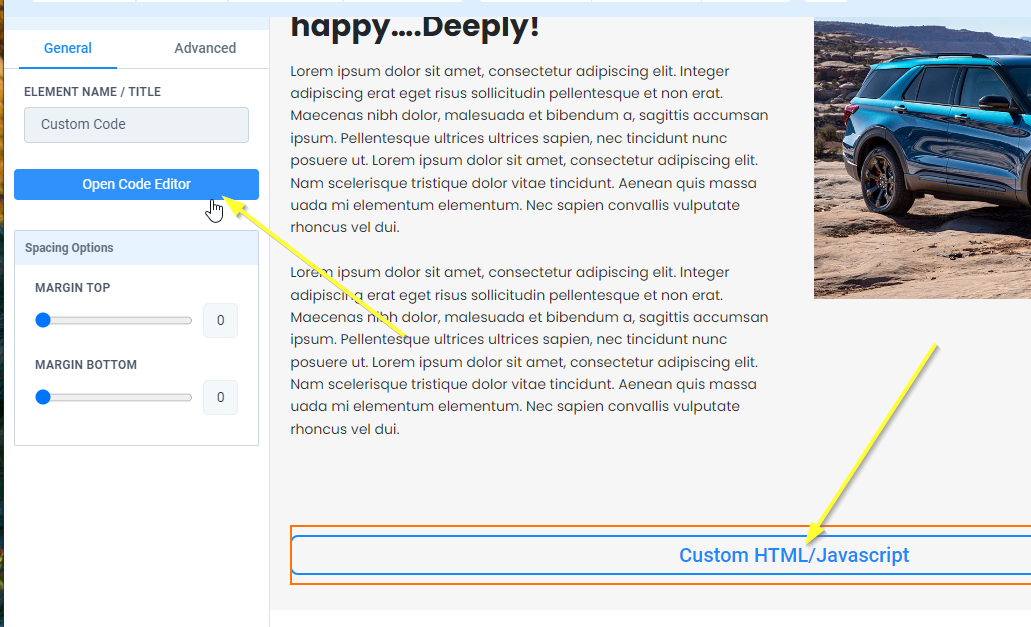
Now select our new element and click Open Code Editor on the left:
步驟 2:複製並貼上程式碼
是時候複製我們的程式碼。複製以下程式碼:
將其貼到我們打開的編輯器視窗中:
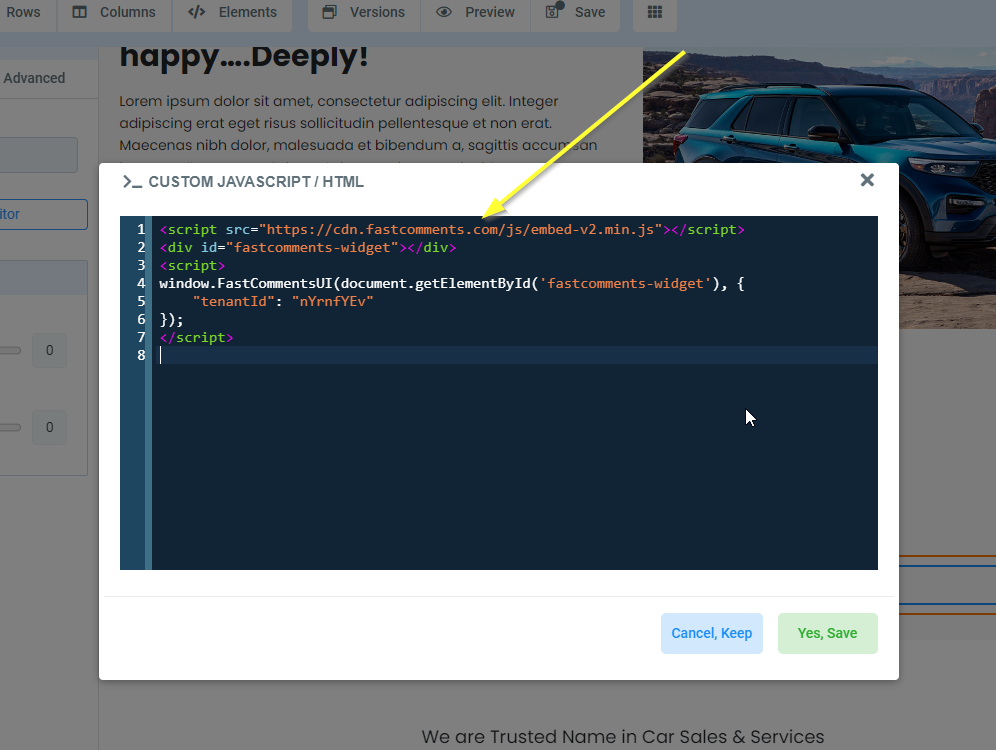
現在我們可以在該視窗的右下角點擊 Yes, Save。
在頁面頂端現在點擊 Save,然後 Preview。
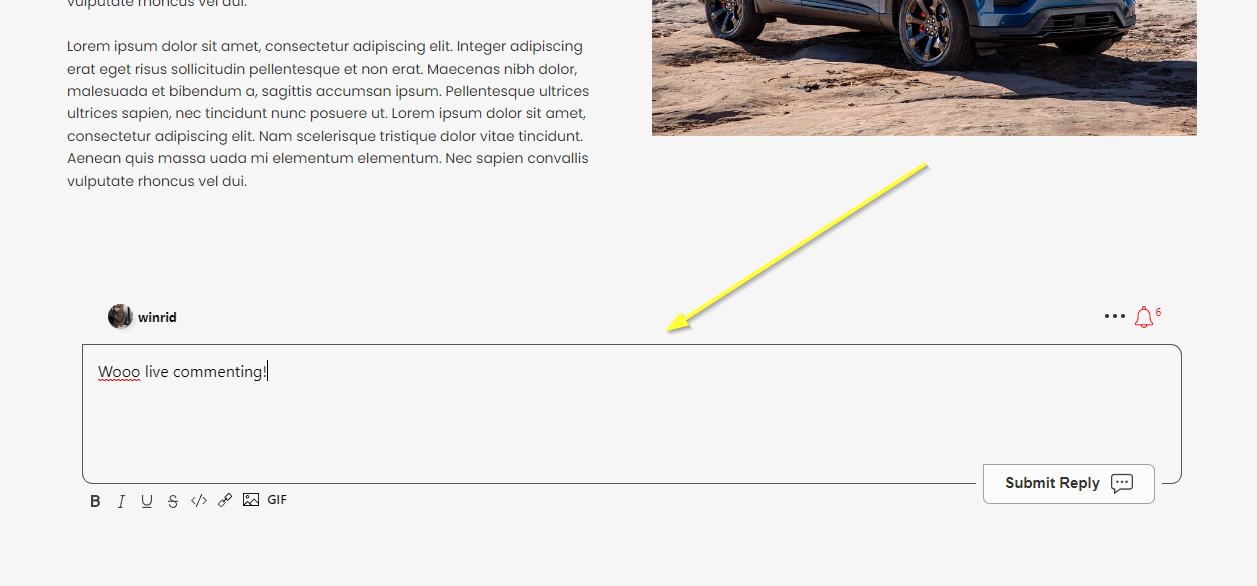
站點安裝成功
就這樣!您現在應該已經在 GoHighLevel 網站上加入了即時評論功能。
如果您遇到權限拒絕的錯誤,或想要自訂 FastComments,請繼續閱讀。
站點網域錯誤
您可能會遇到類似以下的授權錯誤:
原因是 FastComments 不知道應該允許您的帳戶在此網域上使用。
在這種情況下,解決方法很簡單。您只需將您的網站新增到您的 FastComments.com 帳戶。
現在,您的網站應該已經新增了快速、即時的留言功能!
站點客製化
結論
如果提供的步驟或程式碼在任何情況下無法運作,請 讓我們知道。