
Systeme.io 블로그에 댓글 추가
FastComments를 사용하면 Systeme.io 블로그에 실시간 댓글을 쉽게 추가할 수 있습니다.
아래 지침은 Systeme.io에서 구축된 블로그를 위한 것이지만, 임베드 코드를 다른 테마 파일을 편집하여 수동으로 모든 페이지에 추가할 수도 있습니다. FastComments 지원팀도 이를 도와줄 수 있습니다.
이 튜토리얼은 FastComments 계정이 필요합니다. 먼저 가입한 후 여기로 돌아오는 것이 권장됩니다. 여기에서 계정을 만들 수 있습니다.
1단계: 블로그 테마 템플릿 열기 
블로그의 레이아웃을 편집하여 모든 블로그 게시물에 FastComments를 추가하겠습니다.
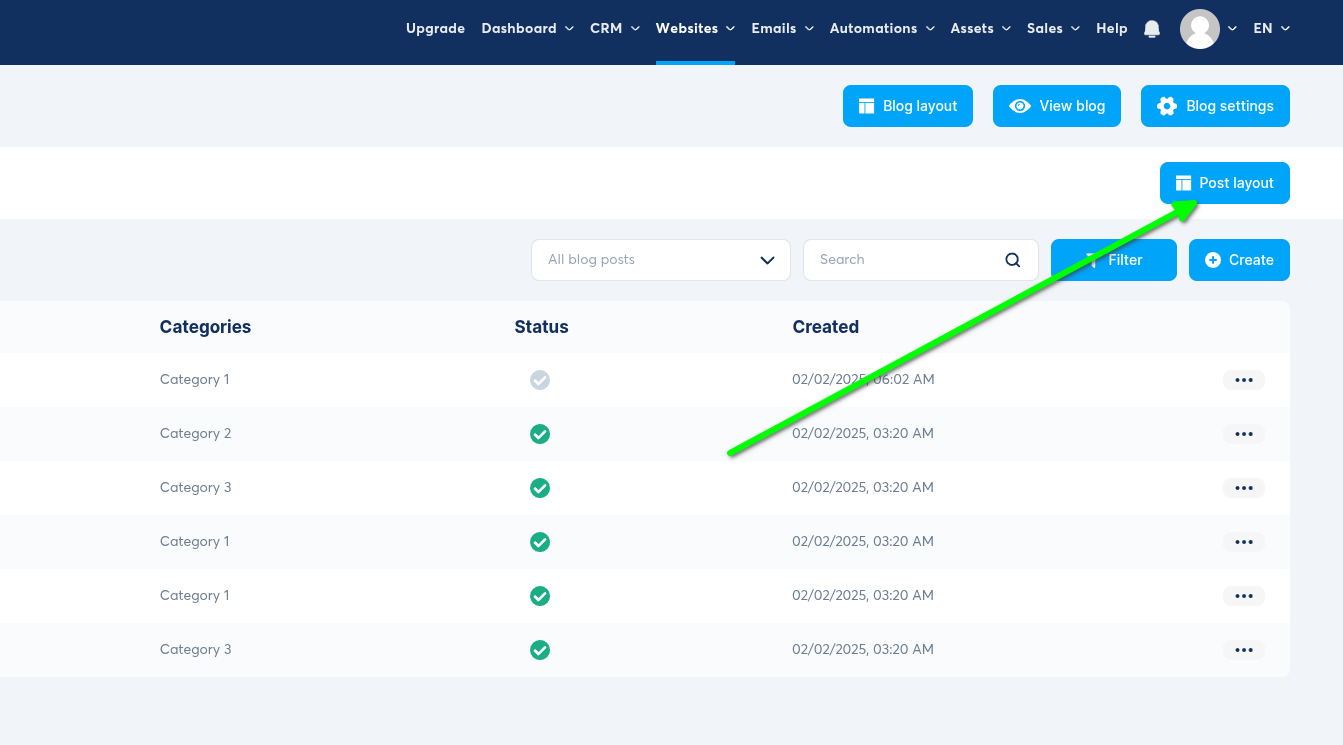
In our Blog admin panel, we're going to click the Post Layout button.
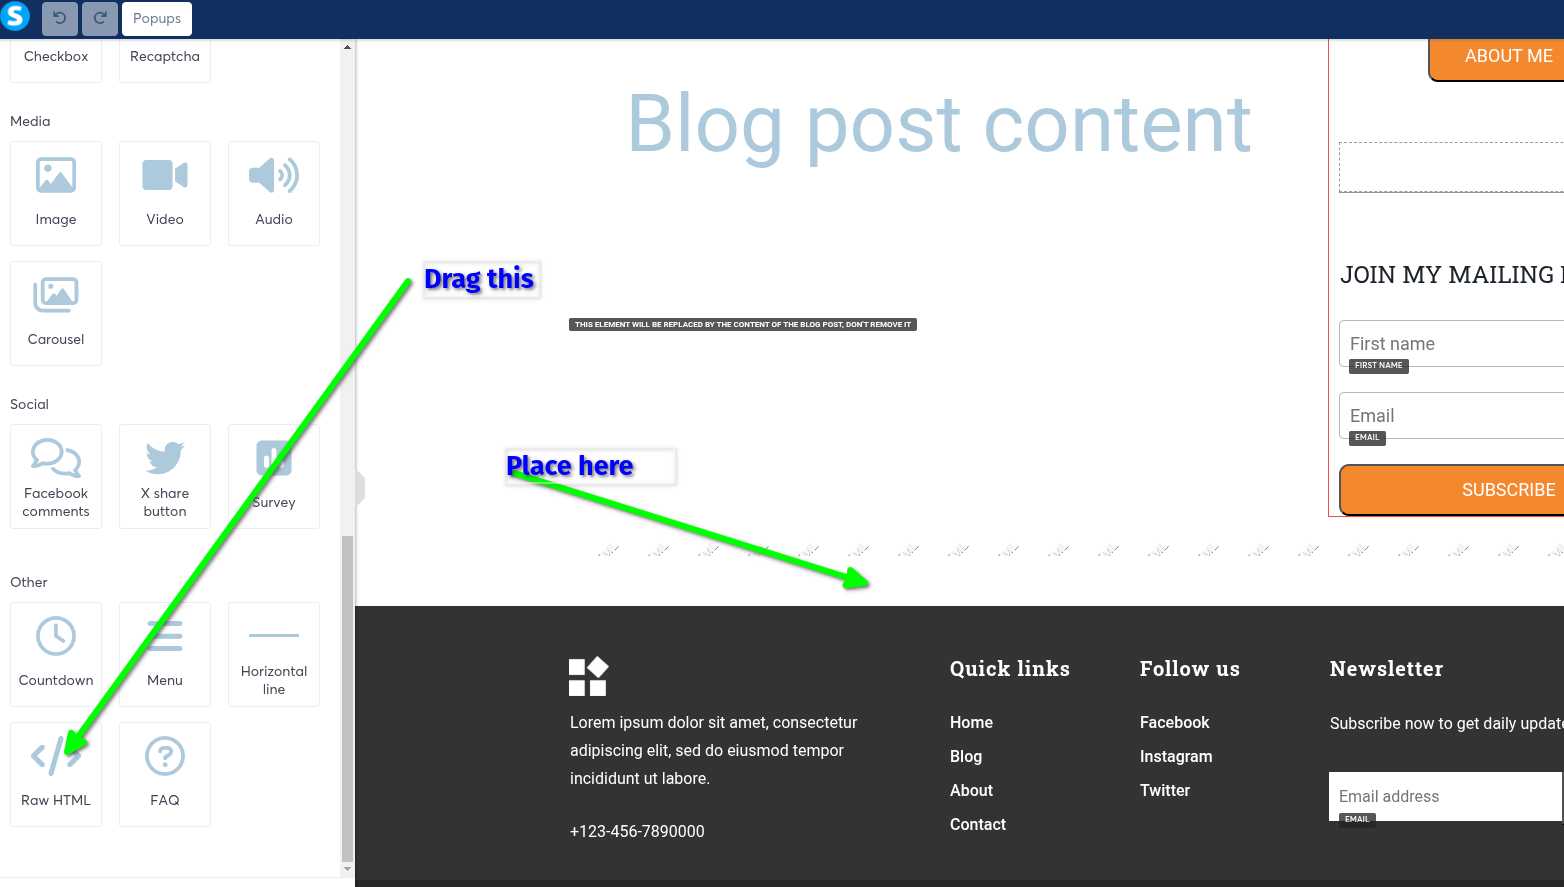
Then we're going to add a Raw HTML block (drag it to where you want the comment area):
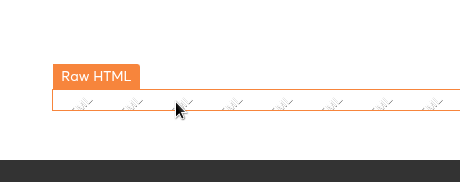
Now move your mouse over the block until it says Raw HTML and click it:
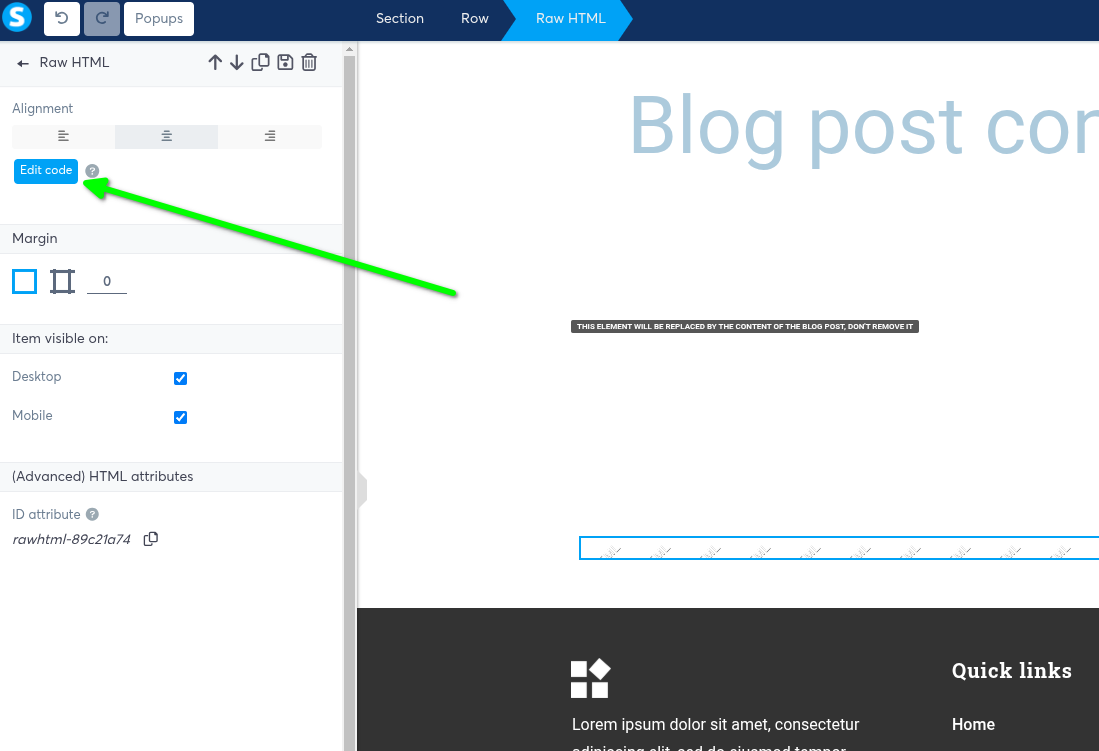
On the left hand side, now we'll have the option to click Edit Code - click that:
2단계: FastComments.com 코드 추가
이제 코드를 복사하겠습니다. 코드 스니펫의 6번째 줄에 tenantId: "demo"라고 적혀 있다면 FastComments 계정으로 로그인한 다음
이 페이지를 새로고침하여 복사된 코드 스니펫에 계정 ID가 반영되게 하세요.

이제 에디터에 붙여넣고 저장을 클릭하세요:
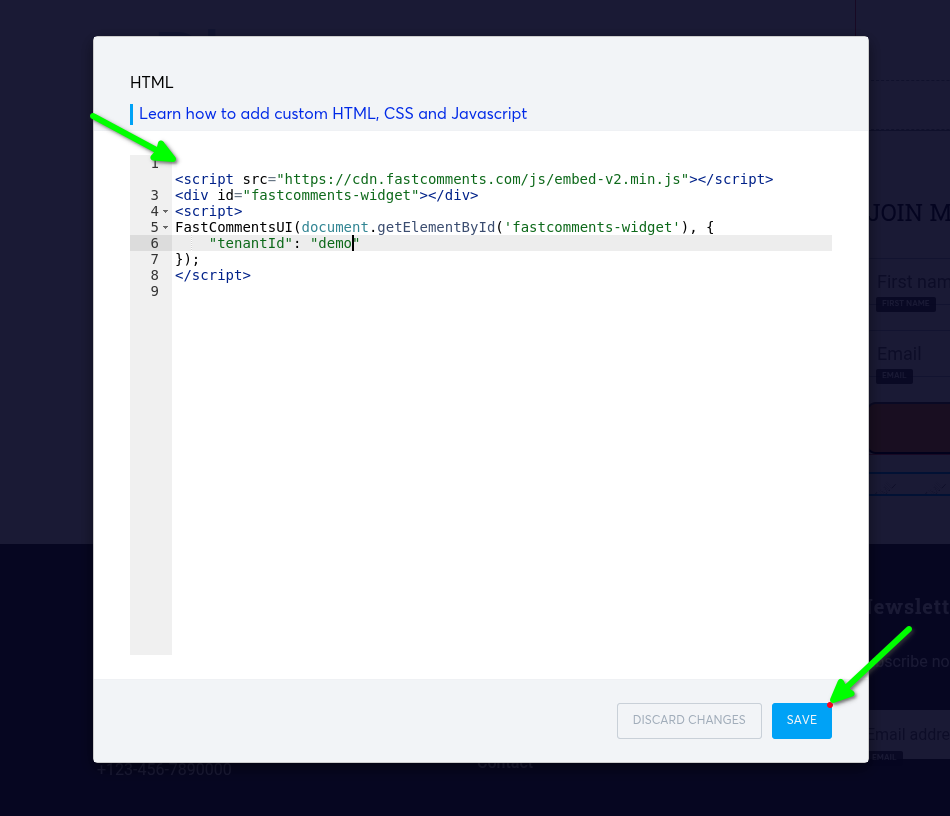
... 그런 다음 사이트를 저장하세요. 그게 전부입니다!
성공
이제 블로그 게시물을 보면 FastComments를 볼 수 있습니다!
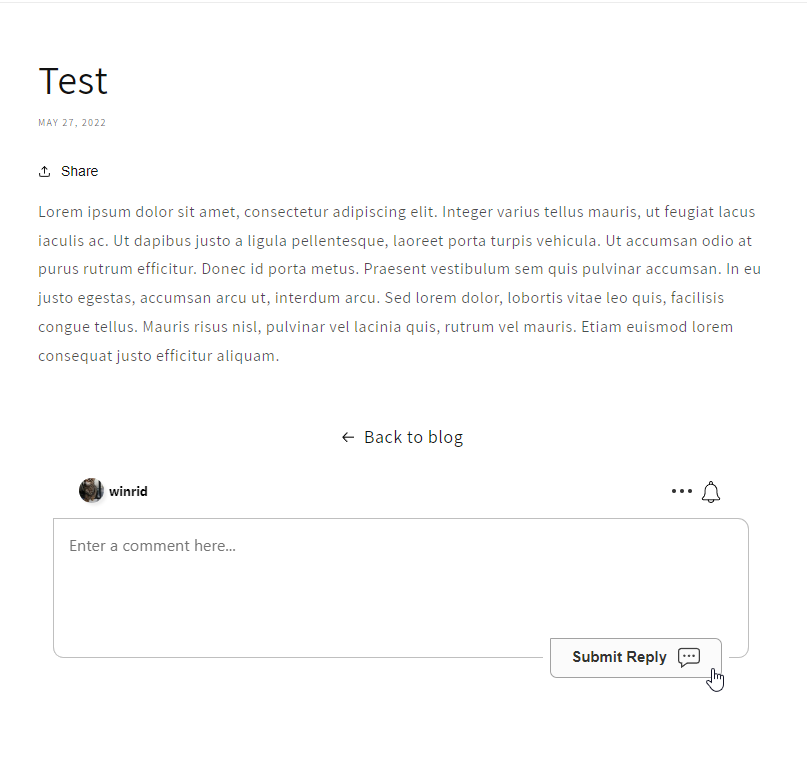
Systeme.io와 함께 FastComments 설정을 완료하신 것을 축하합니다! 도메인 오류가 발생했거나 댓글 영역을 사용자 지정하는 방법을 알고 싶다면 계속 읽어보세요!
도메인 오류
다음과 같은 권한 오류가 발생할 수 있습니다:
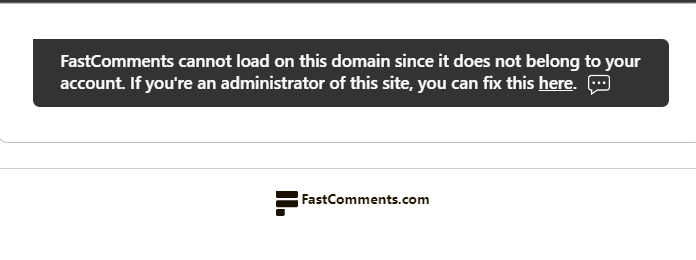
이는 FastComments가 귀하의 계정을 이 도메인에서 사용하도록 허용해야 한다는 사실을 알지 못하기 때문입니다.
이 경우 해결 방법은 간단합니다. FastComments.com 계정에 사이트를 추가하기만 하면 됩니다.