
Ionos サイトにコメントを追加
FastComments を使えば、Ionos で構築された任意のサイトにライブコメント機能を簡単に追加できます。
このチュートリアルには FastComments アカウントが必要です。最初にサインアップしてからここに戻ってくることをおすすめします。アカウントはここで作成できます。
ステップ1:お問い合わせフォームを追加 
まず、FastComments が置き換えるコンタクトフォームを追加します。
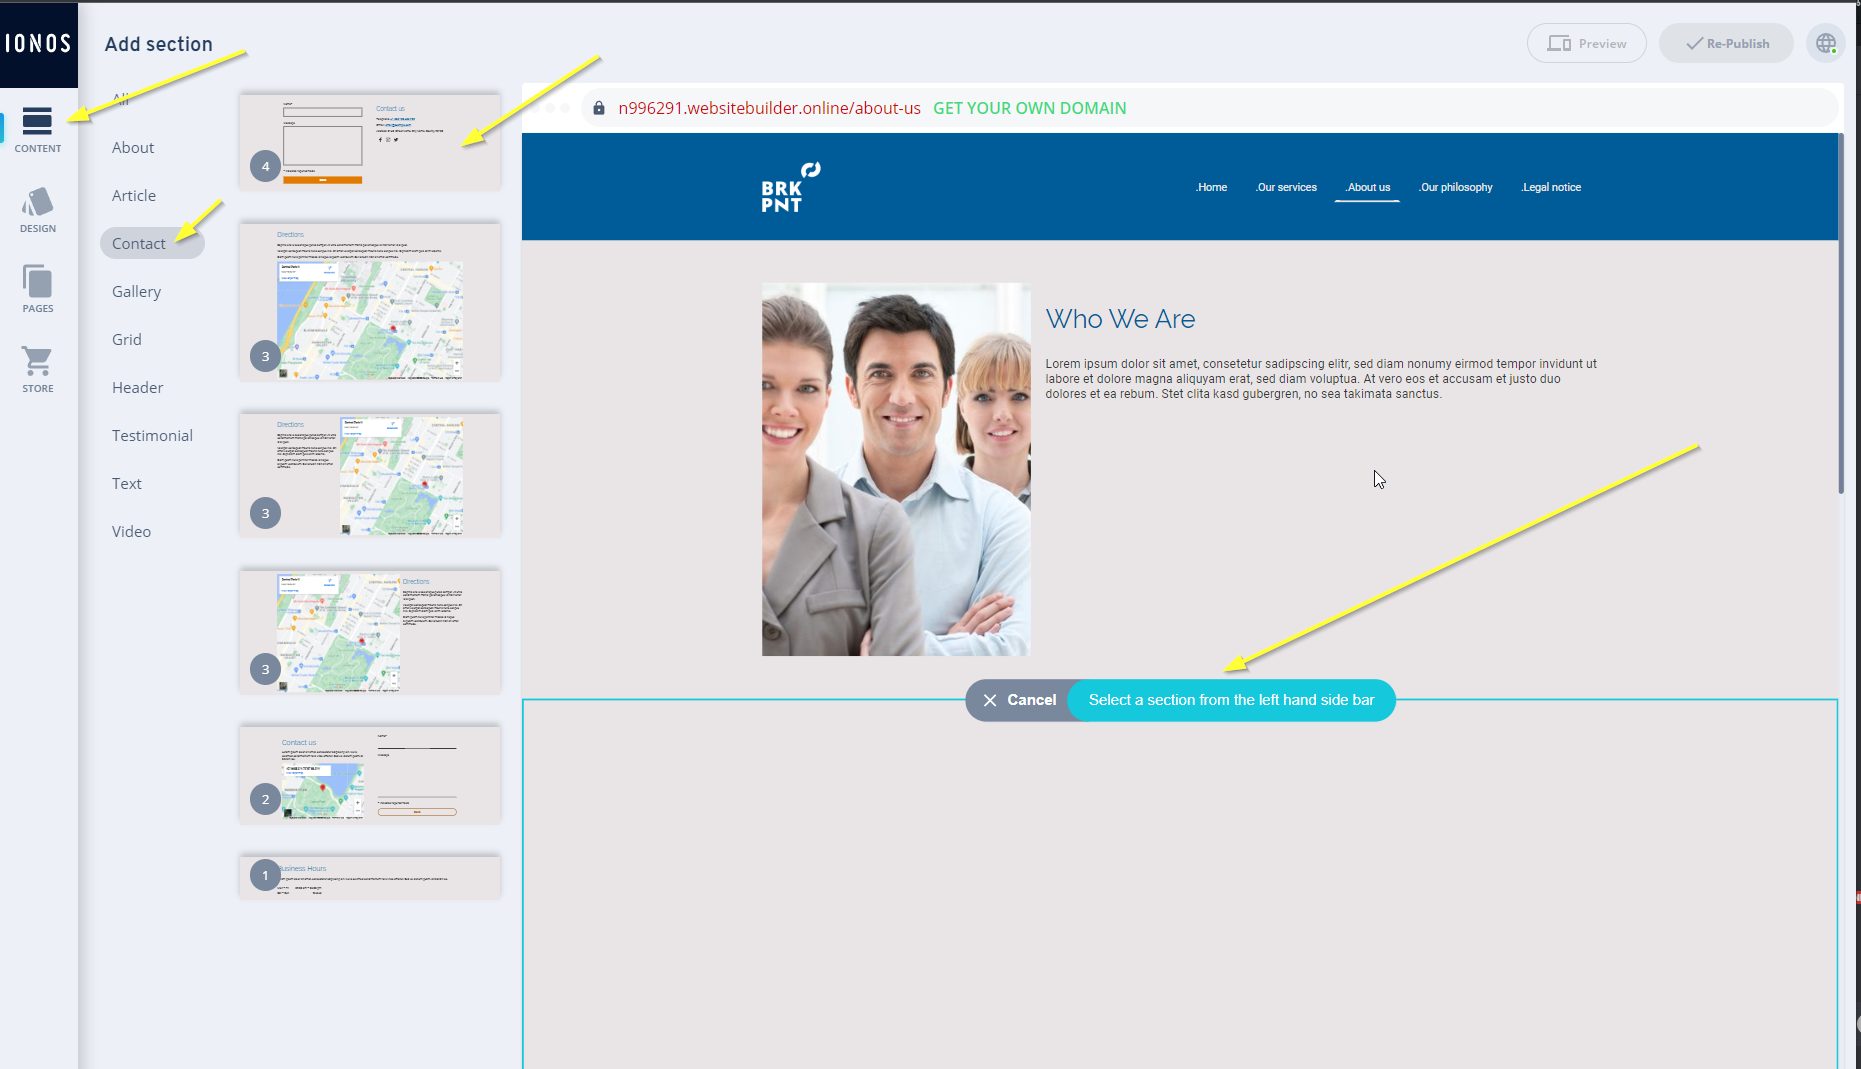
To do this, open the site editor, and click Add Section on the desired page.
Then, go to Content -> Contact -> Contact Form on the left, as shown:
Next, we need to tell FastComments to replace our form. Click on the default form title:
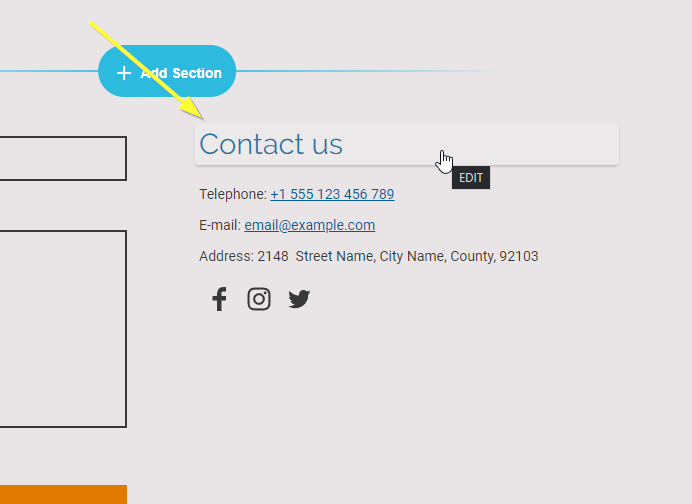
We'll set the title to FastComments Goes Here. It's very important that the casing
and spacing is the same, or else it won't work, so we recommend you copy this text and paste it in.
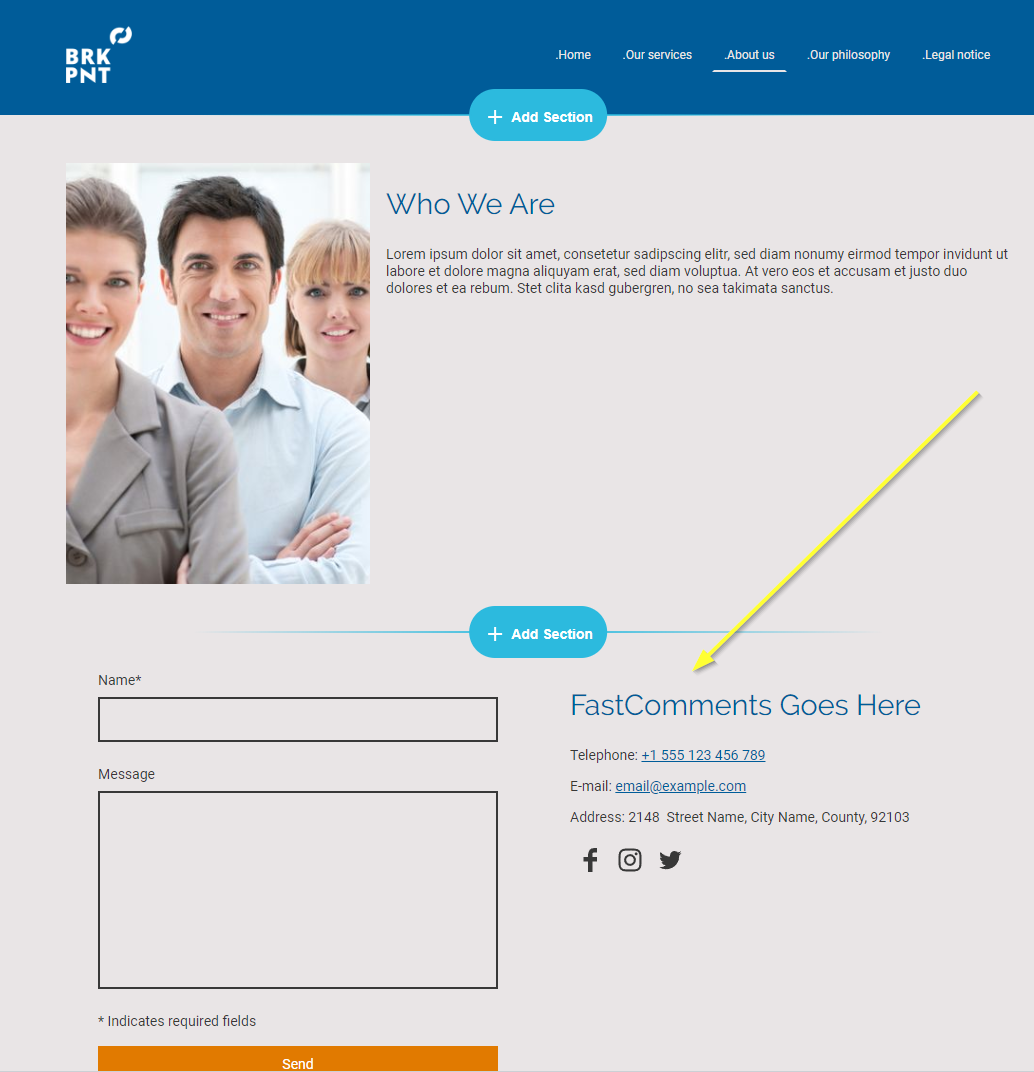
When done, it should appear as follows:
That's the end of step one!
ステップ2:FastComments.com のコードを追加
Next we're going to add the FastComments widget code to your site. This code will search for all forms with the title FastComments Goes Here and
replace it with FastComments.
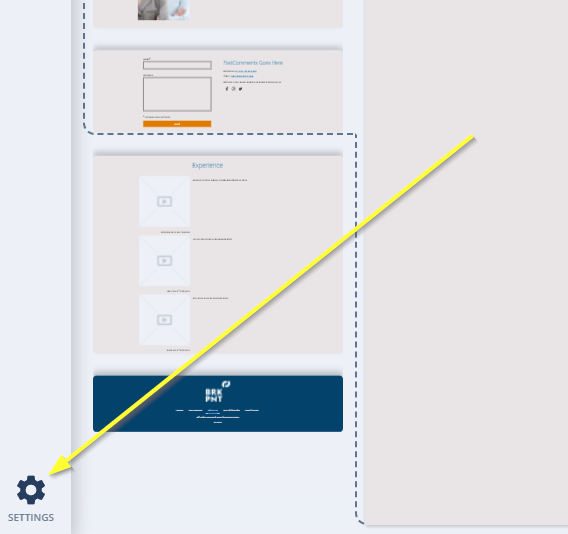
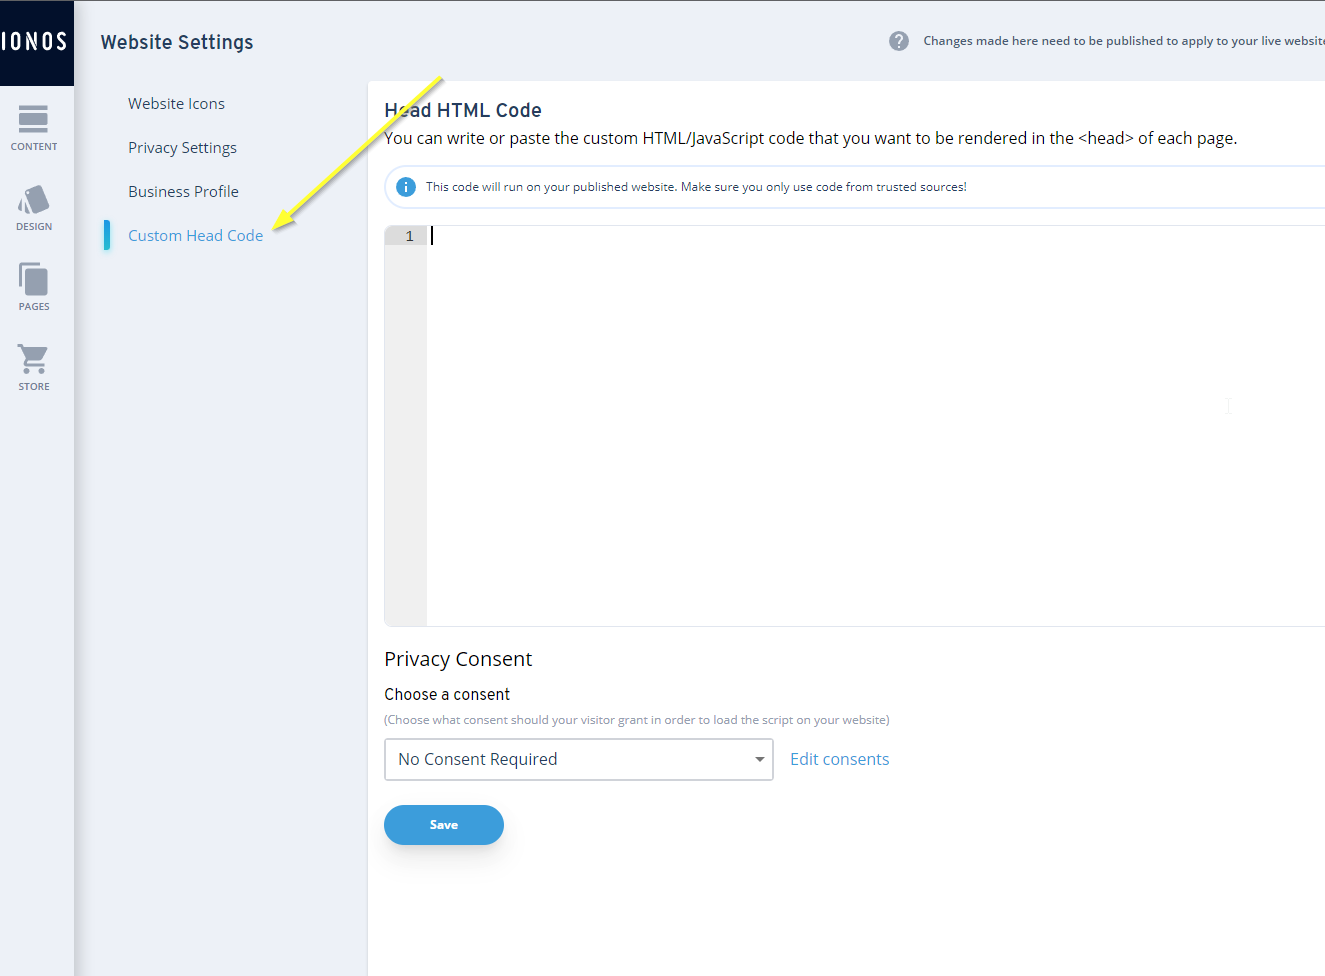
So let's go to Settings in the bottom left of the site editor:
Open the Custom Head Code section:
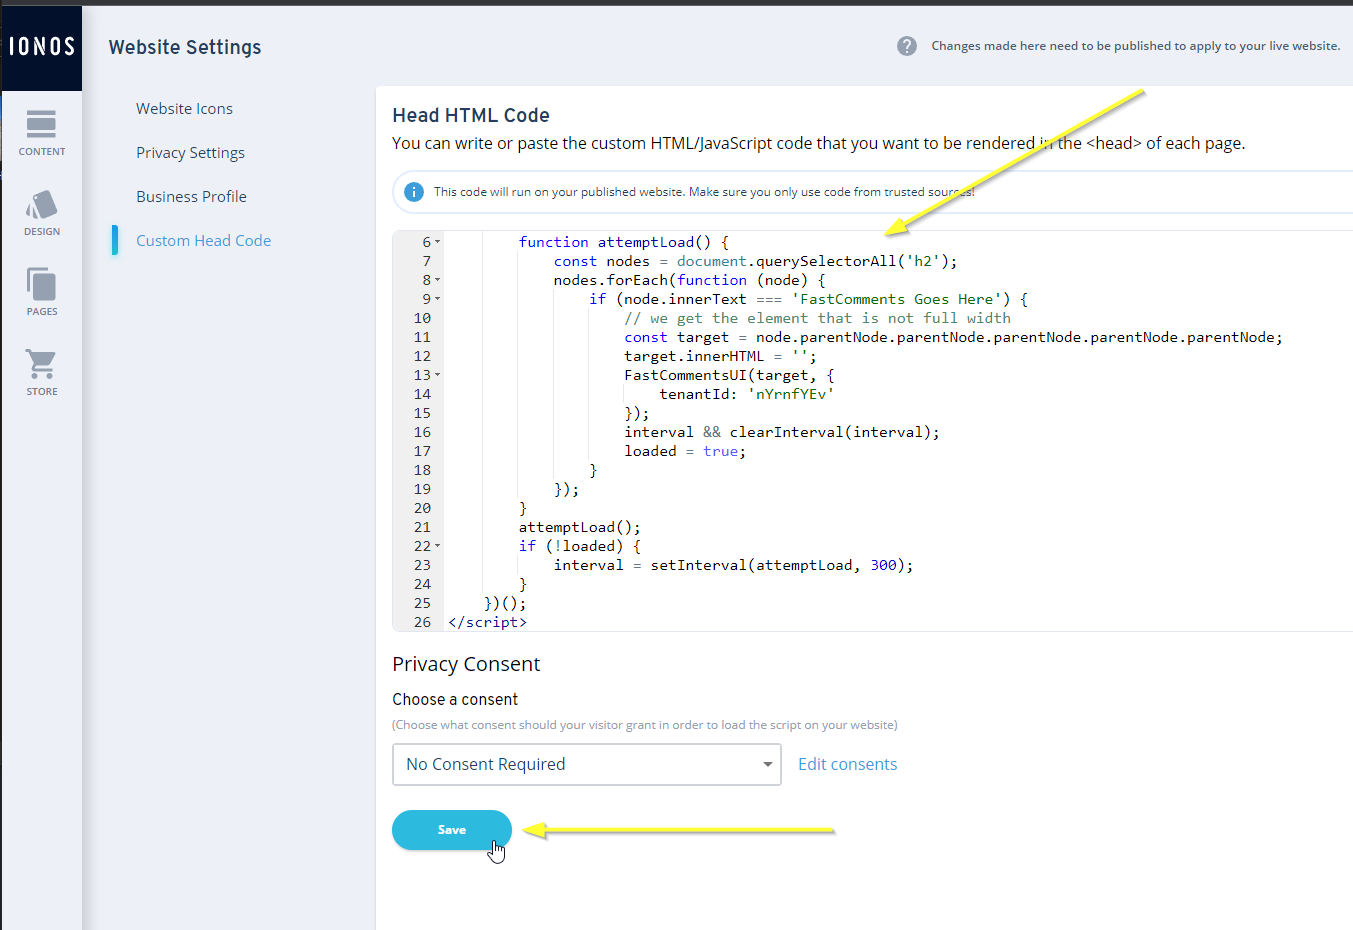
For Ionos we need a special version of the FastComments widget code. Code snippets from other tutorials will not work.
Now copy the following code:

...and paste it in as shown:
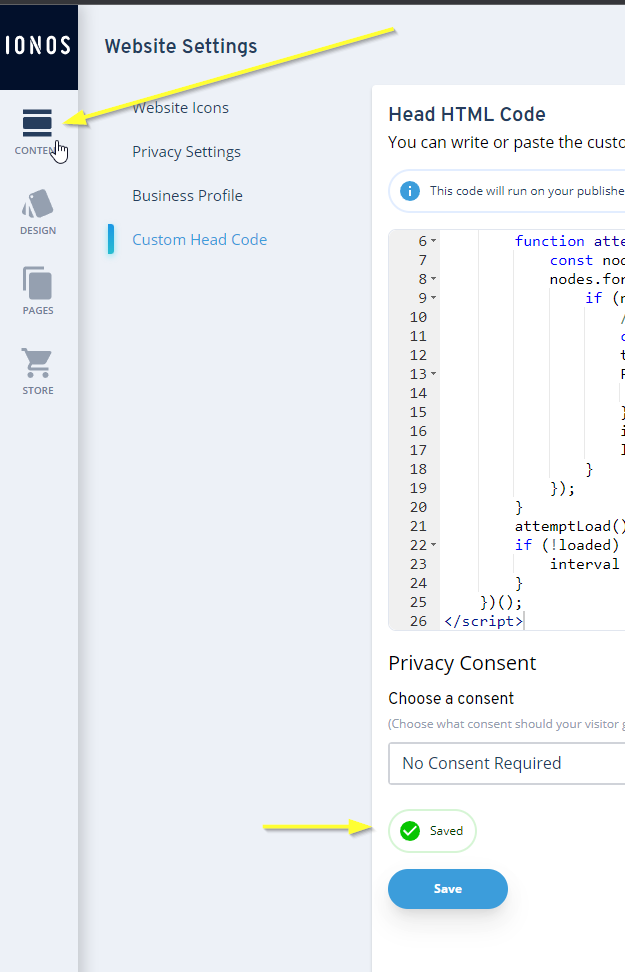
ステップ3:公開
これでサイトを公開すれば完了です。
左上の Content をクリックしてコンテンツエディタに戻ります:
それから公開できます!
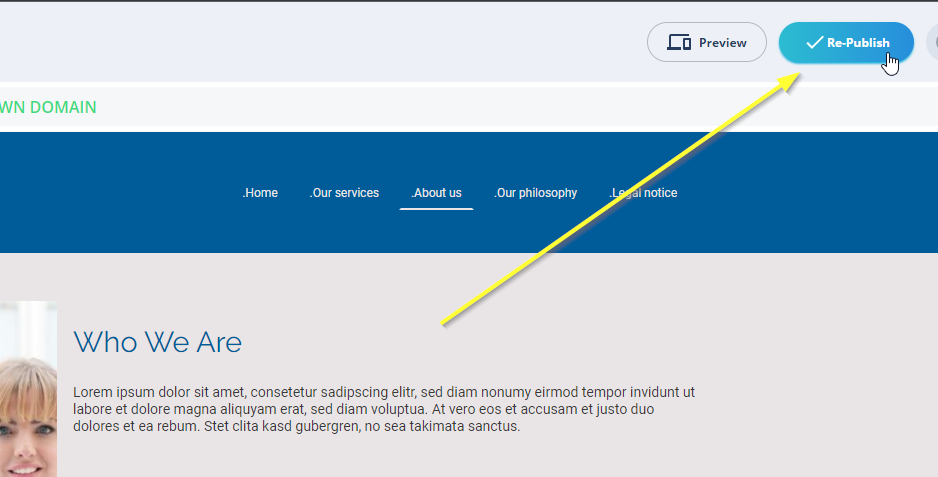
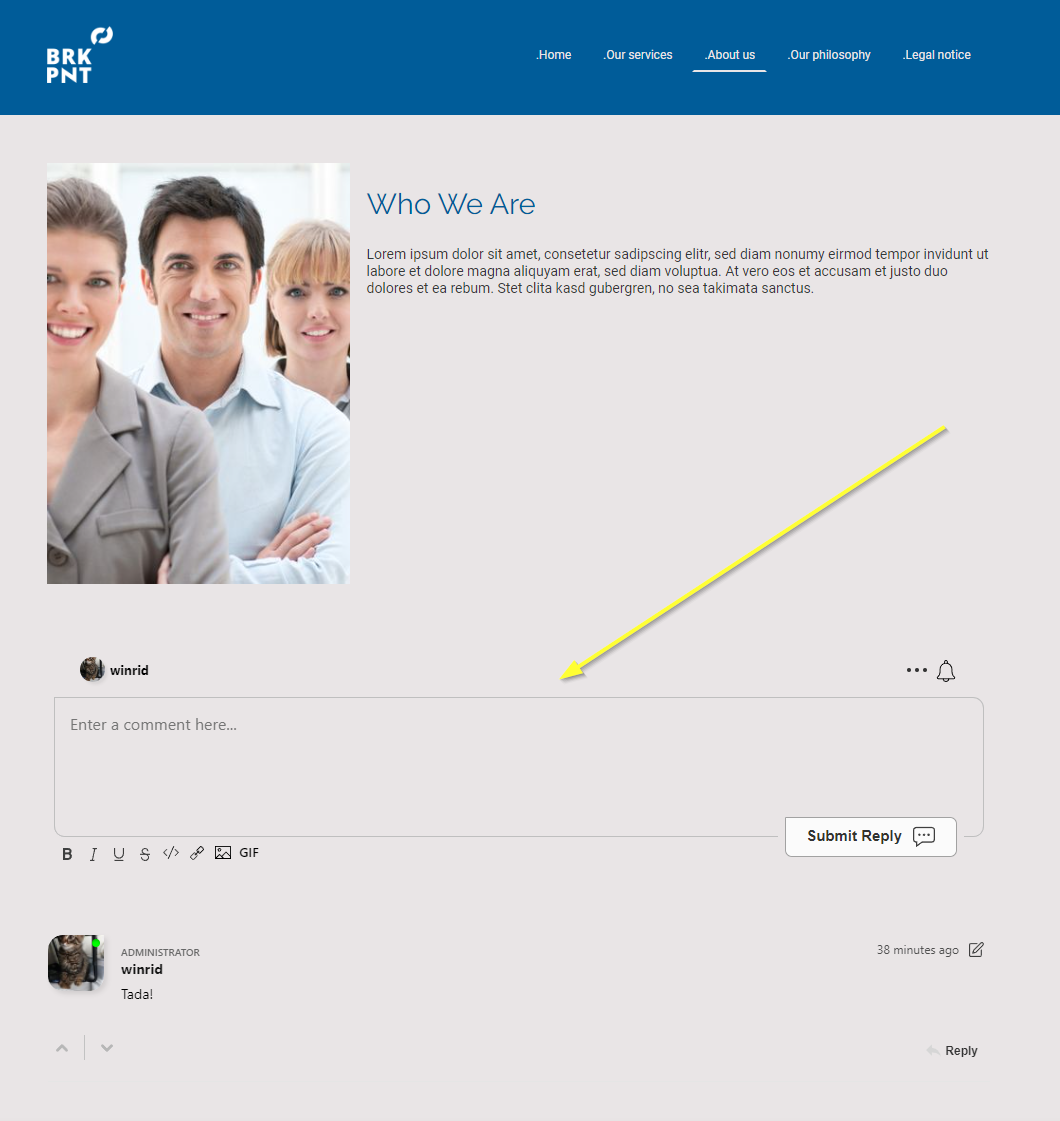
以上です!FastComments がサイトで稼働しているはずです。以下のように表示されます:
完了
よくできました!Ionos サイトにライブコメントを追加しました。
権限が拒否されるエラーが発生した場合、または FastComments をカスタマイズしたい場合は、続きをお読みください。
ドメインエラー
次のような認証エラーが発生することがあります:

これは FastComments がこのドメインでアカウントの使用を許可すべきことを認識していないためです。
この場合、修正は簡単です。あなたのサイトを FastComments.com のアカウントに追加するだけです。
これで Ionos サイトに高速でライブなコメント機能が追加されているはずです!
カスタマイズ
FastComments は、あなたのサイトに合わせてカスタマイズできるように設計されています。
カスタムスタイルを追加したり設定を調整したい場合は、カスタマイズと設定に関するドキュメント をご確認ください。方法がわかります。