
向 ThriveCart Learn+ 课程添加评论
使用 FastComments,我们可以轻松为任何 ThriveCart Learn+ Course 添加实时评论功能。
如果在设置过程中遇到任何问题,FastComments Support 也可以提供帮助。
请注意,本教程需要一个 FastComments 帐户。建议您先注册,然后再返回此处。您可以在此创建帐户。
第 1 步:准备课程 
由于 ThriveCart Learn+ 的设计,我们必须将 FastComments 代码添加到每个希望显示评论的课程页面。
我们可以在每个页面使用相同的代码片段,单独的评论线程将自动与各个页面关联。
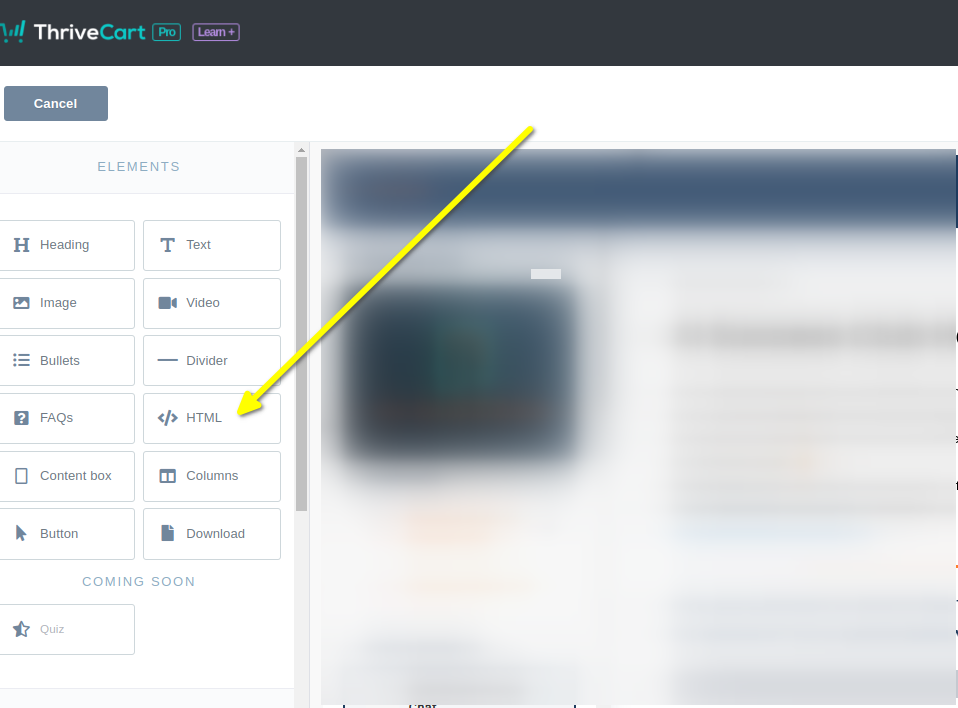
我们首先在编辑器中打开课程并添加一个 HTML 块。
在左侧您应该能看到 HTML 块选项。将其拖到要显示评论的页面位置。
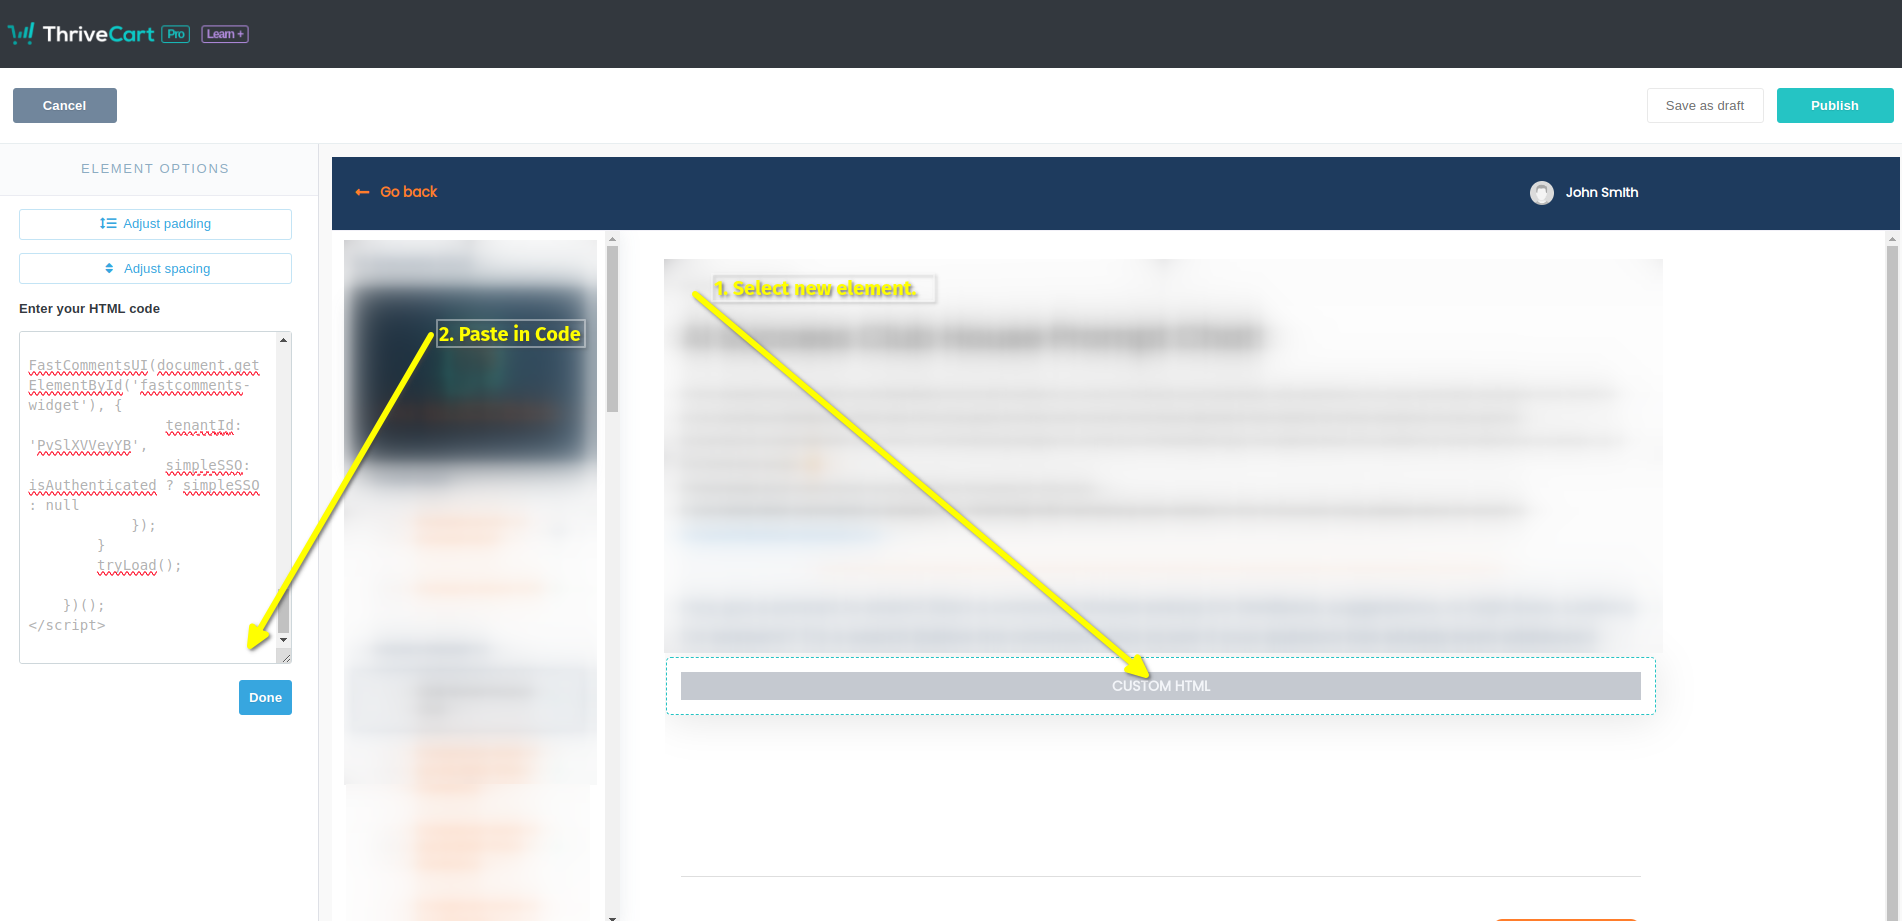
现在选择新的 HTML 元素。左侧会出现一个块,我们可以在其中粘贴代码。
现在您已准备好进行第 2 步。
第 2 步:添加自定义代码
For Step 2 we have to copy our code snippet. Check that line 50 does not say "demo" - you'll want to ensure this has your tenant id. It should be populated for you.
现在我们要复制 ThriveCart-Learn 专用的 FastComments 代码片段。
它相当大,因为与 ThriveCart 的集成有许多功能,所以只需点击代码片段右上角的复制按钮:

Now paste it into the code block on the left in the ThriveCart editor. It should look like this:
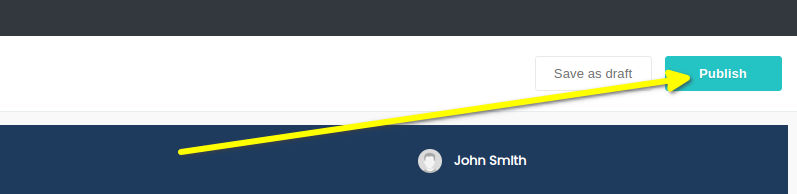
That's it! Now we just have to publish:
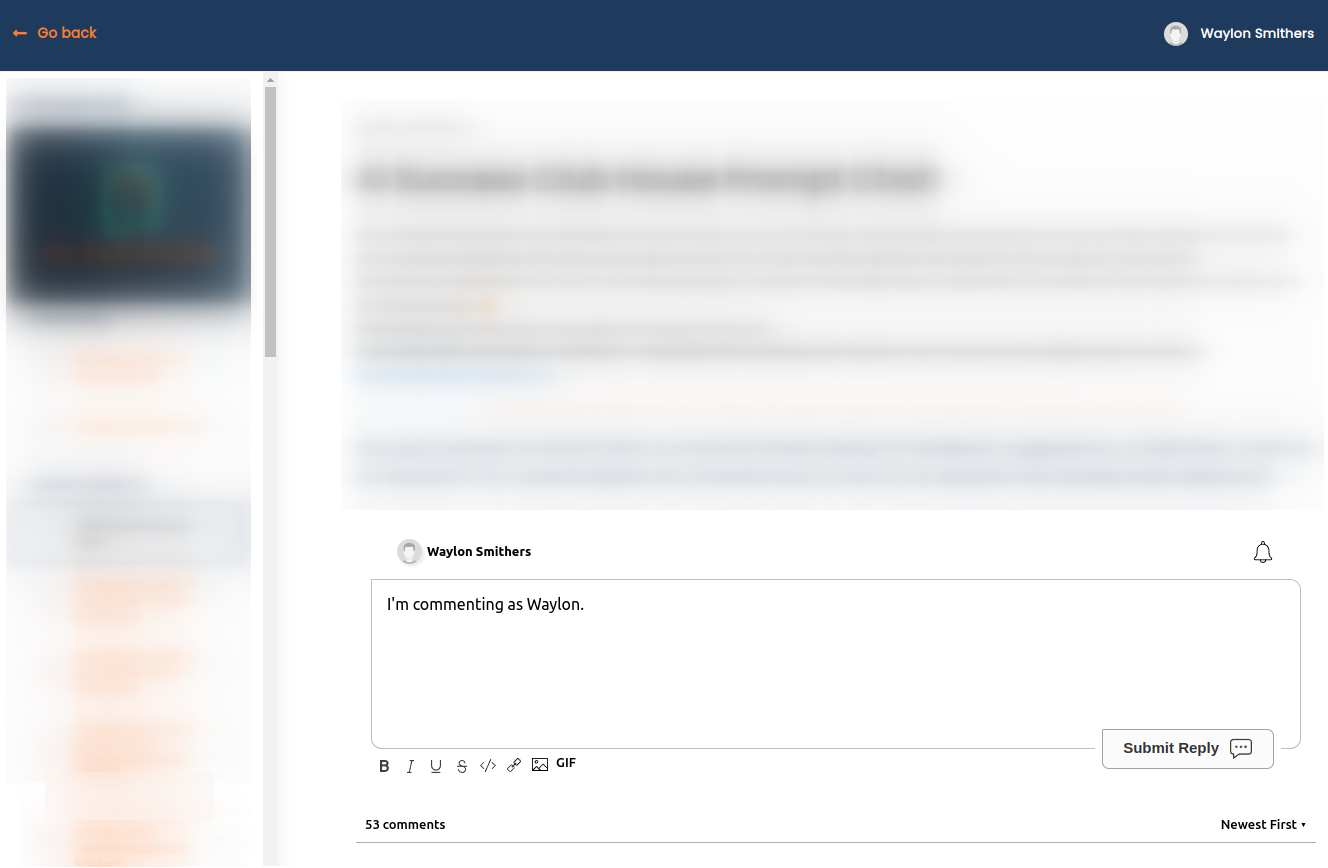
That's it! You should now see the comment box on your course when you preview, and real users will be able to leave comments without signing in or leaving their username/email a second time.
Testing Note!
If you have anonymous commenting disabled, which it is by default, you won't be able to leave comments in Preview mode as the John Smith user. You will get an authentication
error as the default John Smith user has no email. If you want to test, we suggest you use a coupon code and go through your site like an actual user.
成功
成功!您现在应能看到 FastComments 评论小部件。
恭喜您已在 ThriveCart 中设置 FastComments!如果您遇到 Domain Error,或者想了解如何自定义评论区域,请继续阅读!
域名错误
您可能会遇到如下授权错误:

通常发生在您使用自己的域名而不是默认的 "thrivecart.com" 域名时。
这是因为 FastComments 不知道应该允许您的帐户在该域名上使用。
在这种情况下,解决方法很简单。您只需将您的站点添加到您的 FastComments.com 帐户。