
在 ThriveCart Learn+ 課程新增評論
透過 FastComments,我們可以輕鬆為任何 ThriveCart Learn+ 課程新增即時留言功能。
如果您在設定上遇到任何問題,FastComments 支援也可以提供協助。
請注意,本教學需要一個 FastComments 帳戶。建議您先註冊帳戶,然後再回來此處。您可以在此建立帳戶。
步驟 1:準備課程 
由於 ThriveCart Learn+ 的設計,我們必須在每個想要顯示評論的課程頁面上加入 FastComments 代碼。
我們可以在每個頁面使用相同的程式碼片段,系統會自動將不同的留言串綁定到各自的頁面。
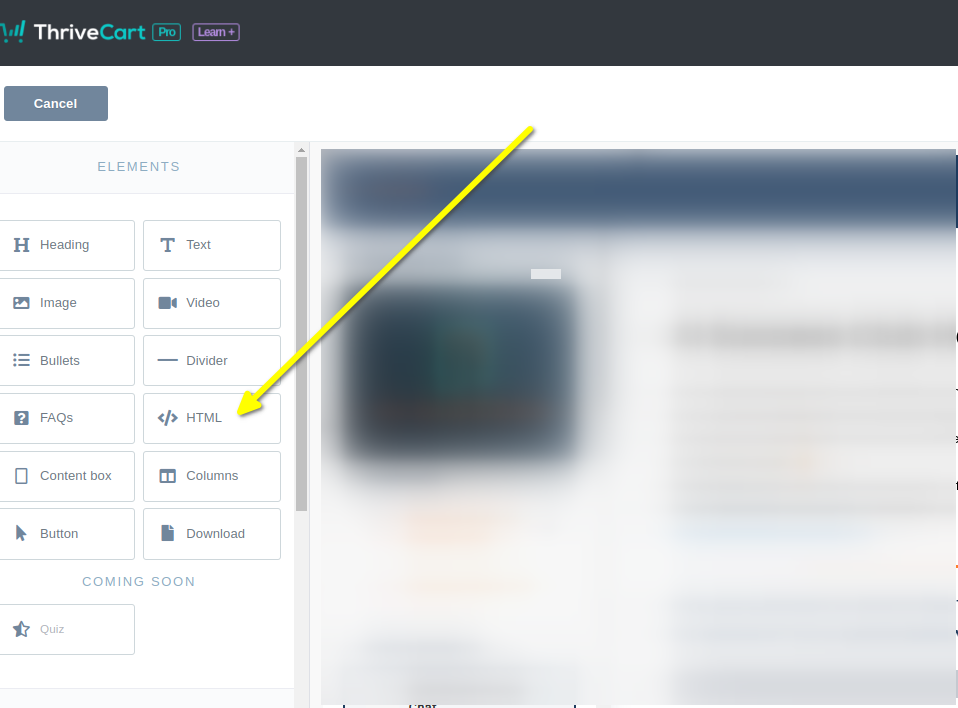
首先在編輯器中打開課程,並新增一個 HTML 區塊。
在左側會看到一個 HTML 區塊選項。將其拖放到你想顯示評論的頁面位置。
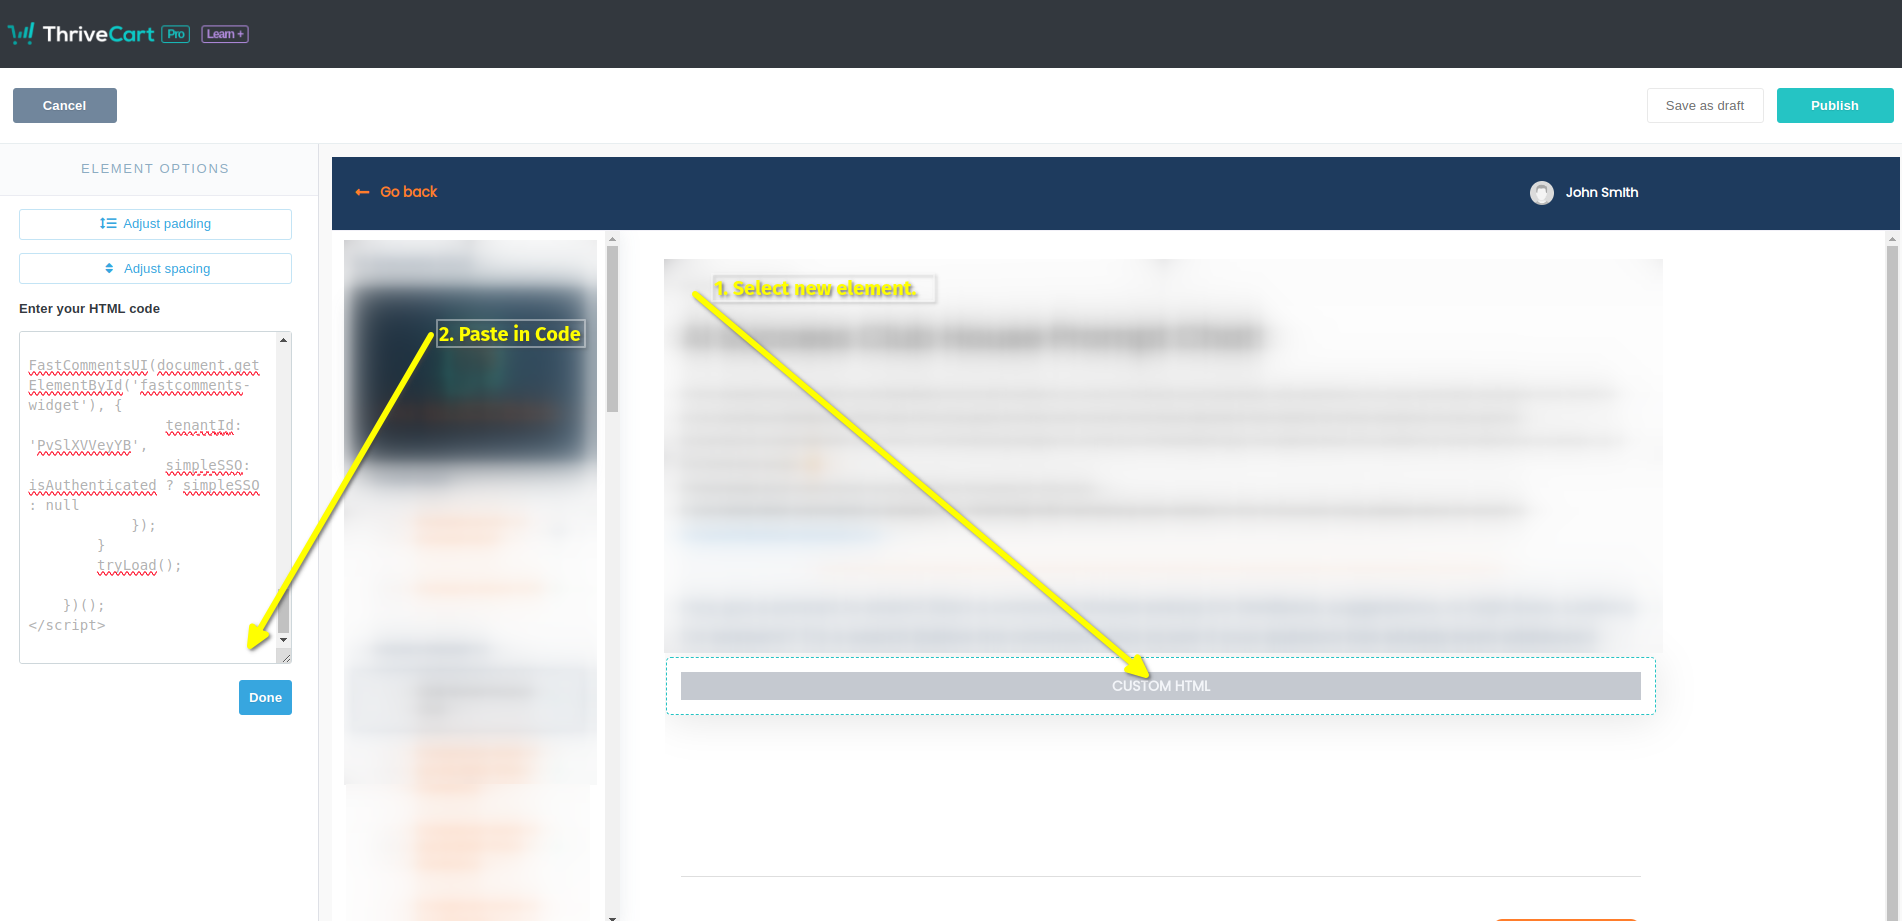
現在選取新的 HTML 元素。左側會出現一個區塊,我們可以在那裡貼上程式碼。
現在你已準備好進行步驟 2。
步驟 2:加入自訂程式碼
For Step 2 we have to copy our code snippet. Check that line 50 does not say "demo" - you'll want to ensure this has your tenant id. It should be populated for you.
現在讓我們複製專為 ThriveCart-Learn 設計的 FastComments 程式碼片段。
它相當龐大,因為與 ThriveCart 的整合有許多功能,所以只要點擊程式碼片段右上角的 Copy 按鈕:

Now paste it into the code block on the left in the ThriveCart editor. It should look like this:
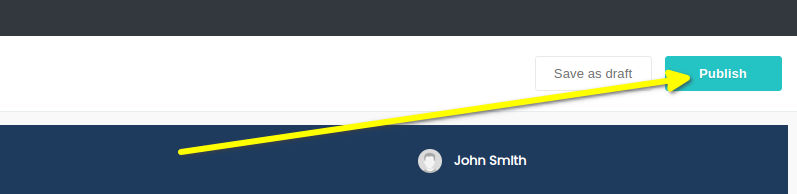
That's it! Now we just have to publish:
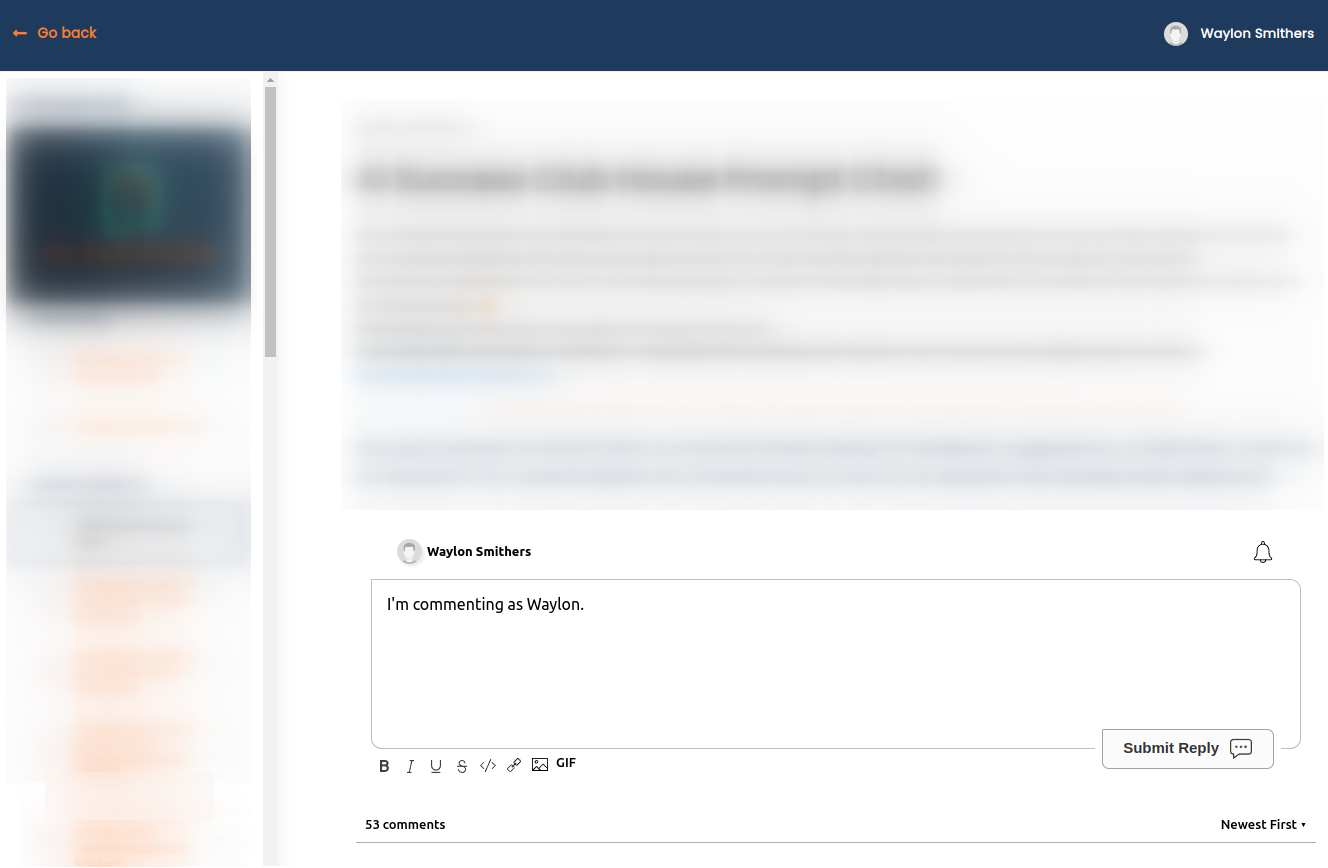
That's it! You should now see the comment box on your course when you preview, and real users will be able to leave comments without signing in or leaving their username/email a second time.
測試注意!
If you have anonymous commenting disabled, which it is by default, you won't be able to leave comments in Preview mode as the John Smith user. You will get an authentication
error as the default John Smith user has no email. If you want to test, we suggest you use a coupon code and go through your site like an actual user.
完成
Success! You should now see the FastComments Comment Widget.
恭喜您已在 ThriveCart 中設定 FastComments!如果您遇到網域錯誤,或想了解如何自訂評論區,請繼續閱讀!
網域錯誤
您可能會遇到像以下的授權錯誤:

通常這是因為您有自己的網域,而不是預設的 "thrivecart.com" 網域。
這是因為 FastComments 不知道它應該允許您的帳戶在此網域上使用。
在這種情況下,修正方法很簡單。您只需將您的網站新增到您的 FastComments.com 帳戶。