
Weebly サイトにコメントを追加する
FastComments を使えば、どの Weebly サイトにも簡単にライブコメント機能を追加できます。
以下の手順は Weebly 上に構築されたブログ向けです。他の種類のサイトについては、サポートスタッフが喜んでお手伝いしますので、お気軽にお問い合わせください。
このチュートリアルには FastComments のアカウントが必要です。先にサインアップしてからここに戻ってくることをお勧めします。こちらでアカウントを作成できます。
ステップ 1: ブログ設定を開く 
First, make sure you have some blog posts added to your site to see the results of this tutorial.
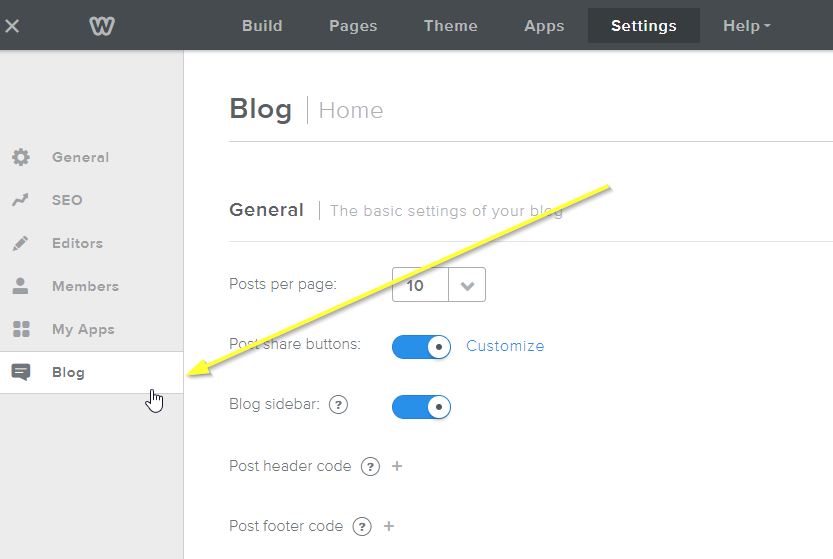
Once ready, we can go ahead and open the Weebly editor, and click Settings at the top.

Now let's open the settings for our blog by going to Blog on the left:
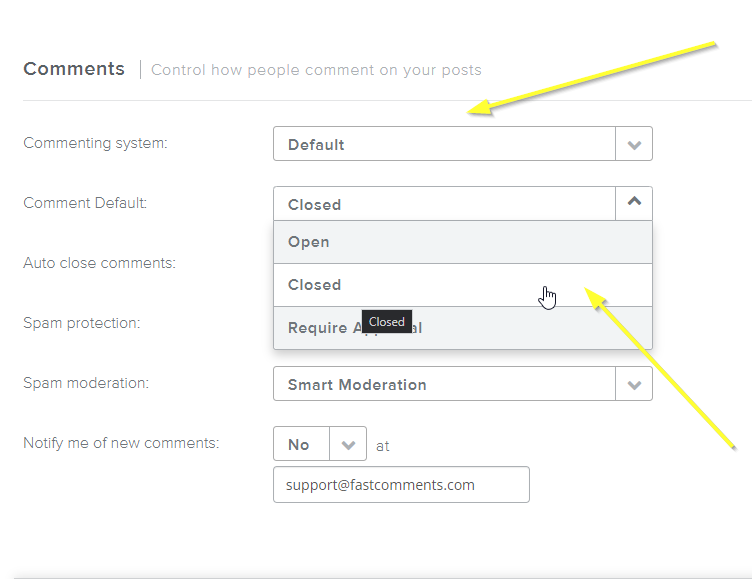
Now what we need to do is disable the default Weebly comment system, which we will replace.
Note if you'd like to migrate over existing comments from your Weebly site to FastComments, your support representative can assist with this migration.
Now let's set the Commenting system to Default and Comment Default to Closed:
Next we just have to add the FastComments.com widget code!
ステップ 2: FastComments.com のコードを追加する
WeeblyとFastCommentsの統合をうまく機能させるために、2つの小さなコードスニペットを追加する必要があります。
最初のスニペットは Weebly の「コメントは閉じられています」メッセージを非表示にするためのもので、2つ目は実際に FastComments を読み込むためのものです。
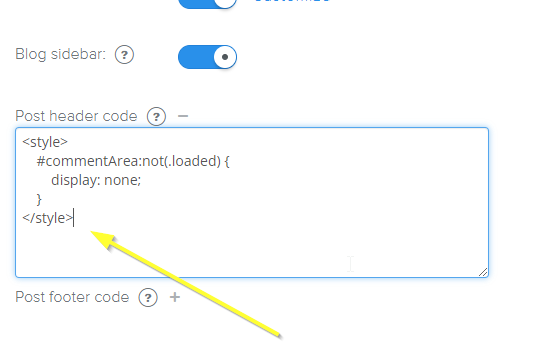
まず、この小さなコードスニペットをコピーしてください:

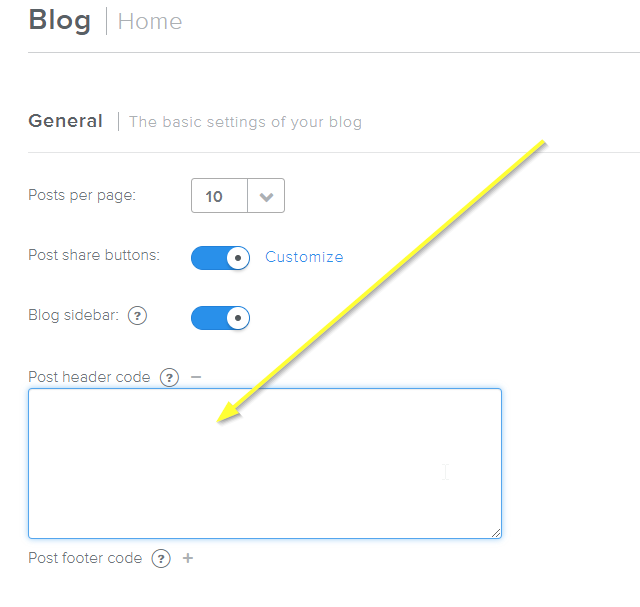
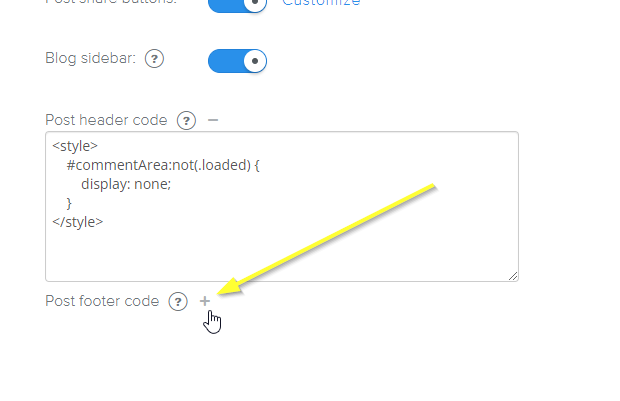
次に、Step Oneで使った同じ設定ページで、Post header codeの横にある+をクリックします。

次のようにテキストボックスが開きます:
次にコードスニペットを貼り付けます:
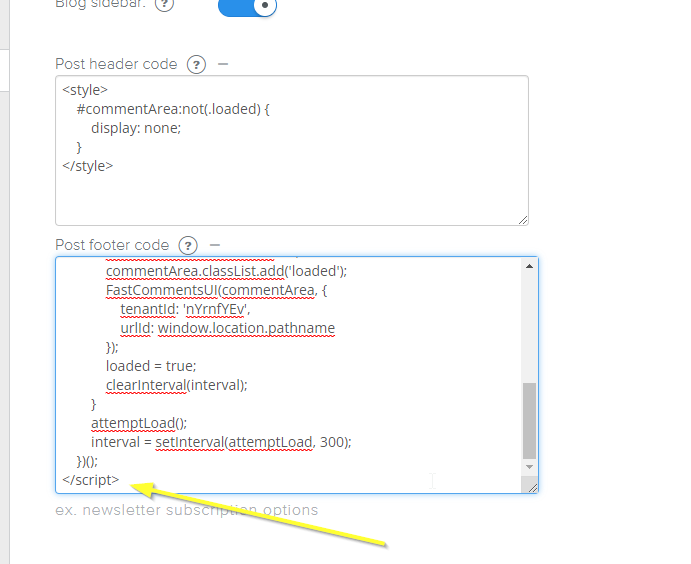
次は FastComments を有効にするフッターコードです。Post footer codeの横にあるプラス記号をクリックします:
Weebly 用に特別に設計されたこのコードスニペットをコピーしてください:
次にフッターコードを貼り付けます:
これで完了です!
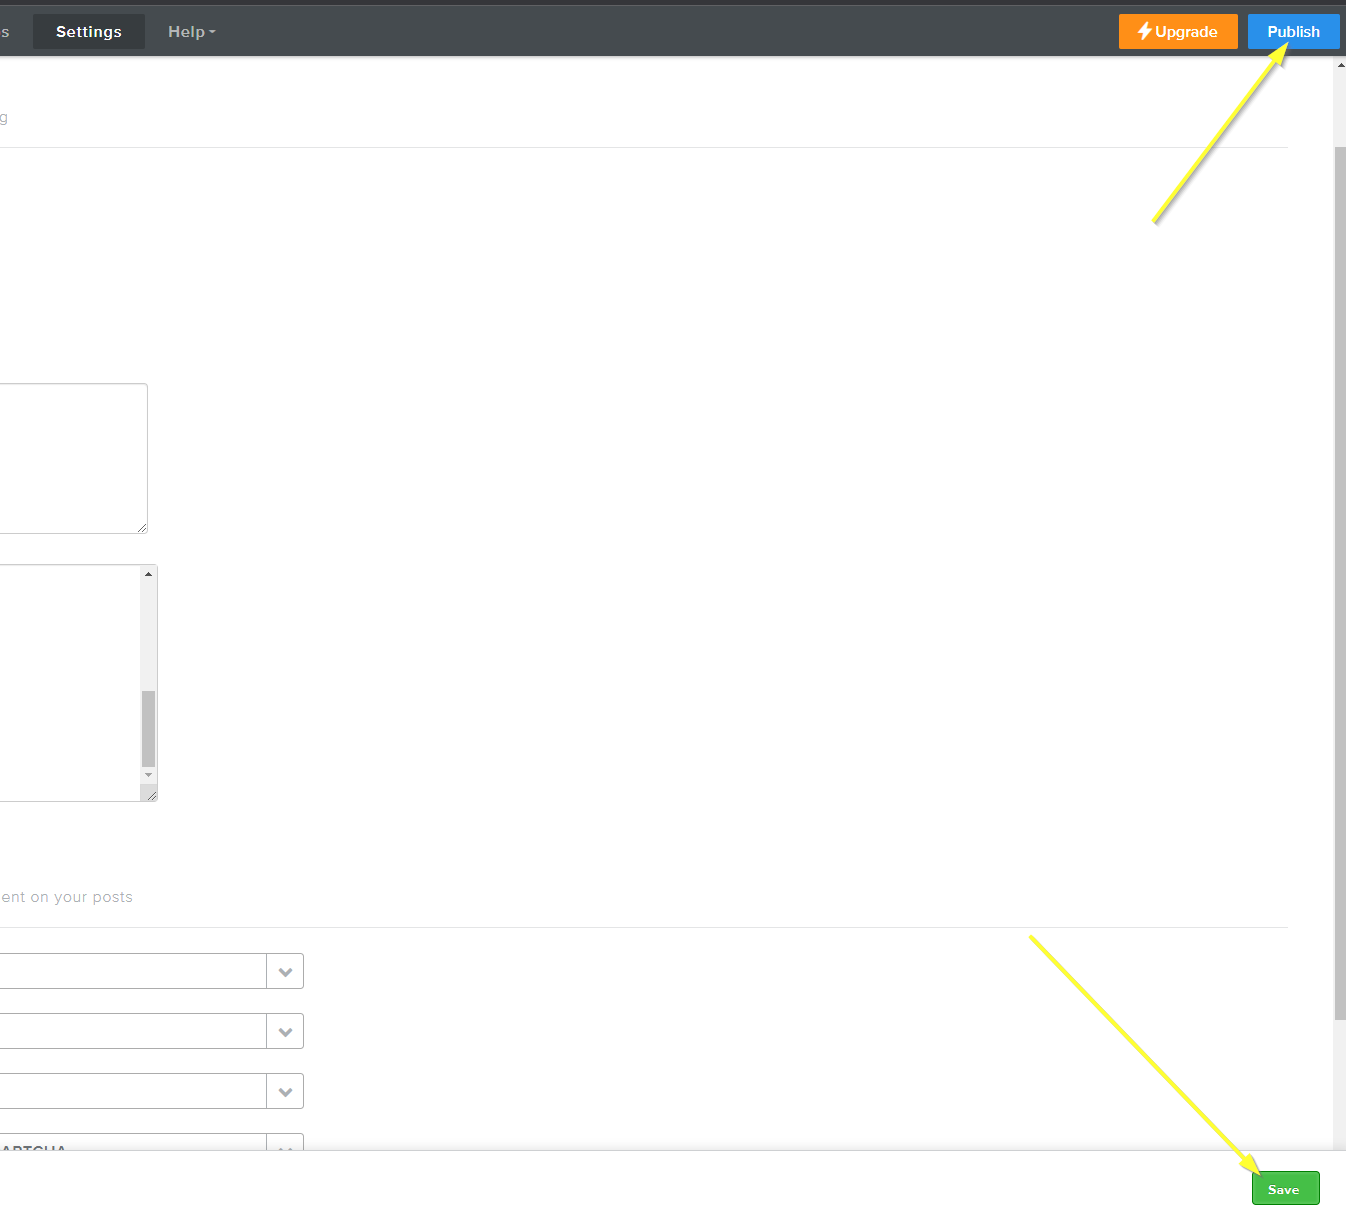
ステップ 3: 公開する!
今は変更を保存してサイトを公開するだけです!
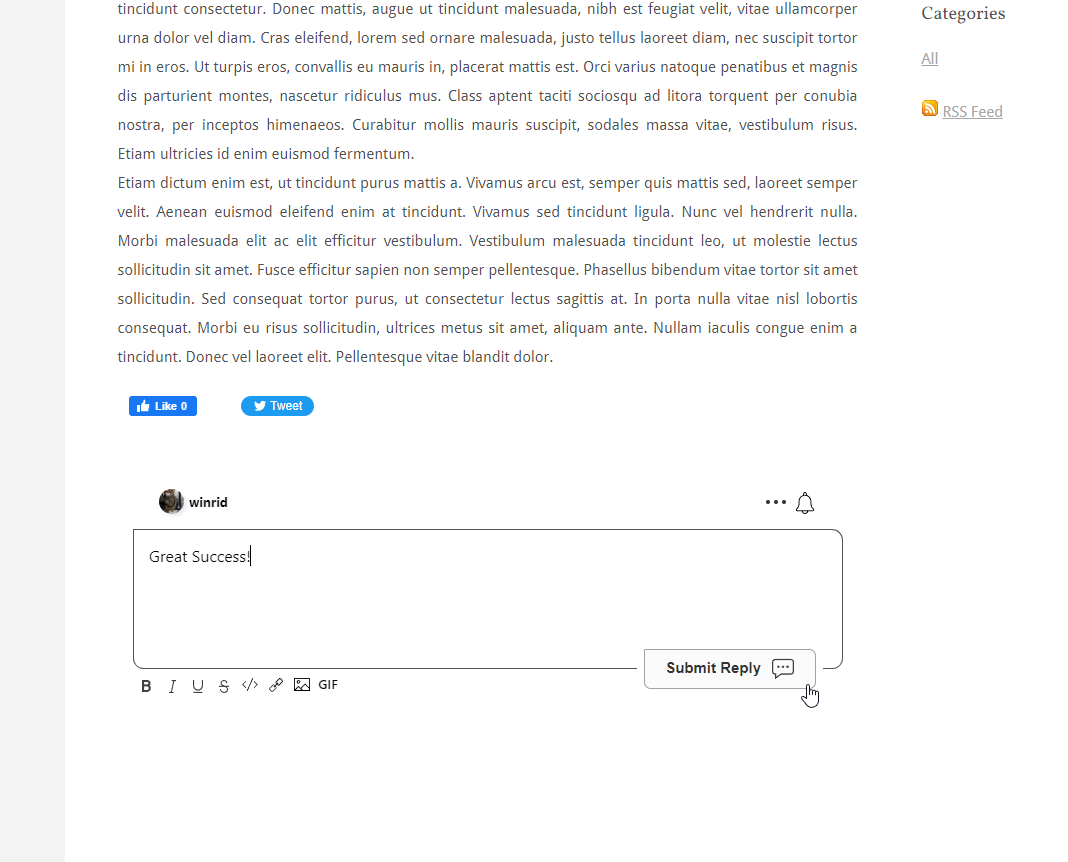
成功
成功しました!サイトを表示すると、FastCommentsのライブコメント機能が有効になっているはずです:
ドメインのエラー
次のような認可エラーが発生することがあります:

これは、FastComments がこのドメインでアカウントの使用を許可するように設定されていないためです。
この場合、対処は簡単です。サイトを FastComments.com のアカウントに追加するだけです。
カスタマイズ
FastComments はあなたのサイトに合わせてカスタマイズできるように設計されています。
カスタムスタイルを追加したり設定を調整したい場合は、方法を学ぶためにカスタマイズと構成に関するドキュメントをご覧ください。