FastComments.com

Framer 사이트에 라이브 댓글 추가


FastComments를 사용하면 Framer로 제작된 모든 사이트에 실시간 댓글 기능을 쉽게 추가할 수 있습니다.

이 튜토리얼에서는 Live Commenting 위젯 설치만 다룹니다. 다른 위젯 설치 또는 SSO 설정에 도움이 필요하시면, 언제든지 지원 티켓을 생성해 주세요.


1단계: 에디터 열기 Internal Link


먼저 사이트의 에디터를 엽니다.

이 예에서는 FastComments를 블로그 페이지에 추가할 것이지만, 어떤 유형의 페이지에서도 작동합니다.
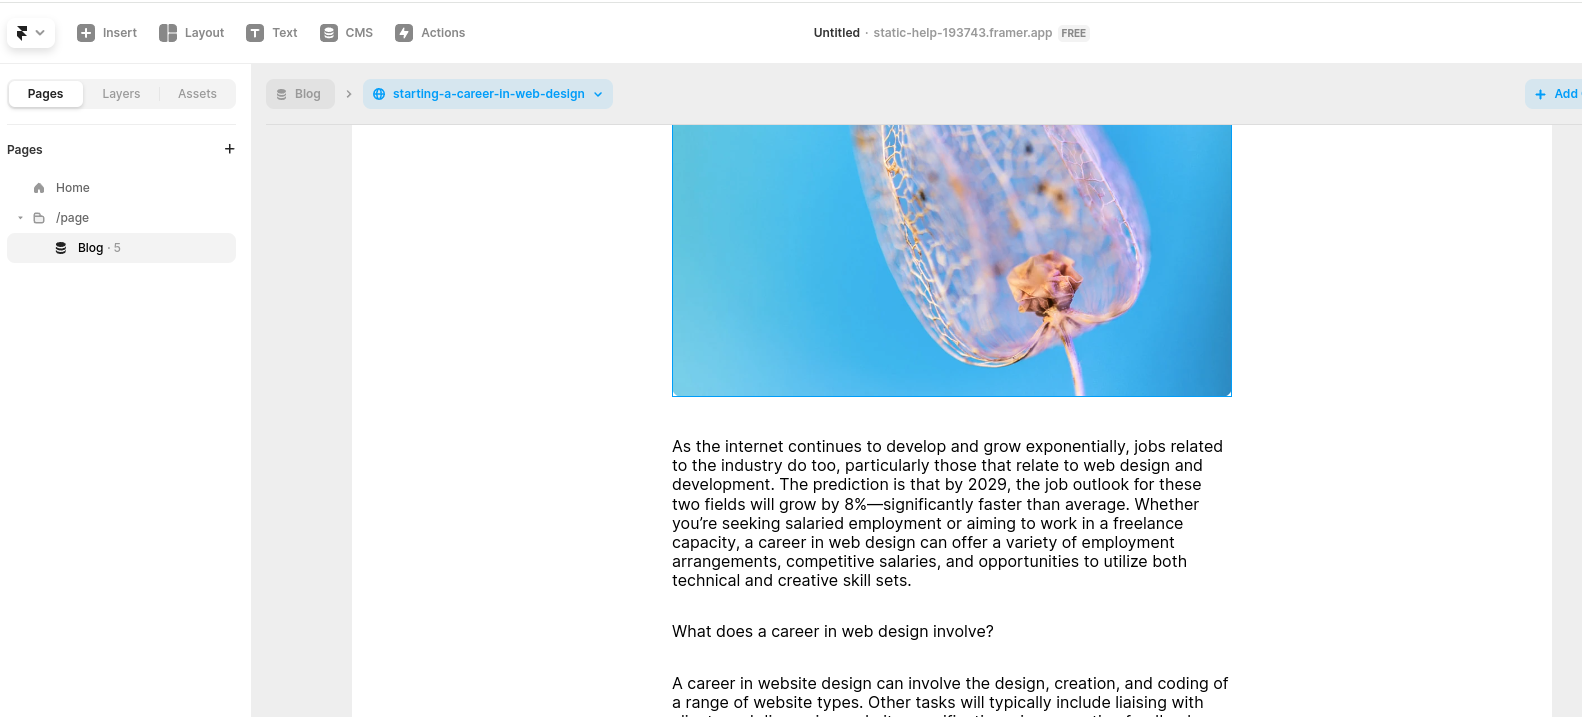
에디터 열기
에디터 열기

2단계: 임베드 블록 추가 Internal Link

이제 Embed 블록을 추가해 보겠습니다.

왼쪽 상단에서 Insert로 이동하세요:
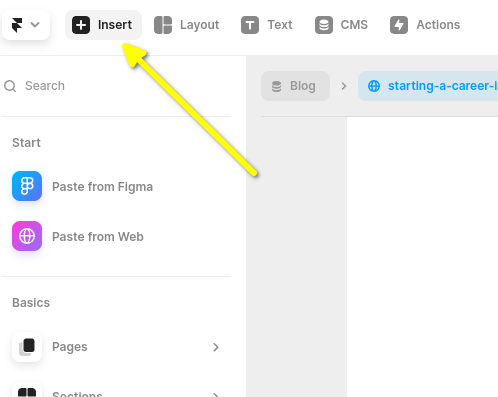
Insert 클릭
Insert 클릭

그런 다음 왼쪽 사이드바를 아래로 스크롤하고 Utility 위에 마우스를 올리세요.

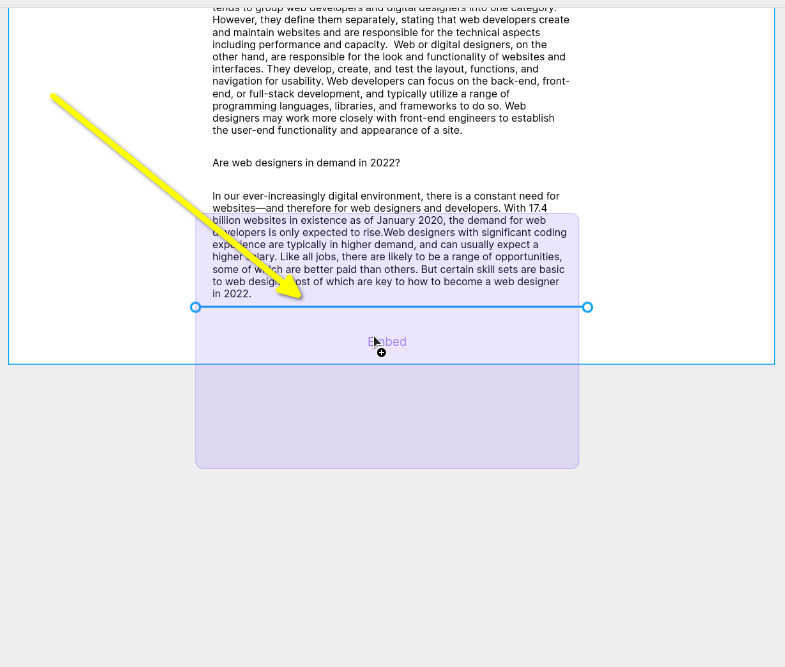
다음으로 블로그 끝 부분에 Embed 블록을 클릭하고 드래그하세요.

중요한 것은 보여진 것처럼 클릭하고 드래그하는 것이며, 그냥 클릭만 하면 안 됩니다. 그냥 클릭하면 Framer가 블로그 밖에 삽입하여 나중에 다시 끌어다 놓아야 합니다.
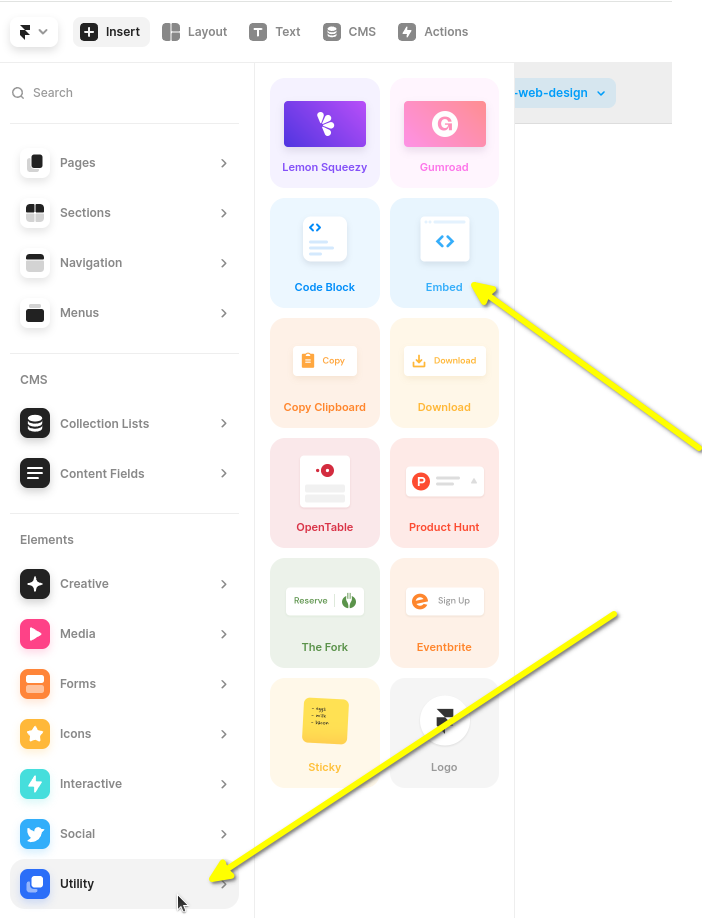
Embed 위젯 찾기
Embed 위젯 찾기
Embed 위젯 끌어다 놓기
Embed 위젯 끌어다 놓기

이제 빈 Embed 위젯이 생기고, 선택하면 오른쪽에 사이드바가 표시됩니다. 사이드바를 확장하면 다음과 유사한 화면을 볼 수 있습니다:
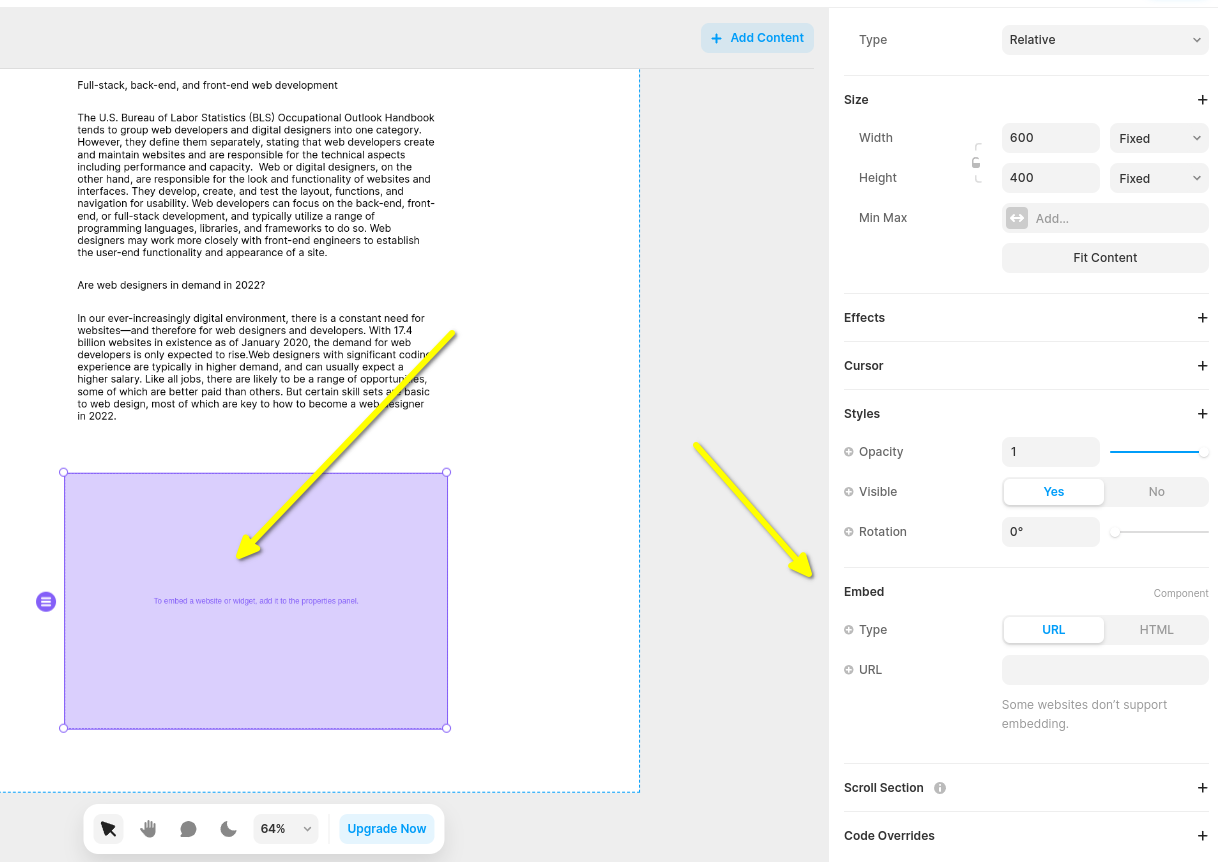
Embed 설정 열기
Embed 설정 열기

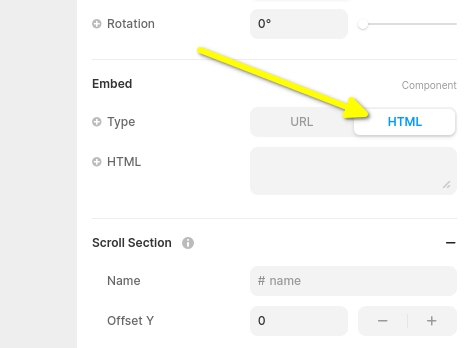
이제 Embed 위젯 유형을 HTML로 변경하겠습니다:

HTML 위젯으로 설정
HTML 위젯으로 설정

이제 다음 단계의 FastComments Framer 코드 스니펫을 적용할 준비가 되었습니다.


3단계: Framer 전용 FastComments 코드 복사하여 붙여넣기 Internal Link

아래는 Framer용 Live Comments FastComments 스니펫입니다.

FastComments Framer 전용 댓글 스니펫
Copy Copy
1
2<script src="https://cdn.fastcomments.com/js/embed-v2.min.js"></script>
3<div id="fastcomments-widget" style="width: 100%;height: 100%;"></div>
4<script>
5 (function fcLoad() {
6 function tryLoad() {
7 // 일부 제공업체는 코드 스니펫을 비동기(async)로 변경합니다
8 const container = document.getElementById('fastcomments-widget');
9 if (!container) {
10 return waitRetry();
11 }
12 if (!window.FastCommentsUI) {
13 return waitRetry();
14 }
15 if (container.fastCommentsSetup) {
16 return;
17 }
18 window.FastCommentsUI(container, {
19 tenantId: 'demo',
20 pageTitle: top.document.title,
21 url: top.location.href,
22 urlId: top.location.pathname
23 });
24 container.fastCommentsSetup = true;
25 }
26 function waitRetry() {
27 setTimeout(tryLoad, 500);
28 }
29 tryLoad();
30 })();
31</script>
32

또는, 대안으로 스트리밍 채팅 위젯을 사용할 수 있습니다. Framer용 Streaming Chat FastComments 스니펫은 다음과 같습니다:

FastComments Framer 전용 스트리밍 채팅 스니펫
Copy Copy
1
2<script src="https://cdn.fastcomments.com/js/embed-live-chat.min.js"></script>
3<div id="fastcomments-live-chat-widget" style="width: 100%;height: 100%;"></div>
4<script>
5 (function fcLoad() {
6
7 function tryLoad() {
8 // 일부 제공업체는 코드 스니펫을 비동기(async)로 변경합니다
9 const container = document.getElementById('fastcomments-live-chat-widget');
10 if (!container) {
11 return waitRetry();
12 }
13 if (!window.FastCommentsLiveChat) {
14 return waitRetry();
15 }
16 if (container.fastCommentsSetup) {
17 return;
18 }
19 window.FastCommentsLiveChat(container, {
20 tenantId: 'demo',
21 pageTitle: top.document.title,
22 url: top.location.href,
23 urlId: top.location.pathname
24 });
25 container.fastCommentsSetup = true;
26 }
27 function waitRetry() {
28 setTimeout(tryLoad, 500);
29 }
30 tryLoad();
31 })();
32</script>
33

FastComments는 Framer 에디터를 지원하므로 코드를 붙여넣으면 다음과 같은 화면을 볼 수 있습니다( Publish를 클릭해야 할 수 있습니다):
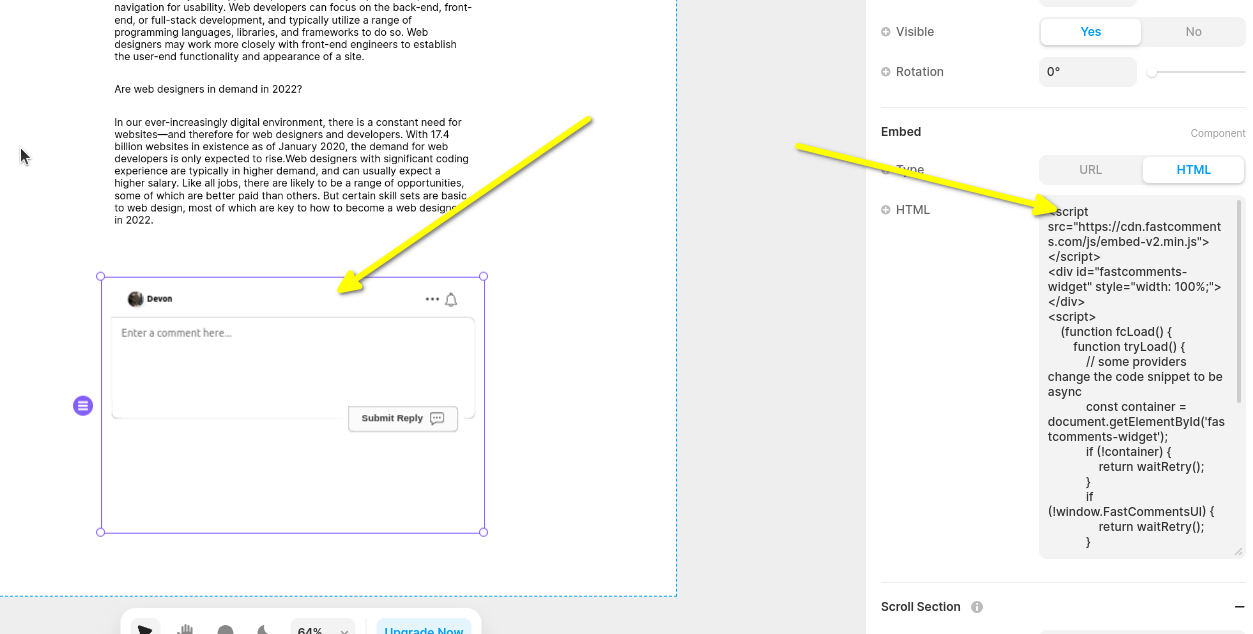
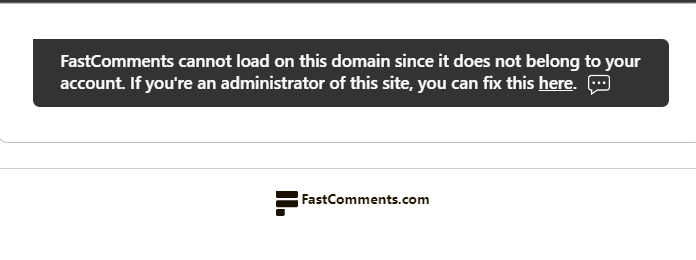
댓글 위젯 미리보기
댓글 위젯 미리보기

이제 사이트를 열면 댓글 영역이 표시됩니다! 원하는 경우 Framer의 사이드바에서 위젯을 전체 너비로 설정할 수도 있습니다.

참고로 Framer는 위젯의 높이를 제한하고 자동 크기 조정을 지원하지 않으므로 여기서는 고정 높이인 Live Chat 위젯을 선택했습니다.

4단계: 위젯 및 페이지 높이 조정 Internal Link

두 가지 작업으로 위젯의 위치를 개선할 수 있습니다.

First, on the left pane, set the widget's height to fill and 1fr:
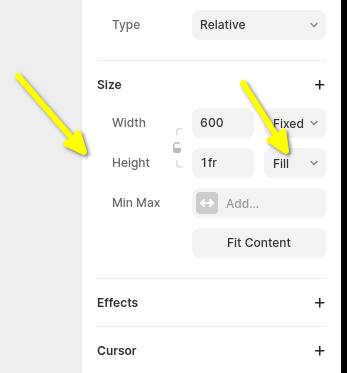
댓글 위젯 높이
댓글 위젯 높이

Next we need to fix the default Framer page config. By default it sets the page height to a fixed size, which can cut off comment threads. So let's set this to fill, too.
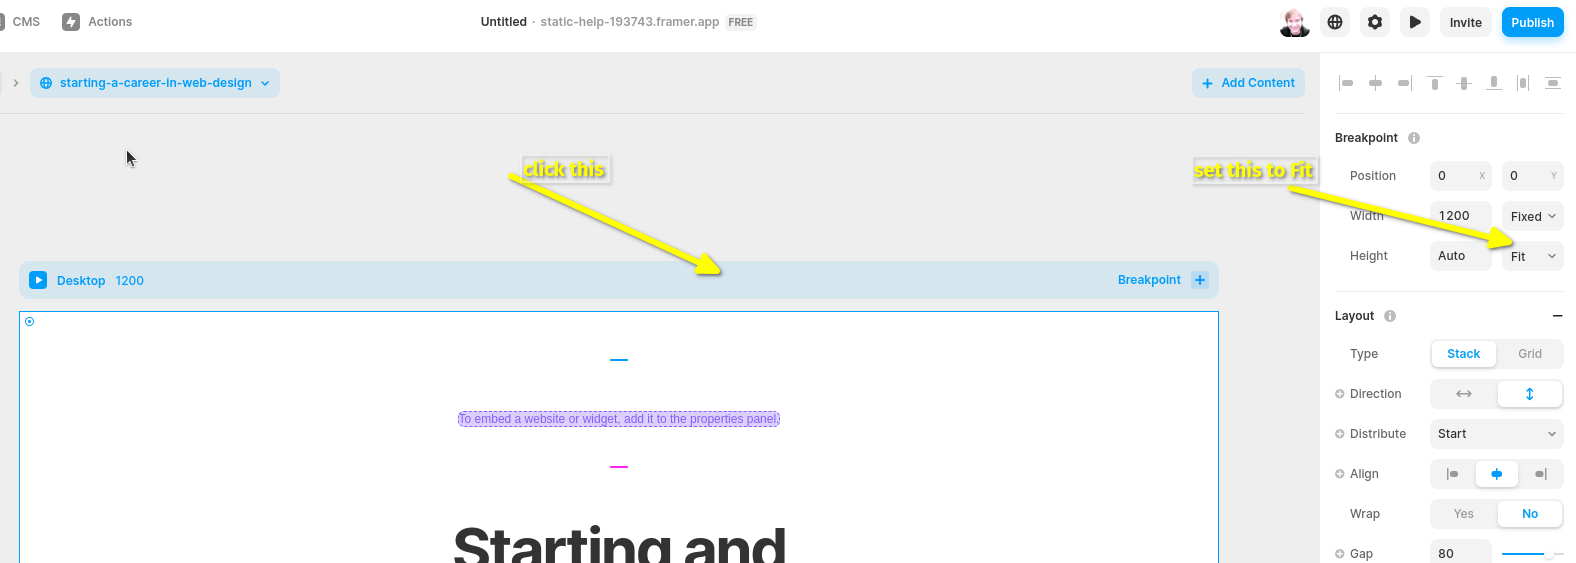
페이지 높이 설정
페이지 높이 설정

원하는 대로 되도록 페이지 높이를 조정해야 할 수도 있습니다.

맞춤 설정 Internal Link


FastComments는 귀하의 사이트에 맞게 맞춤화되도록 설계되었습니다.

맞춤 스타일을 추가하거나 구성을 조정하려면 맞춤화 문서 확인하기에서 방법을 확인하세요.