
在 Framer 网站上添加实时评论
使用 FastComments,我们可以轻松地向任何使用 Framer 构建的网站添加实时评论。
在本教程中,我们仅介绍如何安装实时评论小部件。如果您在安装其他小部件或设置 SSO 时需要帮助,请随时 提交支持工单。
步骤 1:打开编辑器 
首先,打开你网站的编辑器。
在我们的示例中,我们将在 Blog 页面添加 FastComments,但任何类型的页面都应同样适用。
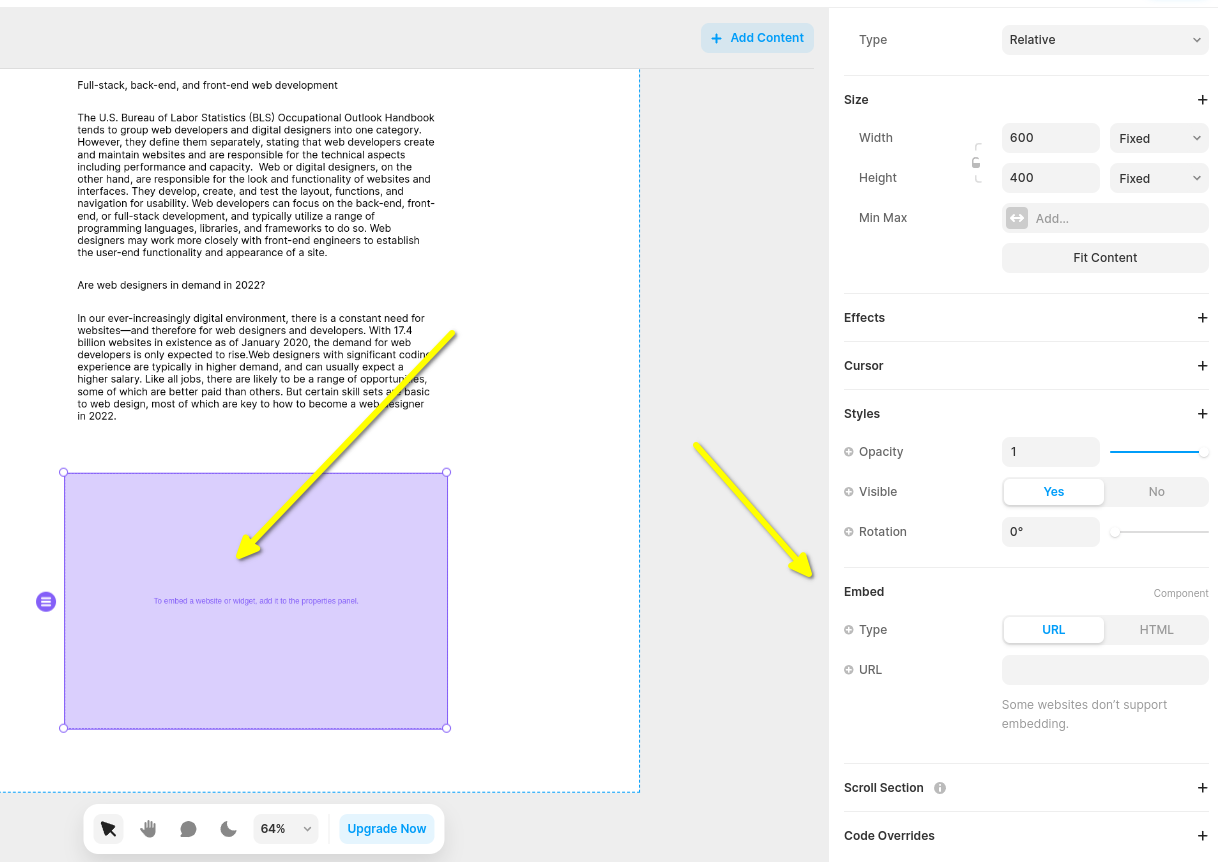
步骤 2:添加嵌入块
现在,让我们添加一个 Embed 小部件。
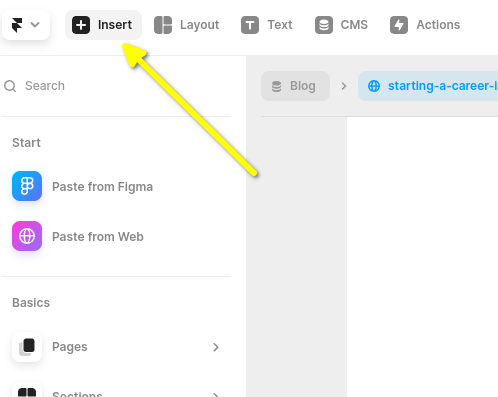
转到左上角的 Insert:
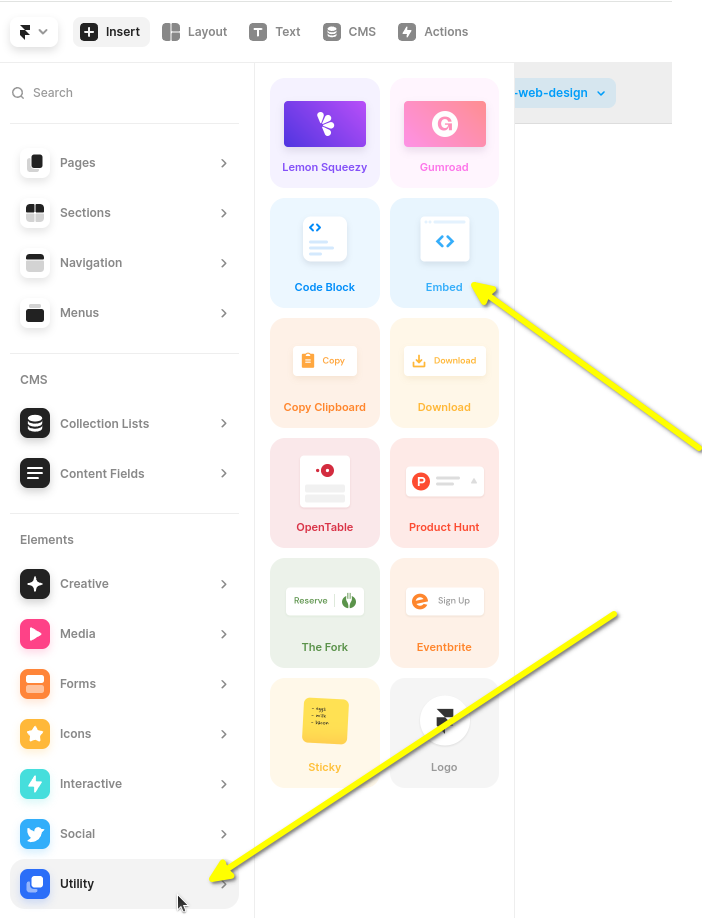
然后向下滚动左侧边栏并将鼠标移到 Utility 上。
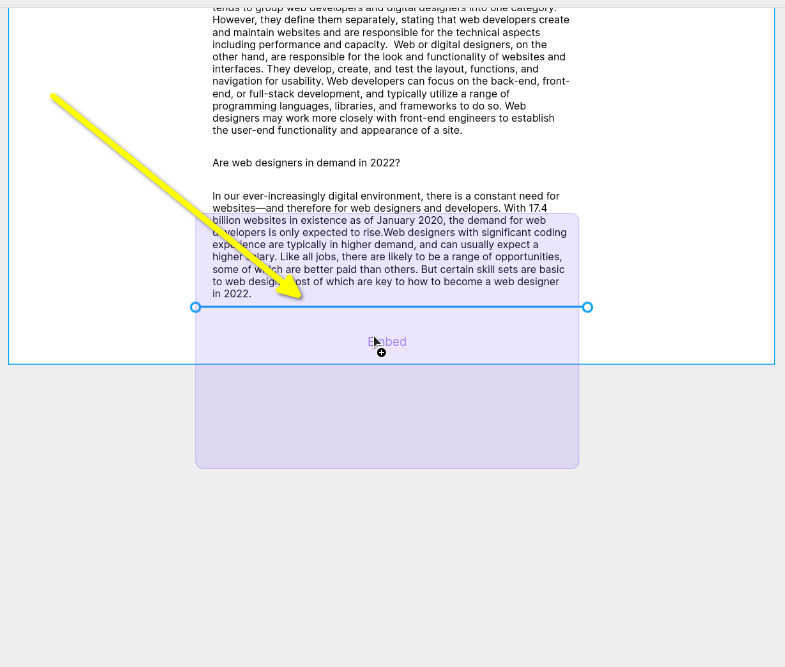
接下来你需要点击并拖动 Embed 小部件到博客的末尾。
重要的是你要像示例那样点击并拖动,而不是只点击它。如果你只是点击,Framer 会将其插入到博客之外,之后你就得再去拖动它。
现在你会有一个空的 Embed 小部件,选中它时右侧会出现一个侧边栏。你可以展开侧边栏,会看到类似如下内容:
现在让我们将 Embed 小部件类型更改为 HTML:
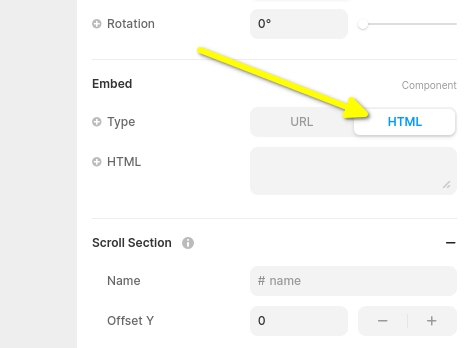
现在你已为下一步的 FastComments Framer 代码片段做好准备。
步骤 3:复制并粘贴适用于 Framer 的 FastComments 代码
Framer 实时评论 (Live Comments) 的 FastComments 代码片段如下。

或者,你也可以使用流式聊天(Streaming Chat)小部件。Framer 流式聊天的 FastComments 代码片段如下:
FastComments 支持 Framer 编辑器,因此在粘贴代码后你应该看到类似的效果(你可能需要点击 Publish):
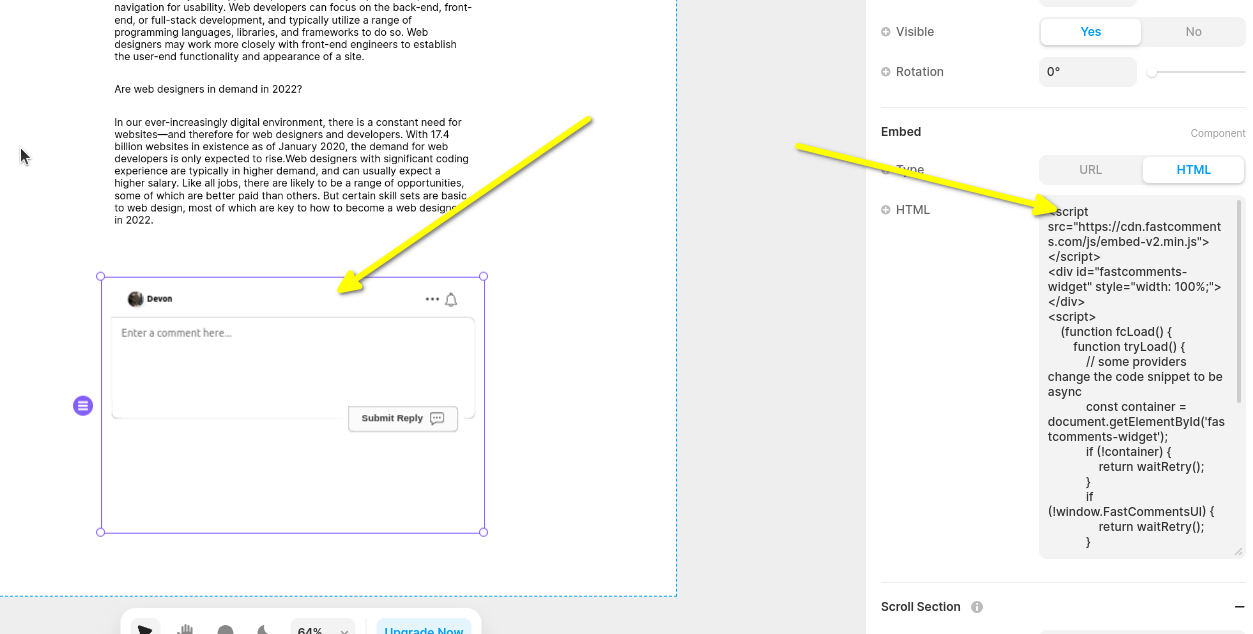
现在当你查看你的网站时应该能看到评论区域!在 Framer 的侧边栏中,你也可以根据需要将小部件设置为全宽。
请注意,Framer 限制小部件的高度并且不支持自动调整大小,因此我们在此选择了固定高度的 Live Chat widget。
步骤 4:调整小部件和页面高度
我们可以通过两件事来改进该小部件的位置。
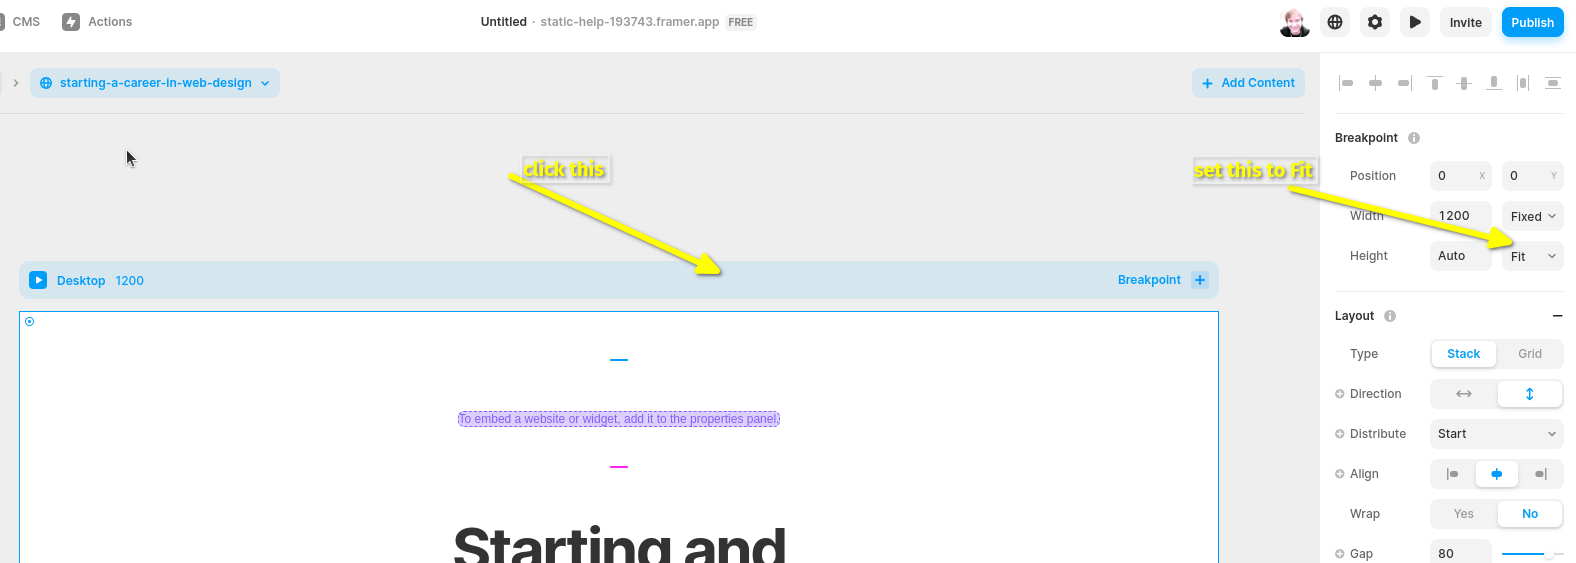
首先,在左侧面板上,将小部件的高度设置为 fill 和 1fr:
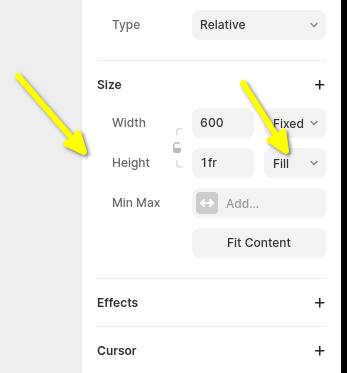
接下来我们需要修复默认的 Framer 页面配置。默认情况下,它会将页面高度设置为固定大小,这可能会截断评论线程。因此也将其设置为 fill。
您可能需要调整页面高度以达到所需效果。
域名错误
您可能会遇到类似以下的授权错误:

这是因为 FastComments 不知道应该允许在此域上使用您的帐户。
在这种情况下,解决方法很简单。您只需将您的站点添加到您的 FastComments.com 帐户。