
Добавление комментариев в LMS через LTI 1.3
FastComments интегрируется с любым LMS, совместимым с LTI 1.3 - D2L Brightspace, Moodle, Blackboard Learn, Sakai, Schoology и другими - через стандарт IMS LTI Dynamic Registration. Один URL-адрес, вставленный в экран регистрации вашего LMS, настраивает всю интеграцию: SSO, контекст курса, отображение ролей и размещение контента. Плагин на ваш сервер устанавливать не нужно. (Для Canvas LMS есть отдельное руководство, поскольку его процесс регистрации отличается.)
После регистрации FastComments появляется как Learning Tool внутри ваших курсов. Студенты видят комментарии в ветках и совместный чат рядом с содержимым курса, и они автоматически входят в систему, используя свою учетную запись LMS.
Цены 
Интеграция FastComments LTI 1.3 включена в планы Flex и Pro без дополнительной оплаты. Она работает с любой LMS, которая поддерживает спецификацию IMS LTI 1.3 Advantage, включая Dynamic Registration.
Быстрый старт
- Войдите в FastComments и перейдите на вашу страницу конфигурации LTI 1.3.
- (Необязательно) Выберите платформу, с которой вы подключаетесь, в выпадающем списке Платформа — это задаёт отображаемую метку, но Автоопределение работает нормально.
- Нажмите Сгенерировать URL. Появится одноразовый Регистрационный URL (действителен 30 минут, одноразовый).
- В вашей LMS откройте экран динамической регистрации LTI 1.3 и вставьте URL в поле Конечная точка регистрации инициации инструмента (или эквивалентное). Отправьте.
- Ваша LMS обращается к FastComments, обменивается ключами и создаёт интеграцию. Всплывающее окно закрывается автоматически после завершения.
- Вернувшись в FastComments, новая конфигурация появится в таблице Существующие конфигурации. Инструмент теперь доступен в курсах вашей LMS.
Поддерживаемые платформы
FastComments LTI 1.3 был протестирован на:
- D2L Brightspace (любая версия с LTI Advantage)
- Moodle 4.0+ (External Tool plugin, LTI Advantage)
- Blackboard Learn (SaaS and Ultra)
- Sakai (версии с поддержкой LTI Advantage)
- Schoology (Enterprise, Dynamic Registration где доступно)
Любая другая LMS, реализующая спецификацию IMS LTI 1.3 Advantage с поддержкой Dynamic Registration, также должна работать — выберите Other LTI 1.3 platform в выпадающем списке платформ при генерации вашего URL регистрации (получить её здесь).
Canvas LMS использует другой процесс настройки (per-developer-key configuration JSON вместо Dynamic Registration). См. специальное руководство по установке Canvas LMS.
Создать URL для регистрации
Перейдите к конфигурации LTI 1.3
Войдите в FastComments и перейдите на вашу страницу конфигурации LTI 1.3.
Если в вашем аккаунте ещё нет доступа LTI, вы увидите "LTI not enabled for this account" - свяжитесь со службой поддержки, чтобы включить его в вашем тарифном плане.
Выберите платформу (необязательно)
В разделе Генерация динамического URL регистрации, используйте выпадающий список Platform, чтобы указать FastComments, к какому LMS вы подключаетесь:
- D2L Brightspace
- Moodle
- Blackboard Learn
- Sakai
- Schoology
- Другая платформа LTI 1.3
Вы также можете оставить его в положении Автоопределение. Платформа считывается из openid-configuration вашего LMS во время регистрации; выпадающий список только задаёт метку отображения для полученной конфигурации.
Сгенерируйте URL
Нажмите Сгенерировать URL. FastComments создаёт одноразовый регистрационный токен и показывает вам URL, похожий на:
https://fastcomments.com/lti/v1p3/register/<long-token>
Скопируйте его. Этот URL:
- Является одноразовым - после того, как ваш LMS успешно вызовет его, токен будет использован.
- Истекает через 30 минут, если не будет использован.
- Должен храниться в секрете - любой, у кого есть URL, может зарегистрировать инструмент в вашем тенанте в течение этих 30 минут.
Существующие конфигурации
После успешного завершения регистрации новая конфигурация появится в таблице Existing Configurations на той же странице, с её Platform, Issuer, Client ID и Status. Вы можете удалить конфигурации из этой таблицы, если вам когда-либо потребуется отменить регистрацию.
Регистрация в D2L Brightspace
D2L Brightspace предоставляет динамическую регистрацию через административный интерфейс LTI Advantage. Вам потребуется доступ администратора.
Откройте экран регистрации
- Войдите в ваш экземпляр Brightspace под учётной записью администратора.
- Перейдите в Admin Tools > Manage Extensibility > LTI Advantage.
- Нажмите Register Tool. (Прямая ссылка:
https://<your-brightspace-host>/d2l/le/ltiadvantage/registrations/create.)
Вставьте URL
Вы увидите форму регистрации. Ключевым полем является Tool initiation registration endpoint (в некоторых версиях Brightspace это поле называется "Tool Initiation Registration URL").
Вставьте URL регистрации FastComments (получите его здесь) в это поле. Оставьте остальные поля пустыми — они будут автоматически заполнены FastComments во время обмена регистрационными данными.
Нажмите Зарегистрировать.
Одобрите инструмент
Brightspace откроет всплывающее окно, которое свяжется с FastComments, обменяется ключами и отобразит экран подтверждения. Всплывающее окно закроется автоматически после завершения регистрации.
Новый инструмент появится в списке инструментов LTI Advantage. По умолчанию Brightspace помечает новые инструменты как отключённые — переведите переключатель в положение включено, чтобы ваши курсы могли им пользоваться.
Добавьте развертывание
В Brightspace LTI-инструменту требуется deployment перед его использованием в курсах:
- Откройте только что зарегистрированный инструмент FastComments.
- Нажмите View Deployments > New Deployment.
- Дайте развертыванию имя (например, "FastComments - Все курсы"), выберите организационные единицы, в которых оно должно быть доступно, и сохраните.
После первого запуска через это развертывание FastComments зафиксирует deployment_id в своей записи конфигурации — последующие запуски из другого развертывания под тем же клиентом будут отклонены, если вы не зарегистрируете снова.
Регистрация в Moodle
Используете Moodle? Мы также публикуем специальный плагин Moodle для FastComments с более тесной интеграцией, чем LTI 1.3 (хуки синхронизации оценок, более глубокая отчетность по активностям, родной интерфейс настроек Moodle). См. Руководство по установке плагина Moodle. Показанный ниже поток LTI 1.3 подходит, если вы хотите одну регистрацию, которая также охватывает другие LMS, или если ваш администратор Moodle не будет устанавливать сторонние плагины.
Moodle 4.0+ поддерживает динамическую регистрацию LTI 1.3 через плагин External Tool.
Откройте экран управления инструментами
- Войдите в Moodle как администратор сайта.
- Перейдите в Site administration > Plugins > Activity modules > External tool > Manage tools.
Вставьте URL
Вы увидите карточку с надписью Tool URL. Вставьте URL регистрации FastComments (получить её здесь) в текстовое поле и нажмите Add LTI Advantage.
Moodle откроет экран регистрации, показывающий идентификацию инструмента и запрашиваемые разрешения. Проверьте их и нажмите Activate (или Register, в зависимости от версии Moodle).
Всплывающее окно закроется после завершения регистрации; новый инструмент FastComments появится в списке Tools со статусом Active.
Сделать его доступным
По умолчанию Moodle добавляет новые инструменты в список "Course tools", но не показывает их в выборе активности. Чтобы сделать FastComments доступным на уровне курса:
- Нажмите значок шестерёнки на плитке FastComments.
- В разделе Tool configuration usage выберите Show in activity chooser and as a preconfigured tool.
- Сохраните.
Преподаватели теперь могут добавлять FastComments в любой курс через Add an activity or resource > FastComments.
Регистрация в Blackboard Learn
Blackboard Learn SaaS и Ultra поддерживают динамическую регистрацию LTI 1.3.
Откройте экран поставщика инструментов
- Войдите в Blackboard как системный администратор.
- Перейдите в Administrator Panel > Integrations > LTI Tool Providers.
- Нажмите Register LTI 1.3 / LTI Advantage Tool.
Если вы видите только "Register LTI 1.1 Provider", ваша версия Blackboard ещё не поддерживает LTI 1.3 — обновите систему или обратитесь в службу поддержки Blackboard.
Вставьте URL
Вставьте URL регистрации FastComments (получить её здесь) в поле Client ID / Registration URL (названия полей в Blackboard различаются в зависимости от версии). Нажмите Submit.
Blackboard выполняет обмен регистрационными данными с FastComments и показывает экран подтверждения.
Одобрите и включите
Blackboard помечает вновь зарегистрированные инструменты как Approved but excluded по умолчанию:
- Найдите запись FastComments в списке поставщиков инструментов.
- Откройте меню и выберите Edit.
- Установите для Tool Status значение Approved.
- В разделе Institution Policies проверьте, какие данные пользователя отправляются (имя, электронная почта, роль). Сохраните.
Инструмент теперь доступен преподавателям при добавлении ими контента в курсы.
Регистрация в Sakai или Schoology
Sakai
Sakai поддерживает динамическую регистрацию LTI 1.3 в релизах с LTI Advantage. Из Administration Workspace:
- Войдите как администратор Sakai и откройте Administration Workspace.
- Выберите External Tools > Install LTI 1.3 Tool.
- Вставьте URL регистрации FastComments (получить его здесь) и отправьте.
- Одобрите инструмент после завершения рукопожатия.
Инструмент затем появляется в разделе External Tools и может быть добавлен администраторами сайтов.
Schoology
Инстансы Schoology Enterprise поддерживают LTI 1.3, но доступность Dynamic Registration варьируется в зависимости от развертывания. Свяжитесь с вашим менеджером аккаунта Schoology.
Если Dynamic Registration недоступна в вашем экземпляре Schoology, вам нужно будет настроить интеграцию вручную, используя эти конечные точки:
- OIDC Login URL:
https://fastcomments.com/lti/v1p3/login - Target Link URL:
https://fastcomments.com/lti/v1p3/launch - Public Keyset URL (JWKS):
https://fastcomments.com/lti/v1p3/jwks - Redirect URLs:
https://fastcomments.com/lti/v1p3/launch
После того как Schoology предоставит вам Client ID и Deployment ID, свяжитесь со службой поддержки FastComments, чтобы зарегистрировать конфигурацию на вашем tenant.
Other LTI 1.3 Platforms
Любая LMS, соответствующая спецификации IMS LTI 1.3 Advantage, должна работать с тем же URL регистрации (получить его здесь). Ищите настройку с пометкой "Dynamic Registration", "Tool Registration URL", "Tool initiation registration endpoint" или похожую.
Если ваша платформа поддерживает только ручную настройку LTI 1.3, используйте четыре конечные точки, перечисленные в разделе Schoology выше, и свяжитесь со службой поддержки для завершения настройки.
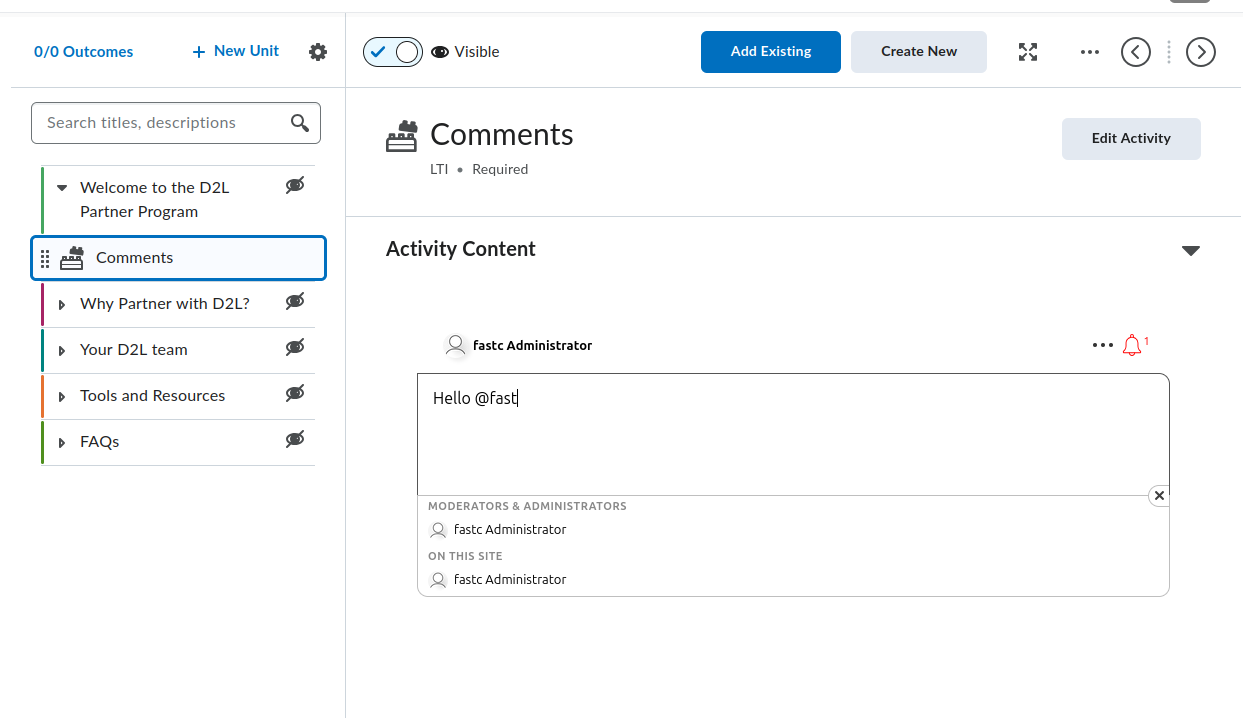
Добавить в содержимое курса D2L
Эта страница описывает добавление FastComments в курс Brightspace после того, как администратор зарегистрировал инструмент и создал deployment. Если инструмент ещё не зарегистрирован, сначала смотрите руководство по регистрации D2L.
Brightspace поставляется с двумя сценариями создания контента: Classic Content и New Content Experience (также называемый Lessons). Оба предоставляют доступ к FastComments, но пути в меню различаются. В каждом разделе ниже указаны оба варианта там, где они расходятся.
Найдите инструмент FastComments
Инструмент FastComments появляется в двух местах внутри редактора контента курса:
- В выборе активности, доступном через кнопку Add Existing модуля/юнита (в старых версиях Brightspace помечено как Add Existing Activities). В текущих сборках Brightspace FastComments отображается прямо в выборе; в старых версиях он вложен в подпункт External Learning Tools. Любой из путей добавляет FastComments как отдельную тему.
- В диалоге Insert Stuff внутри HTML-редактора, в разделе LTI Advantage. Это встраивает FastComments inline в HTML-тему через поток LTI deep linking.
Если FastComments не появляется ни в одном из выборщиков, deployment не включён для организационной единицы (org unit), в которой находится курс. Попросите вашего администратора Brightspace открыть меню «Администрирование» > Manage Extensibility > LTI Advantage > инструмент FastComments > View Deployments, открыть deployment и добавить организационную единицу курса (или родительскую org unit) в раздел Org Units.
Добавление FastComments как темы в модуль
Classic Content:
- Откройте курс и нажмите Content в навигационной панели.
- Выберите модуль, в котором должна быть дискуссия (или создайте его через Add a module).
- Нажмите Add Existing (в старом Brightspace: Add Existing Activities > External Learning Tools).
- В выборщике нажмите FastComments. Brightspace создаст тему в модуле и вернёт вас в представление контента.
- Нажмите новую тему. Переименуйте её в нечто описательное, например
FastComments Discussion, используя встроенный редактор заголовка.
New Content Experience (Lessons):
- Откройте курс и нажмите Content.
- Откройте юнит и lesson, в котором должна быть дискуссия.
- Нажмите Add > Existing Activity и выберите FastComments (в старом Brightspace: вложено в External Learning Tools).
- Активность добавляется в lesson.
- Нажмите на название активности, чтобы переименовать её.
Впервые, когда любой пользователь (преподаватель или студент) откроет тему, FastComments инициализирует поток для этой resource link. Поток привязан к ID resource link, поэтому переименование или перемещение темы не изменяет загружаемый поток.
Встраивание FastComments внутри HTML-темы
Используйте этот поток, когда вы хотите, чтобы комментарии отображались под чтением, видео или другим контентом на той же странице темы, а не как отдельная тема.
- Откройте или создайте HTML-тему в модуле/lesson.
- Нажмите Edit HTML, чтобы открыть HTML-редактор Brightspace.
- Поместите курсор туда, где должен появиться поток комментариев.
- Нажмите кнопку Insert Stuff (иконка пазла на панели инструментов редактора).
- В диалоге Insert Stuff прокрутите до LTI Advantage и нажмите FastComments.
- FastComments откроет deep linking выборщик. Подтвердите размещение (стандартные параметры подходят для дискуссий по контенту); нажмите Insert или Continue.
- Brightspace вернётся в HTML-редактор с блоком-заполнителем, представляющим LTI launch. Нажмите Save and Close в теме.
Когда тема загрузится, Brightspace заменит заполнитель на iframe, который автоматически запустит FastComments через LTI. Студенты увидят поток обсуждения inline.
Одна HTML-тема может содержать несколько deep-linked встраиваний FastComments. Каждое встраивание получает собственный поток, потому что каждая deep link создаёт отдельный resource link ID.
Тема модуля против встроенной ссылки
Выберите подход «тема модуля», когда:
- Дискуссия является основной активностью на этом шаге модуля.
- Вы хотите, чтобы тема отображалась в оглавлении Brightspace, отслеживании выполнения и Class Progress.
Выберите подход «встраивание inline», когда:
- Комментарии должны располагаться под другим контентом на той же странице.
- Вы не хотите отдельный элемент в оглавлении, отслеживаемый по выполнению.
Видимость, черновик и условия выпуска
Новая тема FastComments по умолчанию видна студентам. Чтобы скрыть её во время настройки:
- В редакторе контента нажмите заголовок темы (Classic) или меню с тремя точками у активности (New Content Experience).
- Установите статус в Draft (Classic) или переключите Visibility в положение «выключено» (New Content Experience).
Темы в состоянии Draft невидимы студентам. Преподаватели и TAs по-прежнему видят их с бейджем «Draft».
Чтобы ограничить доступ к теме для конкретной группы или секции:
- Откройте тему.
- Нажмите меню заголовка темы > Edit Properties In-place (Classic) или Edit > Restrictions (New Content Experience).
- В разделе Release Conditions нажмите Create.
- Выберите Group enrollment или Section enrollment, укажите группу/секцию и сохраните.
Условия выпуска накладываются на собственное отображение ролей FastComments. Студенты, которые не видят тему, не получат LTI launch.
Что видят студенты при первом запуске
Когда студент нажимает тему (или загружает HTML-тему с встраиванием):
- Brightspace выполняет LTI 1.3 launch в фоновом режиме.
- FastComments получает имя студента, email, URL аватара и роль в LMS и автоматически авторизует его. Окна входа FastComments не показываются.
- Поток комментариев для этого resource link отображается внутри iframe Brightspace.
Сопоставление ролей при запуске:
- Brightspace
Administratorстановится в FastComments admin для потока (полный доступ к модерации, удалению, бану и конфигурации). - Brightspace
Instructorстановится в FastComments moderator (pin, hide, delete, ban). - Все остальные роли (
Learner,TeachingAssistantи т.д.) становятся стандартными участниками для комментирования.
Комментарии атрибутируются к учётной записи студента в Brightspace. Если студент изменит своё имя или аватар в Brightspace, при следующем LTI launch изменения синхронизируются.
Ограничьте публичный доступ (рекомендуется)
По умолчанию данные комментариев FastComments доступны для публичного чтения. Любой, кто сможет угадать URL потока или API endpoint, может просмотреть комментарии, даже вне Brightspace. Для курсовых обсуждений почти всегда следует ограничить просмотр только зарегистрированными слушателями.
Откройте вашу страницу настройки виджета и создайте правило с включённой опцией Require SSO To View Comments, затем установите уровень безопасности в Secure SSO, чтобы потоки могли загружаться только через подписанный LTI launch.
См. Protecting Comment Threads With Single-Sign-On для полного пошагового руководства, включая настройку области действия правила для одного домена или страницы.
Высота iframe и изменение размера
FastComments отправляет postMessage org.imsglobal.lti.frameResize при каждом рендере потока и при изменениях контента (новый комментарий, разворачивание ответов). Brightspace слушает это сообщение и подстраивает высоту iframe, чтобы поток не обрезался и внутри не появлялась полоса прокрутки.
Если iframe остаётся с фиксированной малой высотой:
- Убедитесь, что курс загружен по HTTPS. Слушатель postMessage Brightspace отклоняет фреймы со смешанным содержимым.
- Убедитесь, что никакое расширение браузера не блокирует канал postMessage.
- Для встроенных в HTML тем убедитесь, что окружающий HTML не оборачивает iframe в контейнер с фиксированной высотой. Уберите любые inline-стили вида
style="height: ..."у родительского элемента.
Особенности Brightspace (Gotchas)
Инструмент не отображается в выборщике Add Existing. Deployment не включён для org unit этого курса. Администратору нужно добавить org unit (или родительскую) в список Org Units у deployment. Регистрация инструмента сама по себе недостаточна; именно deployment определяет, какие курсы видят инструмент.
Несоответствие deployment_id при запуске. FastComments закрепляет (TOFU-pins) первый увиденный deployment_id для регистрации. Если администратор удалит исходный deployment и создаст новый, запуски из нового deployment будут отклоняться с ошибкой несоответствия deployment. Исправление — повторно зарегистрировать FastComments (сгенерировать новый registration URL (получить его здесь) и снова выполнить Dynamic Registration); старая запись конфигурации будет заменена.
Инструмент запускается, но показывает «Invalid LTI launch». Курс находится в другой структуре арендатора/организации, чем покрывает deployment, или deployment был отключён после регистрации. Повторно проверьте меню «Администрирование» > Manage Extensibility > LTI Advantage > FastComments > переключатель Enabled и список org units deployment.
Имена и роли отсутствуют внутри FastComments. Brightspace отправляет LTI запуски с утверждениями Names and Role Provisioning Services (NRPS). Если курс был обновлён с более старой ссылки LTI 1.1, в запуске могут отсутствовать утверждения name и email. Повторно добавьте тему FastComments через Add Existing (не мигрируйте старую ссылку), чтобы запуск использовал LTI 1.3.
Встраивание показывает экран входа вместо авто-SSO. HTML-тема была вставлена как обычный <iframe>, указывающий на FastComments, а не через Insert Stuff > LTI Advantage. Простые iframe пропускают LTI launch и попадают на общедоступную страницу FastComments. Удалите iframe и вставьте снова через поток Insert Stuff.
Добавить в содержимое курса Moodle
Это руководство описывает добавление FastComments в курс Moodle 4.x после того, как администратор сайта зарегистрировал инструмент и сделал его видимым в выборе активности. Если FastComments ещё не зарегистрирован, сначала см. руководство по регистрации Moodle.
Откройте курс в режиме редактирования
- Войдите в Moodle как преподаватель с правами редактирования (или выше) для данного курса.
- Откройте курс.
- Включите режим редактирования, переключив переключатель в правом верхнем углу заголовка курса.
Moodle 4.x заменил устаревший выпадающий список «Add an activity or resource», использовавшийся в 3.x, полноэкранным диалогом выбора активности. Moodle 4.5 сохраняет тот же диалог, но добавляет строку с избранным вверху, поэтому закрепление FastComments один раз ускорит доступ к нему в последующих разделах.
Добавление активности FastComments
- Прокрутите к секции курса (теме или неделе), где должна быть дискуссия.
- Нажмите Add an activity or resource внизу этой секции.
- В диалоговом окне выбора выберите FastComments. Если вы не видите его, перейдите к разделу «Проблемы» ниже.
Откроется форма настроек активности. Важные поля:
- Activity name (обязательно). Отображается на странице курса и в журнале оценок. Пример:
Week 3 Discussion. - Activity description. Необязательный вступительный текст, отображаемый над потоком комментариев.
- Show description on course page. Отметьте, если хотите, чтобы описание было видно без входа в активность.
- Preconfigured tool. Установлено в
FastComments(автоматически выбирается при запуске из диалогa). Не изменяйте. - Launch container. Установите в New window. См. раздел «Проблемы» для объяснения, почему «Same window» ломает работу в некоторых установках Moodle.
- Tool URL, Public key, Shared secret, Custom parameters. Оставьте пустыми. Dynamic Registration настроен на уровне сайта.
Прокрутите вниз и нажмите Save and return to course (или Save and display, чтобы сразу открыть активность).
Активность появится строкой в секции с иконкой FastComments. Студенты нажимают на строку, чтобы открыть поток комментариев.
Встраивание FastComments прямо в редактор
Для потока внутри Page, главы Book, Lesson или любого другого ресурса, использующего редактор Atto или TinyMCE:
- Откройте ресурс в режиме редактирования.
- Поместите курсор туда, где должен появиться поток.
- В панели редактора нажмите кнопку LTI / External tool. В Atto она помечена как «Insert LTI Advantage content». В TinyMCE (по умолчанию в Moodle 4.3+) она находится в меню More как External tools.
- Выберите FastComments из списка инструментов.
- FastComments откроет окно глубоких ссылок. Подтвердите заголовок потока и нажмите Embed.
- Редактор вставит блок-заполнитель LTI. Сохраните ресурс.
Каждый встроенный экземпляр — это отдельный поток, привязанный к ID элемента глубоких ссылок, поэтому страница с тремя вставками FastComments создаст три независимых потока.
Ограничение доступа и групповые настройки
Стандартные настройки активности Moodle применяются к активностям FastComments:
- Common module settings > Group mode. Установка в Separate groups или Visible groups сама по себе не разделяет FastComments на потоки для каждой группы. Режим групп Moodle только фильтрует журнал оценок и список участников. Чтобы обеспечить отдельный поток для каждой группы, добавьте по одной активности FastComments для каждой группы и используйте Restrict access, чтобы ограничить область видимости каждой активности.
- Restrict access > Add restriction. Поддерживает стандартные условия Moodle: Date, Grade, Group, Grouping, User profile и вложенные наборы ограничений. Используйте Group, чтобы заблокировать активность FastComments для одной группы.
- Activity completion. Установите Students must view this activity to complete it, если хотите отслеживание завершения. FastComments в настоящее время не отправляет событие завершения обратно в Moodle, кроме запуска.
Сопоставление ролей
FastComments считывает претензию LTI roles, которую Moodle отправляет при каждом запуске, и сопоставляет её следующим образом:
- Moodle Manager или Site administrator -> FastComments admin
- Moodle Editing teacher или Non-editing teacher -> FastComments moderator
- Moodle Student -> FastComments commenter
- Moodle Guest -> только чтение
Администраторы могут удалять любые комментарии, банить пользователей и редактировать настройки потоков. Модераторы могут удалять и одобрять комментарии внутри потока, в который они вошли. Пользовательские роли Moodle наследуют сопоставление от архетипа, из которого они были клонированы.
Что видят студенты
Студенты нажимают на активность FastComments (или прокручивают до встроенного блока внутри Page или Book). Moodle отправляет их идентификационные данные в FastComments через LTI-запуск:
- Нет экрана входа. FastComments автоматически выполняет вход под учётной записью Moodle.
- Их отображаемое имя, электронная почта и аватар берутся из Moodle.
- Поток привязан к
(Moodle site, course, resource link ID), поэтому та же активность, дублированная в другом курсе, получает новый поток. - Дерево ответов, голосование и уведомления работают так же, как в автономном потоке FastComments.
Ограничение публичного доступа (рекомендуется)
По умолчанию данные комментариев FastComments доступны для публичного чтения. Любой, кто может угадать URL потока или API-эндпойнт, может просмотреть его комментарии, даже вне Moodle. Для обсуждений курса почти всегда необходимо ограничить просмотр только зарегистрированными студентами.
Откройте вашу страницу настройки виджета и создайте правило с включённой опцией Require SSO To View Comments, затем установите уровень безопасности в Secure SSO, чтобы потоки можно было загружать только через подписанный LTI-запуск.
См. Protecting Comment Threads With Single-Sign-On для полного пошагового руководства, включая то, как ограничить правило для одного домена или страницы.
Проблемы Moodle
FastComments отсутствует в диалоге выбора активности. Администратор сайта зарегистрировал инструмент, но не установил Tool configuration usage в Show in activity chooser and as a preconfigured tool. Исправьте это в Site administration > Plugins > Activity modules > External tool > Manage tools > значок шестерёнки на плитке FastComments.
Запуск не удался или показывается пустой фрейм при установке «Same window». Файлы cookie сессии Moodle по умолчанию используют SameSite=Lax, и некоторые браузеры удаляют их при кросс-сайтовом POST, который LTI 1.3 использует для возврата из FastComments. Установите Launch container в New window для активности. Это жёсткое требование для встроенного FastComments внутри Page или Book, поскольку путь запуска из редактора всегда открывает новое окно.
Претензия iss — это URL сайта Moodle, а не идентификатор арендатора. FastComments использует URL сайта Moodle (значение конфигурации wwwroot) как LTI-issuer. Если ваша инстанция Moodle переедет на новый домен или вы измените wwwroot, существующие потоки FastComments останутся привязанными к старому issuer и не будут соответствовать новым запускам. Перерегистрируйте инструмент для нового URL и при необходимости мигрируйте потоки через админку FastComments.
Резервное копирование и восстановление активности. Резервное копирование курса и восстановление его в новом курсе создаёт новые resource link ID, поэтому восстановленные активности FastComments начнутся с пустых потоков. Оригинальный курс сохраняет исходные потоки. Это предусмотренное поведение, а не ошибка.
TinyMCE по умолчанию в Moodle 4.5. Moodle 4.5 поставляется с TinyMCE как редактором по умолчанию для новых установок. Кнопка External tool находится в меню More (...), а не на основной панели инструментов. Старые сайты, обновлённые с 4.1, сохраняют Atto, если администратор не изменил настройку по умолчанию.
Добавить в содержимое курса Blackboard
После того как администратор зарегистрировал FastComments как инструмент LTI 1.3 Advantage и утвердил политики учреждения, преподаватели добавляют его в курсы через стандартные точки размещения Blackboard. Конкретные шаги отличаются между Ultra Course View и Original Course View, поэтому ниже рассмотрены оба варианта.
Ultra Course View
Ultra Course View является видом по умолчанию в Blackboard Learn SaaS с 2026 года.
- Откройте курс и перейдите на страницу Course Content.
- Наведите курсор или коснитесь места в оглавлении, куда вы хотите поместить ветку комментариев, и нажмите фиолетовую кнопку + (Add content).
- Выберите Content Market. Панель Content Market показывает все одобренные LTI-инструменты и размещения Building Block для вашего учреждения.
- Найдите плитку FastComments и нажмите её. Blackboard создаст элемент контента в позиции, где вы открыли меню +.
- По умолчанию элемент появляется в оглавлении как запись «Visible to students» для преподавателей, у которых персональная настройка Hide from students отключена. Если у вас в личных настройках по умолчанию стоит Hidden, элемент создаётся скрытым — вы переключаете селектор видимости в строке элемента, когда будете готовы.
- Чтобы переименовать элемент, кликните по заголовку в оглавлении и введите новую метку. Заголовок, который видят студенты в оглавлении, не связан с идентификатором потока FastComments, поэтому переименование можно выполнять в любое время.
Если вы не видите Content Market в списке опций, администратор учреждения скрыл это размещение. Тот же выборщик также доступен через More tools в том же меню + в группе LTI Tools.
Original Course View
Original Course View по‑прежнему поддерживается в Learn SaaS и остаётся основным опытом для самостоятельных установок Learn 9.1 на ветке релизов Q4 2024 CU.
- Откройте курс и войдите в Content Area (например, в стандартную область Information или Content в меню курса).
- Включите Edit Mode переключателем в правом верхнем углу страницы.
- Нажмите Build Content на панели действий.
- В подменю Learning Tools нажмите FastComments. Подменю Learning Tools заполняется размещениями инструментов LTI 1.3 после того, как администратор регистрирует инструмент. Если вы не видите его, смотрите раздел с типичными проблемами ниже.
- На форме Create FastComments задайте:
- Name: метка, которую видят студенты в области контента.
- Description: необязательный текст, отображаемый над встроенной веткой.
- Permit Users to View this Content: переключатель доступности Да/Нет.
- Track Number of Views: включите, если хотите статистику просмотров по элементу в Blackboard. FastComments ведёт собственную аналитику независимо.
- Date and Time Restrictions: необязательные окна Display After / Display Until.
- Отправьте форму. Инструмент появится как кликабельный элемент в области контента.
Embedding Inside an Item or Document
В обоих видах курса преподаватели встраивают FastComments прямо в тело Item, Document или любого поля с богатым текстом через кнопку LTI Advantage в редакторе контента.
Ultra Course View:
- Создайте или отредактируйте Document.
- Нажмите Add content внутри тела документа в том месте, где должен появиться поток.
- На панели редактора откройте меню Insert content и нажмите Content Market (точка входа LTI Advantage / Deep Linking).
- Выберите FastComments. FastComments возвращает deep-link полезную нагрузку, и Blackboard вставляет встроенный блок в тело документа в позиции курсора.
- Сохраните документ. Студенты увидят поток, отрисованный inline при прокрутке.
Original Course View:
- Редактируйте любой элемент с телом в формате rich-text.
- В панели редактора контента нажмите значок плюса Add Content и выберите Content Market (в старых CU Q4 2024 он помечен как Add Content from External Tool).
- Выберите FastComments. Редактор вставит плейсхолдер, ссылающийся на ресурс, связанный через deep link.
- Отправьте элемент.
Каждое deep-link встраивание создаёт собственную ветку FastComments, поэтому элемент с двумя встроенными блоками FastComments будет содержать два независимых потока комментариев.
Visibility, Release Conditions, and Group Restrictions
Элементы контента FastComments ведут себя как любые другие элементы контента Blackboard в отношении правил управления доступом, наложенных на них.
- Ultra: нажмите селектор видимости в строке (Visible to students, Hidden from students, Conditional availability). Conditional availability поддерживает окна даты/времени, правила по успеваемости относительно элементов gradebook и правила по членству относительно групп курса.
- Original: откройте контекстное меню элемента и выберите Adaptive Release или Adaptive Release: Advanced, чтобы ограничить доступ к инструменту по дате, членству, оценке или статусу просмотра. Используйте Set Group Availability на элементе, чтобы ограничить доступ конкретными группами курса.
FastComments уважает любое решение Blackboard о блокировке. Если Blackboard скрывает элемент от студента, LTI-запуск для этого студента не выполняется, и он не появляется в представлении модератора.
Gradebook Behavior
FastComments не отправляет оценки обратно через LTI Advantage Assignment and Grade Services. Для элементов контента FastComments автоматически не создаётся столбец оценок.
Если ваш тенант Blackboard настроен на автоматическое создание столбца оценок для каждого нового элемента контента вне зависимости от метаданных оценивания, пустой столбец появится в любом случае. Чтобы скрыть его:
- Ultra: откройте Gradebook, нажмите заголовок столбца, выберите Edit и выключите Show to students и Include in calculations. Или используйте Delete, если в вашем учреждении разрешено удалять столбцы для неоценённых элементов.
- Original: откройте Grade Center, нажмите на шеврон столбца, выберите Hide from Users (on/off) и при необходимости Hide from Instructor View в разделе Column Organization.
What Students See
Когда студент открывает элемент FastComments или прокручивает встроенный блок:
- Blackboard запускает LTI 1.3 сообщение в FastComments. Студент проходит вход через SSO, используя свою учётную запись Blackboard (имя, электронную почту, аватар, роль) без показа формы входа.
- Ветка комментариев отображается в iframe. Трединг, ответы, упоминания и реакции доступны в зависимости от настроек виджета комментариев в FastComments.
- Их комментарии атрибутируются к их учётной записи Blackboard. Если студент позже изменит имя или фото в Blackboard, при следующем запуске профиль FastComments обновится.
Соответствие ролей из Blackboard в FastComments:
- System Administrator и Course Builder соответствуют роли FastComments admin.
- Instructor и Teaching Assistant соответствуют роли FastComments moderator.
- Student, Guest и Observer соответствуют роли FastComments commenter.
Модераторы видят элементы модерации (pin, hide, ban, delete) встроенными в каждый комментарий в треде.
Lock Down Public Access (Recommended)
По умолчанию данные комментариев FastComments доступны для публичного чтения. Любой, кто сможет угадать URL потока или API endpoint, сможет просмотреть комментарии, даже вне Blackboard. Для дискуссий в курсе почти наверняка вы захотите ограничить просмотр только зачисленными студентами.
Откройте вашу страницу настройки виджета и создайте правило с включённым Require SSO To View Comments, затем установите уровень безопасности в Secure SSO, чтобы потоки загружались только через подписанный LTI-запуск.
См. Protecting Comment Threads With Single-Sign-On для полного пошагового руководства, включая то, как ограничить правило для одного домена или страницы.
Thread Scoping
FastComments ограничивает область действия каждого потока по триаде (Blackboard host, course ID, resource link ID). Два элемента FastComments в одном курсе создают два потока. Тот же элемент, скопированный в две разные оболочки курса (например, через копирование курса), создаёт два потока, потому что Blackboard выдаёт новый resource link ID при копировании. Чтобы сохранить общий поток при копировании курса, используйте Deep Linking с явным URN потока, настроенным в FastComments до запуска копирования.
Blackboard-Specific Gotchas
FastComments tile missing from the Build Content menu (Original) or Content Market (Ultra). Администратор одобрил инструмент, но оставил политику учреждения, блокирующую соответствующее размещение. Перейдите в Administrator Panel > Integrations > LTI Tool Providers, отредактируйте запись FastComments и убедитесь, что размещения Course Content Tool (Original) и Course Content Tool - allow students / Deep Linking content tool (Ultra) включены. Сохраните и обновите страницу курса.
"Tool not configured for this context" or "Tool is not deployed" error on launch. Область развёртывания, зарегистрированная при динамической регистрации, не совпадает с контекстом учреждения, к которому принадлежит курс. В записи провайдера инструмента Blackboard проверьте, что Deployment ID совпадает с тем, что FastComments показывает на странице конфигурации LTI 1.3 для этого арендатора. Если они различаются, удалите размещение и повторно выполните динамическую регистрацию с нового URL регистрации (получить его здесь).
Iframe height looks fixed or content gets cut off. Некоторые тенанты Blackboard поставляются со строгой Content Security Policy, которая блокирует стандартный LTI iframe-resize postMessage. FastComments посылает как Canvas-совместимое сообщение lti.frameResize, так и IMS-совместимое org.imsglobal.lti.frameResize для максимальной совместимости, но переопределение CSP на уровне тенанта блокирует обработчик в родительском окне. Попросите администратора подтвердить, что *.fastcomments.com включён в allowlist LTI-инструментов и что никакой пользовательский заголовок CSP не удаляет postMessage события. После этого изменение размера заработает без дополнительной настройки.
Course copy duplicates threads. Копирование курса в Blackboard выдаёт новые resource link ID для размещений LTI, поэтому скопированные курсы начинают с пустых потоков. Это ожидаемое поведение. Если вам нужно, чтобы скопированный курс унаследовал исходный поток, настройте Deep Linking с явным URN потока до копирования или обратитесь в поддержку FastComments для массового переназначения ID потоков.
Student sees a generic Blackboard error on launch. Причина — отсутствующая или устаревшая claim email. Убедитесь, что политика учреждения для FastComments включает Role, Name и Email Address в разделе User Fields to Send. Сохраните, затем запустите снова в новой сессии браузера.
Добавить в содержимое курса Sakai или Schoology
После регистрации FastComments на платформе преподаватели добавляют его в содержание курса через стандартные потоки добавления внешних инструментов платформы. Эта страница охватывает Sakai 23.x и Schoology Enterprise.
Ограничить публичный доступ (рекомендуется)
По умолчанию данные комментариев FastComments на обеих платформах доступны для чтения публично. Любой, кто сумеет угадать URL потока или API-эндпоинт, может просмотреть комментарии, даже вне Sakai или Schoology. Для дискуссий в курсе вам почти наверняка нужно ограничить просмотр только зарегистрированными студентами.
Откройте свою страницу настройки виджета и создайте правило с включённой опцией Require SSO To View Comments, затем установите уровень безопасности в Secure SSO, чтобы потоки могли загружаться только через подписанный LTI-запуск.
См. Protecting Comment Threads With Single-Sign-On для полного пошагового руководства, включая способ ограничения правила до одного домена или страницы.
Sakai
1. Добавьте FastComments на сайт
Ответственный за сайт включает инструмент для каждого сайта отдельно:
- Откройте сайт и в левой навигации нажмите Site Info.
- Нажмите Manage Tools.
- Прокрутите до списка External Tools и переключите FastComments в положение «включено».
- Нажмите Continue, проверьте список инструментов, затем нажмите Finish.
FastComments теперь отображается в левой навигации сайта.
2. Измените порядок в левой навигации
Перейдите в Site Info > Tool Order. Перетащите FastComments в нужное место и нажмите Save. Также с этого экрана можно переименовать метку навигации и скрыть её от студентов.
3. Встраивание внутри страницы Lessons
Чтобы разместить FastComments непосредственно внутри страницы Lessons, а не как отдельный инструмент в левой навигации:
- Откройте инструмент Lessons на сайте.
- Нажмите Add Content > Add External Tool.
- Выберите FastComments из списка.
- Если при регистрации FastComments рекламировал Deep Linking, Sakai откроет селектор содержимого инструмента, чтобы вы могли выбрать или пометить поток. Если Deep Linking не был объявлен, Sakai вставит ссылку запуска по умолчанию.
- Сохраните элемент Lessons.
Каждый встроенный экземпляр получает собственный поток, привязанный к этой ссылке ресурса.
4. Настройка прав доступа студентов
Sakai ограничивает запуск внешних инструментов через Realms. Чтобы убедиться, что студенты могут запускать FastComments:
- Войдите как администратор Sakai и откройте Administration Workspace > Realms.
- Откройте соответствующую область (например,
!site.template.courseили конкретную область сайта). - Убедитесь, что у роли
accessвключеноlti.launchи что права роли в группе external.tools предоставлены. - Сохраните область.
Для переопределений на уровне сайта ответственный за сайт может настроить видимость инструмента по ролям через Site Info > Tool Order, скрывая или показывая FastComments для конкретных ролей.
5. Что видят студенты
Студенты нажимают пункт FastComments в левой навигации (или прокручивают до встроенного блока Lessons) и попадают непосредственно в просмотр потоковых комментариев. SSO происходит автоматически: Sakai отправляет данные пользователя в LTI-запуске, и FastComments автоматически входит за него под учётной записью Sakai.
Отображение ролей:
- Sakai
Instructor-> модератор FastComments - Sakai
Admin(админ в Administration Workspace) -> администратор FastComments - Sakai
Student/access-> комментатор FastComments
6. Подводные камни Sakai
- Инструмент не виден в Manage Tools. Если FastComments не отображается в списке External Tools, администратору Sakai нужно открыть реестр инструментов (Administration Workspace > External Tools > FastComments) и установить Stealthed в
false. Инструменты со Stealthed=true скрываются из выбора Manage Tools на уровне сайта. - Сбой запусков в браузерах с общими сессиями. Токен CSRF портала Sakai привязан к сессии браузера. Если студент вошёл в два сайта Sakai в разных вкладках или сессия устарела, запуск возвращает 403. Решение: закройте другие вкладки Sakai, выйдите, войдите снова и запустите заново. Администраторы также могут увеличить
sakai.csrf.token.cache.ttl, если это происходит на уровне кластера. - Встраивание в фрейм. Убедитесь, что
lti.frameheightвsakai.propertiesдостаточно велик (600 или больше), чтобы поток комментариев не обрезался внутри страницы Lessons.
Schoology
Schoology Enterprise имеет два сценария установки. Уточните, какой из них применим, перед добавлением инструмента в курс.
1. Два сценария установки
- (a) Установка на уровне организации. Системный администратор Schoology установил FastComments на уровне организации и назначил его для всех курсов или для конкретных шаблонов курсов. Преподавателям не нужно устанавливать инструмент — они переходят напрямую к разделу «Добавить материалы».
- (b) Самостоятельная установка преподавателем. Преподаватель устанавливает инструмент в конкретный курс через Course Options > External Tools > Install LTI Apps. Самостоятельная установка требует предварительного одобрения приложения FastComments системным администратором на уровне организации.
2. Добавление FastComments как материала курса
Внутри курса:
- Откройте курс и перейдите в Materials.
- Нажмите Add Materials > Add File/Link/External Tool.
- Выберите External Tool.
- Выберите FastComments из списка зарегистрированных инструментов.
- Установите Name (это то, что видят студенты в списке материалов) и при необходимости добавьте Description.
- Оставьте Enable Grading (передачу оценки) OFF. FastComments не отправляет оценки обратно в Schoology, поэтому включение передачи оценок создаст пустую колонку в журнале оценок.
- Нажмите Submit.
Материал теперь появляется в списке материалов курса и открывает поток FastComments при клике.
3. Встраивание внутри Rich Text редактора
Если системный администратор включил размещение Deep Linking для FastComments при регистрации, преподаватели могут встроить поток комментариев в любое поле Rich Text (инструкции к заданию, тело страниц, подсказки для обсуждений):
- Откройте Rich Text редактор на нужной странице.
- Нажмите значок External Tool (в виде пазла) на панели инструментов.
- Выберите FastComments.
- Настройте встраивание в диалоге deep-linking и нажмите Insert.
- Сохраните страницу.
Если кнопки External Tool нет в Rich Text редакторе, значит Deep Linking отключён для этого инструмента на данном тенанте. См. раздел с подводными камнями ниже.
4. Видимость и назначение по секциям
Schoology регулирует доступность инструментов по секциям курса через Course Options:
- В курсе нажмите Course Options > External Tools.
- Для каждого установленного LTI-приложения вы контролируете, доступно ли оно для всех секций курса или для конкретных секций.
- Чтобы ограничить FastComments определёнными секциями, снимите галочки с секций, которые не должны видеть инструмент.
- Доступ на уровне секции также определяет, какие секции видят пункт Add Materials > External Tool для FastComments.
5. Что видят студенты
Студенты нажимают на материал FastComments (или прокручивают до встроенного фрагмента) и попадают в поток обсуждения. SSO происходит автоматически через LTI-запуск под их учётной записью Schoology.
Отображение ролей:
- Schoology
Administrator-> администратор FastComments - Schoology
Instructor-> модератор FastComments - Schoology
Student-> комментатор FastComments
6. Подводные камни Schoology
- Только для Enterprise. Личные и бесплатные аккаунты Schoology не могут устанавливать инструменты LTI 1.3. Если ваш тенант на бесплатном тарифе, опция External Tools отсутствует в Course Options. Обновитесь до Schoology Enterprise, чтобы использовать FastComments.
- Deep Linking отключён по умолчанию у тенанта. Некоторые тенанты Schoology ограничивают размещение Deep Linking на уровне организации. В этом случае преподаватели видят только поток Add Materials > External Tool, а не кнопку External Tool в Rich Text редакторе. Чтобы включить встраивание, системный администратор должен перейти в System Settings > Integration > LTI 1.3 > FastComments и включить размещение Content Item / Deep Linking, затем сохранить.
- Переопределение по секциям. Если FastComments назначен на уровне организации, но преподаватель не может найти его в Add Materials, секция курса исключена в назначении на уровне организации. Попросите системного администратора добавить секцию в назначение приложения FastComments.
- Имя материала и идентичность потока. Переименование материала в Schoology не перемещает поток комментариев. Потоки привязаны к LTI resource link ID, поэтому при переименовании поток останется тем же; удаление и повторное создание материала создаёт новый пустой поток.
Устранение неполадок
"Токен регистрации не найден, истёк или уже использован"
Токен в вашем URL для регистрации (получить его здесь) действителен 30 минут и может быть использован только один раз. Если ваш LMS занял больше времени, или если регистрация была повторена после успешного выполнения, токен будет отклонён. Сгенерируйте новый URL на странице конфигурации FastComments LTI 1.3 и начните заново.
"Platform rejected registration"
Ваш LMS отказал в рукопожатии регистрации. Наиболее частые причины:
- Tool already registered with the same client name. Некоторые платформы (в частности D2L) отклоняют вторую регистрацию "FastComments", пока предыдущая не удалена. Удалите старый инструмент в вашем LMS, затем повторите попытку.
- Wrong field in the LMS. Убедитесь, что вы вставили URL в поле registration / tool initiation registration endpoint, а не в поле launch URL или login URL.
- The LMS doesn't actually support Dynamic Registration. Старые версии Moodle и Blackboard декларируют поддержку LTI 1.3, но позволяют только ручную настройку. Проверьте документацию вашей платформы.
"Failed to fetch platform configuration"
FastComments не смог прочитать документ openid-configuration вашего LMS. Это редкость и обычно означает, что LMS предоставил некорректный или недоступный discovery URL. Свяжитесь со службой поддержки вашего LMS.
Launch shows "Configuration not found"
Либо конфигурация в FastComments была удалена, либо запуск пришёл с пары iss/client_id, которую мы не распознаём. Если вы удалили и заново зарегистрировали, попросите ваш LMS удалить и снова добавить инструмент FastComments, чтобы он получил новый client_id.
Launch shows "Deployment not registered"
Вы запустили FastComments из развертывания Brightspace/Moodle/Blackboard, отличного от того, в котором он был запущен впервые. FastComments фиксирует deployment_id при первом запуске в качестве проверки безопасности. Чтобы добавить новое развертывание под тем же клиентом, свяжитесь со службой поддержки — мы добавим deployment ID в конфигурацию.
Launch shows "Unsupported message_type"
LMS отправила LTI-сообщение, которое FastComments не обрабатывает (например, LtiSubmissionReviewRequest). FastComments поддерживает только стандартный resource-link launch и потоки deep-linking. Обратитесь к нам, если нужно добавить поддержку конкретного типа сообщения.
Iframe doesn't resize
Большинство LMS автоматически подстраивают размер LTI iframe. Если ваш этого не делает, проверьте, позволяют ли настройки запуска LMS инструменту отправлять события postMessage в родительский фрейм. FastComments посылает сообщения изменения размера как в формате Canvas (lti.frameResize), так и в спецификации IMS (org.imsglobal.lti.frameResize).
Наименьшие привилегии и минимизация данных
Интеграция FastComments LTI 1.3 следует принципу наименьших привилегий: она использует только те претензии (claims) запуска, которые необходимы для идентификации пользователя, привязки комментариев к правильному курсу и ресурсу, а также применения разрешений на основе ролей.
Остальная часть этой страницы сопоставляет каждую претензию, которую потребляет интеграция, каждую службу LTI Advantage, к которой она не запрашивает доступ, и каждую категорию данных, которые она не собирает. Рецензенты по безопасности и закупкам могут напрямую брать ответы из таблиц ниже.
Элементы данных, получаемые от LMS
Каждый LTI 1.3 запуск содержит подписанный JWT от LMS. FastComments извлекает следующие претензии из этого JWT и не использует ничего другого:
| Field | LTI claim | Purpose | Required | Stored |
|---|---|---|---|---|
| User identifier | sub | Identifies the user consistently across launches so the same person resolves to the same FastComments SSO user | Yes | Yes, as part of a stable internal SSO ID |
| Display name | name | Attribution shown next to the user's comments | Yes (falls back to "LMS User" if absent) | Yes |
email | Account matching, notifications, moderation, support correspondence | Optional (the integration works without it) | Yes when provided | |
| Avatar URL | picture | Displayed on the user's comments | Optional | URL only; FastComments does not download or rehost the image |
| Roles | https://purl.imsglobal.org/spec/lti/claim/roles | Determines whether the user is administrator, instructor (moderator), or learner | Yes | Derived isAdmin / isModerator flags on the SSO session |
| Course context | https://purl.imsglobal.org/spec/lti/claim/context (id, title) | Associates the comment thread with the correct LMS course | Yes | Yes, as part of the resolved page identifier |
| Resource link | https://purl.imsglobal.org/spec/lti/claim/resource_link (id) | Associates comments with the correct activity or tool placement inside the course | Yes when present | Yes, as part of the resolved page identifier |
| Deployment ID | https://purl.imsglobal.org/spec/lti/claim/deployment_id | Routes the launch to the correct FastComments tenant configuration | Yes | Yes, on the FastComments LTI configuration record |
Претензии и области (scopes), заявленные при регистрации
Во время динамической регистрации LTI 1.3 FastComments регистрирует себя с scope: "" (без дополнительных OAuth-областей) и заявляет только следующие претензии OpenID Connect:
iss, sub, name, email, picture
Она регистрирует два типа сообщений:
LtiResourceLinkRequest- стандартный запуск курса в FastComments.LtiDeepLinkingRequest- позволяет преподавателям разместить инструмент FastComments внутри курса.
Дополнительные токены доступа от LMS не запрашиваются.
Службы LTI Advantage, к которым не запрашивается доступ
| Service / scope | Requested? | Reason |
|---|---|---|
| Names and Role Provisioning Services (NRPS) | No | The integration does not need a course roster; user identity arrives with each launch |
| Assignment and Grade Services (AGS) - lineitem, score, result scopes | No | The integration is not gradebook-aware |
| Deep Linking beyond the standard placement return | No additional data | Deep linking is used only for instructor placement of the tool; no course content is enumerated |
Данные, которые не собираются
Помимо самого LTI, FastComments не запрашивает и не получает от LMS или пользователя следующее:
| Category | Collected? |
|---|---|
| Student grades | No |
| Assignment submissions | No |
| Attendance records | No |
| Full course rosters | No |
| Government identifiers | No |
| Date of birth | No |
| Postal address or phone number | No |
| Financial information | No |
| LMS administrator credentials | No |
Границы доступа
- FastComments получает данные только внутри авторизованного запуска LTI 1.3, подписанного зарегистрированными ключами LMS. Интеграция не делает обратных запросов в LMS за дополнительной информацией.
- Токены запуска одноразовые и с коротким сроком действия. Повторно проигранные или истекшие токены отклоняются.
- Администраторы LMS контролируют, где инструмент развернут внутри их платформы. Например, D2L Brightspace поддерживает ограничение по org-unit для каждого развертывания и настройки безопасности на уровне развертывания, что позволяет администраторам ограничивать инструмент определёнными курсами или организационными единицами, а не делать его доступным глобально. Moodle, Blackboard, Sakai и Schoology предлагают эквивалентные средства управления развертываниями в своих реализациях LTI 1.3.
Хранение и сохранение данных
FastComments хранит данные, полученные через LTI, на протяжении активного периода обслуживания комментариев и в соответствии с настройками срока хранения, настроенными клиентом. Данные комментариев хранятся в продукции, где данные зашифрованы в состоянии покоя. При прекращении учётной записи или по письменному запросу на удаление FastComments удаляет или анонимизирует данные клиента в соответствии с применимым соглашением.
Для полного описания хранения и обработки данных смотрите Политику конфиденциальности FastComments.
Частота пересмотра
Любая новая функция LTI, для которой потребуются дополнительные претензии, области или службы LTI Advantage, проходит ревью перед выпуском, чтобы подтвердить, что запрашиваемый доступ необходим и соразмерен реализуемой функции.
Короткое заявление для анкет по безопасности
FastComments applies least privilege and data minimization to its LTI 1.3 integration. The integration uses only the LTI launch claims required to authenticate the user (
sub,name,picture), determine their role, and identify the course and resource that comments belong to. FastComments does not request Names and Role Provisioning Services, Assignment and Grade Services, gradebook data, attendance, full rosters, or LMS administrative access. LMS administrators retain control over which org units, courses, and deployments the tool is available in.