
Dodajte komentare u svoj LMS putem LTI 1.3
FastComments se integriše sa bilo kojim LMS-om kompatibilnim sa LTI 1.3 - D2L Brightspace, Moodle, Blackboard Learn, Sakai, Schoology, i drugi - putem IMS LTI Dynamic Registration standarda. Jedan URL, koji se zalepi u ekran za registraciju vašeg LMS-a, povezuje celu integraciju: SSO, kontekst kursa, mapiranje uloga i postavljanje sadržaja. Nema plugina za instalaciju na vašem serveru. (Canvas LMS ima sopstveni vodič jer je njegov tok registracije drugačiji.)
Kada je registrovan, FastComments se pojavljuje kao Learning Tool unutar vaših kurseva. Studenti vide komentare u nitima i zajedničko ćaskanje pored sadržaja kursa, i automatski su prijavljeni svojim LMS nalogom.
Cene 
FastComments LTI 1.3 integracija je uključena u planove Flex i Pro bez dodatnih troškova.
Radi sa bilo kojim LMS-om koji podržava IMS LTI 1.3 Advantage specifikaciju, uključujući Dynamic Registration.
Brzi početak
- Prijavite se na FastComments i otiđite na vašu stranicu za konfiguraciju LTI 1.3.
- (Opcionalno) Izaberite platformu sa koje se povezujete iz padajućeg menija Platforma - to podešava prikazni naziv, ali Automatsko otkrivanje radi dobro.
- Kliknite Generiši URL. Pojaviće se jednokratni URL za registraciju (važi 30 minuta, za jednokratnu upotrebu).
- U vašem LMS-u otvorite ekran za dinamičku registraciju LTI 1.3 i nalepite URL u polje Tool initiation registration endpoint (ili ekvivalentno). Pošaljite.
- Vaš LMS poziva FastComments, razmenjuje ključeve i kreira integraciju. Iskočni prozor se sam zatvara kada se proces završi.
- Vratite se u FastComments — nova konfiguracija se pojavljuje u tabeli Postojeće konfiguracije. Alat je sada dostupan u vašim kursevima unutar LMS-a.
Podržane platforme
FastComments LTI 1.3 je testiran na:
- D2L Brightspace (bilo koja verzija sa LTI Advantage)
- Moodle 4.0+ (External Tool plugin, LTI Advantage)
- Blackboard Learn (SaaS i Ultra)
- Sakai (verzije sa podrškom za LTI Advantage)
- Schoology (Enterprise, Dynamic Registration gde je dostupno)
Bilo koji drugi LMS koji implementira IMS LTI 1.3 Advantage specifikaciju sa Dynamic Registration takođe bi trebalo da radi - izaberite Other LTI 1.3 platform iz padajućeg menija platforme kada generišete svoj URL za registraciju (preuzmite ovde).
Canvas LMS koristi drugačiji tok podešavanja (per-developer-key configuration JSON umesto Dynamic Registration). Pogledajte namenski vodič za instalaciju Canvas LMS-a.
Generisanje URL-a za registraciju
Idite na LTI 1.3 konfiguraciju
Prijavite se na FastComments i idite na vašu stranicu za LTI 1.3 konfiguraciju.
Ako vaš nalog još nema LTI pristup, videćete "LTI nije omogućen za ovaj nalog" - kontaktirajte podršku da ga omoguće na vašem planu.
Izaberite platformu (opciono)
Pod Generiši dinamički URL za registraciju, koristite padajući meni Platforma da kažete FastComments kojoj LMS platformi se povezujete:
- D2L Brightspace
- Moodle
- Blackboard Learn
- Sakai
- Schoology
- Druga LTI 1.3 platforma
Takođe možete ostaviti na Automatsko otkrivanje. Platforma se čita iz vašeg LMS-ovog openid-configuration tokom registracije; padajući meni samo postavlja oznaku koja će se prikazati za nastalu konfiguraciju.
Generišite URL
Kliknite Generiši URL. FastComments kreira jednokratni token za registraciju i prikaže vam URL koji izgleda ovako:
https://fastcomments.com/lti/v1p3/register/<long-token>
Kopirajte ga. Ovaj URL:
- Je za jednokratnu upotrebu - nakon što vaš LMS uspešno pozove URL, token se potroši.
- Ističe posle 30 minuta ako se ne iskoristi.
- Treba ga držati privatnim - svako ko ima URL može registrovati alat za vaš tenant u roku od tih 30 minuta.
Postojeće konfiguracije
Kada se registracija uspešno završi, nova konfiguracija se pojavljuje u tabeli Postojeće konfiguracije na istoj stranici, sa svojom Platformom, Issuer-om, Client ID-jem i Statusom. Možete izbrisati konfiguracije iz ove tabele ako ikada budete morali da se odregistrujete.
Registracija u D2L Brightspace
D2L Brightspace izlaže dinamičku registraciju kroz LTI Advantage administratorski interfejs. Trebaće vam administratorski pristup.
Otvorite ekran za registraciju
- Prijavite se u vašu Brightspace instancu kao administrator.
- Idite na Admin Tools > Manage Extensibility > LTI Advantage.
- Kliknite Register Tool. (Direktan URL je
https://<your-brightspace-host>/d2l/le/ltiadvantage/registrations/create.)
Zalepite URL
Videćete obrazac za registraciju. Ključno polje je Tool initiation registration endpoint (neke verzije Brightspace-a ga nazivaju "Tool Initiation Registration URL").
Zalepite FastComments registration URL (nabavite ga ovde) u to polje. Ostavite ostala polja prazna — FastComments će ih automatski popuniti tokom postupka razmene pri registraciji.
Kliknite Register.
Odobrite alat
Brightspace otvara skočni prozor koji komunicira sa FastComments, razmenjuje ključeve i prikazuje ekran za potvrdu. Skočni prozor se sam zatvara kada se registracija završi.
Novi alat će se pojaviti na listi LTI Advantage alata. Podrazumevano Brightspace označava nove alate kao disabled — prebacite prekidač na enabled da bi vaši kursevi mogli da ga koriste.
Dodajte deployment
U Brightspace-u, LTI alati zahtevaju deployment pre nego što mogu biti korišćeni u kursevima:
- Otvorite novo registrovani FastComments tool.
- Kliknite View Deployments > New Deployment.
- Dajte deployment-u ime (npr. "FastComments - All Courses"), izaberite organizacione jedinice u kojima treba da bude dostupan, i sačuvajte.
Nakon prvog pokretanja preko ovog deployment-a, FastComments prikači deployment_id na svoj zapis konfiguracije — naredna pokretanja iz drugog deployment-a u okviru istog klijenta biće odbijena osim ako se ponovo ne registrujete.
Registracija u Moodle
Koristite Moodle? Takođe objavljujemo poseban Moodle plugin za FastComments sa bližom integracijom nego LTI 1.3 (grade sync hooks, dublje izveštavanje aktivnosti, nativni Moodle interfejs za podešavanja). Pogledajte Vodič za instalaciju Moodle plugina. LTI 1.3 flow ispod je pravi izbor ako želite jedinstvenu registraciju koja pokriva i druge LMS-ove, ili ako vaš Moodle administrator neće instalirati dodatke trećih strana.
Moodle 4.0+ podržava LTI 1.3 Dynamic Registration kroz dodatak External Tool.
Otvorite ekran za upravljanje alatima
- Prijavite se u Moodle kao administrator sajta.
- Idite na Site administration > Plugins > Activity modules > External tool > Manage tools.
Nalepite URL
Videćete karticu označenu Tool URL. Nalepite URL za registraciju FastComments (preuzmite ga ovde) u tekstualno polje i kliknite Add LTI Advantage.
Moodle otvara ekran za registraciju koji prikazuje identitet alata i dozvole koje zahteva. Pregledajte i kliknite Activate (ili Register, u zavisnosti od verzije Moodla).
Iskakajući prozor se zatvara kada se registracija završi; novi FastComments alat pojavljuje se u listi Tools sa statusom Active.
Učinite ga dostupnim
Po defaultu Moodle dodaje nove alate na listu "Course tools" ali ih ne prikazuje u izborniku aktivnosti. Da biste omogućili FastComments na nivou kursa:
- Kliknite ikonu zupčanika na FastComments pločici.
- Ispod Tool configuration usage, izaberite Show in activity chooser and as a preconfigured tool.
- Sačuvajte.
Instruktori sada mogu dodati FastComments u bilo koji kurs putem Add an activity or resource > FastComments.
Registracija u Blackboard Learn
Blackboard Learn SaaS i Ultra podržavaju LTI 1.3 Dynamic Registration.
Otvorite ekran provajdera alata
- Prijavite se u Blackboard kao sistem administrator.
- Idite na Administrator Panel > Integrations > LTI Tool Providers.
- Kliknite Register LTI 1.3 / LTI Advantage Tool.
Ako vidite samo "Register LTI 1.1 Provider", vaša verzija Blackboard-a još ne podržava LTI 1.3 — nadogradite ili kontaktirajte Blackboard podršku.
Nalepite URL
Nalepite FastComments registration URL (preuzmite ovde) u polje Client ID / Registration URL (oznake se razlikuju po verziji). Pošaljite.
Blackboard obavlja registracioni handshake sa FastComments i prikazuje ekran za potvrdu.
Odobrite i omogućite
Blackboard označava novo registrovane alate kao Approved but excluded podrazumevano:
- Pronađite unos za FastComments na listi provajdera alata.
- Otvorite meni i izaberite Edit.
- Postavite Tool Status na Approved.
- U okviru Institution Policies, pregledajte koji se korisnički podaci šalju (name, email, role). Sačuvajte.
Alat je sada dostupan instruktorima kada dodaju sadržaj na kurseve.
Registracija u Sakai ili Schoology
Sakai
Sakai podržava LTI 1.3 Dynamic Registration na izdanjima koja imaju LTI Advantage. Iz Administration Workspace:
- Prijavite se kao Sakai administrator i otvorite Administration Workspace.
- Izaberite External Tools > Install LTI 1.3 Tool.
- Nalepite FastComments registration URL (preuzmite ovde) i pošaljite.
- Odobrite alat kada se handshake završi.
Alat će se potom pojaviti pod External Tools i mogu ga dodati održavaoci sajtova.
Schoology
Schoology Enterprise instance podržavaju LTI 1.3, ali dostupnost Dynamic Registration varira u zavisnosti od deploymenta. Obratite se svom Schoology account manageru.
Ako Dynamic Registration nije dostupna na vašoj Schoology instanci, moraćete da konfigurišete integraciju ručno koristeći sledeće endpoint-e:
- OIDC Login URL:
https://fastcomments.com/lti/v1p3/login - Target Link URL:
https://fastcomments.com/lti/v1p3/launch - Public Keyset URL (JWKS):
https://fastcomments.com/lti/v1p3/jwks - Redirect URLs:
https://fastcomments.com/lti/v1p3/launch
Nakon što vam Schoology dodeli Client ID i Deployment ID, kontaktirajte FastComments podršku da registrujete konfiguraciju na vašem tenant-u.
Other LTI 1.3 Platforms
Bilo koji LMS koji prati IMS LTI 1.3 Advantage spec trebalo bi da radi sa istim registration URL (preuzmite ovde). Potražite podešavanje označeno kao "Dynamic Registration", "Tool Registration URL", "Tool initiation registration endpoint", ili slično.
Ako vaša platforma podržava samo ručno podešavanje LTI 1.3, koristite četiri endpoint-a navedena u odeljku Schoology iznad i kontaktirajte podršku da finalizujete postupak.
Dodavanje u sadržaj kursa (D2L)
Ova stranica objašnjava kako dodati FastComments u Brightspace kurs nakon što je administrator registrovao alat i kreirao deployment. Ako alat još nije registrovan, prvo pogledajte D2L registration guide.
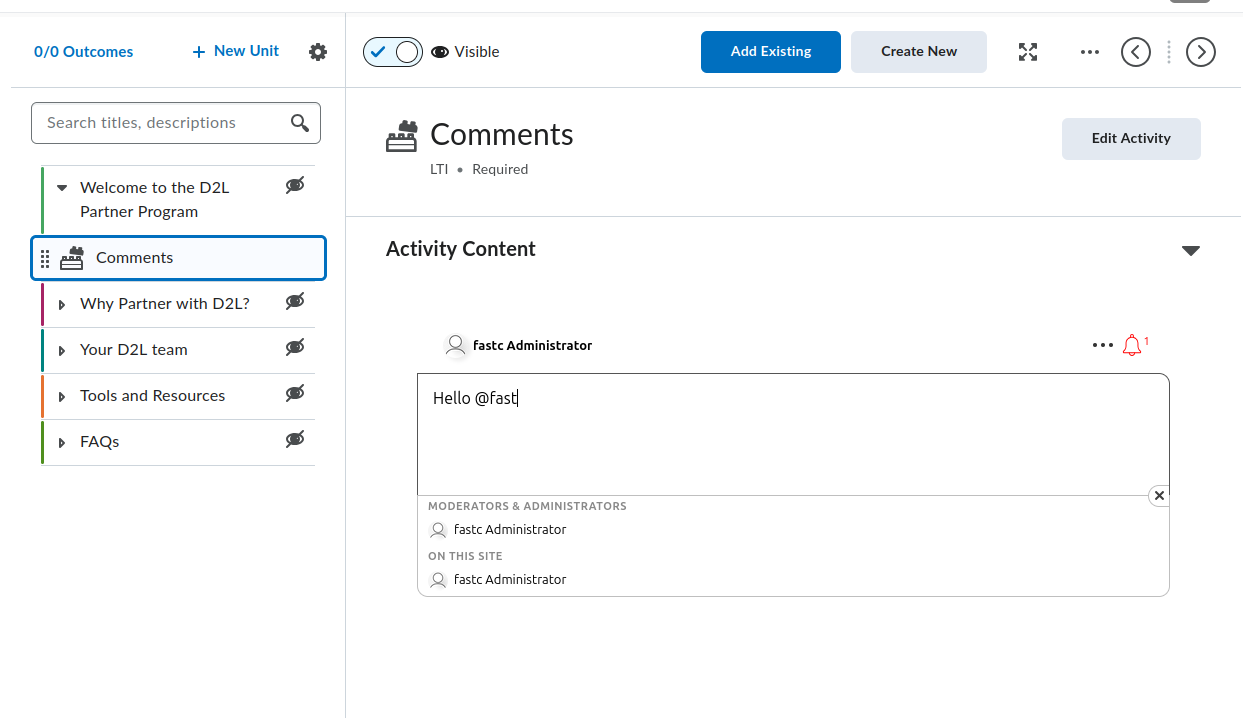
Brightspace nudi dva iskustva za kreiranje sadržaja: Classic Content i New Content Experience (takođe nazvan Lessons). Oba omogućavaju FastComments, ali putanje kroz menije se razlikuju. Svaki odeljak ispod pokriva oba slučaja gde se razlikuju.
Locate the FastComments Tool
FastComments alat se pojavljuje na dva mesta unutar editora sadržaja kursa:
- Activity picker, dostupan iz modula/jedinice preko dugmeta Add Existing (u starijim verzijama Brightspace označeno kao Add Existing Activities). U aktuelnim verzijama Brightspace, FastComments se pojavljuje direktno u pickeru; u starijim verzijama je ugnježden pod podmenijem External Learning Tools. Bilo koji od ova dva puta dodaje FastComments kao zasebnu temu.
- Insert Stuff dijalog unutar HTML editora, pod LTI Advantage. Ovo ugrađuje FastComments inline u HTML temu preko LTI deep linking procesa.
Ako se FastComments ne pojavljuje ni u jednom pickeru, deployment nije omogućen za org unit koji sadrži kurs. Zamolite Brightspace administratora da otvori Admin Tools > Manage Extensibility > LTI Advantage > FastComments tool > View Deployments, otvori deployment i doda org unit kursa (ili roditeljski org unit) pod Org Units.
Add FastComments as a Topic in a Module
Classic Content:
- Otvorite kurs i kliknite Content u navigacionom baru.
- Izaberite modul koji treba da sadrži diskusiju (ili kreirajte jedan preko Add a module).
- Kliknite Add Existing (stariji Brightspace: Add Existing Activities > External Learning Tools).
- U pickeru kliknite FastComments. Brightspace kreira temu u modulu i vraća vas u prikaz sadržaja.
- Kliknite novu temu. Preimenujte je u nešto opisno kao
FastComments Discussionkoristeći inline title editor.
New Content Experience (Lessons):
- Otvorite kurs i kliknite Content.
- Otvorite jedinicu i lesson koja treba da sadrži diskusiju.
- Kliknite Add > Existing Activity i izaberite FastComments (stariji Brightspace: ugnježdeno pod External Learning Tools).
- Aktivnost je dodata u lesson.
- Kliknite na naslov aktivnosti da biste je preimenovali.
Prvi put kada bilo koji korisnik (instruktor ili student) otvori temu, FastComments inicijalizuje thread za taj resource link. Thread je vezan za resource link ID, tako da preimenovanje ili premještanje teme ne menja koji se thread učitava.
Embed FastComments Inline in an HTML Topic
Koristite ovaj tok kada želite da komentari budu prikazani ispod teksta za čitanje, videa ili drugog sadržaja unutar iste stranice teme, umesto kao zasebna tema.
- Otvorite ili kreirajte HTML temu u modulu/lesson-u.
- Kliknite Edit HTML da otvorite Brightspace HTML editor.
- Postavite kursor na mesto gde treba da se pojavi thread komentara.
- Kliknite dugme Insert Stuff (ikona slagalice u toolbar-u editora).
- U Insert Stuff dijalogu, skrolujte do LTI Advantage i kliknite FastComments.
- FastComments otvara deep linking picker. Potvrdite pozicioniranje (podrazumevana podešavanja rade za sadržajne diskusije); kliknite Insert ili Continue.
- Brightspace se vraća u HTML editor sa placeholder blokom koji predstavlja LTI launch. Kliknite Save and Close na temi.
Kada se tema učita, Brightspace zamenjuje placeholder iframe-om koji automatski pokreće FastComments putem LTI. Studenti vide thread diskusije inline.
Jedna HTML tema može sadržavati više deep-linked FastComments embed-ova. Svaki embed dobija sopstveni thread jer svaki deep link proizvodi jedinstven resource link ID.
Module Topic vs Inline Quicklink
Izaberite pristup module topic kada:
- Diskusija predstavlja glavnu aktivnost za taj korak u modulu.
- Želite da tema bude vidljiva u Brightspace tabeli sadržaja, praćenju završetka i Class Progress.
Izaberite pristup inline embed kada:
- Komentari treba da se nalaze ispod drugog sadržaja na istoj stranici.
- Ne želite zaseban element koji se prati u tabeli sadržaja za praćenje završetka.
Visibility, Draft, and Release Conditions
Nova FastComments tema je podrazumevano vidljiva studentima. Da je sakrijete dok je podešavate:
- U editoru sadržaja kliknite naslov teme (Classic) ili meni sa tri tačke na aktivnosti (New Content Experience).
- Podesite status na Draft (Classic) ili isključite Visibility (New Content Experience).
Draft teme su nevidljive studentima. Instruktori i TA i dalje ih vide sa "Draft" značkom.
Da ograničite temu na određenu grupu ili sekciju:
- Otvorite temu.
- Kliknite meni naslova teme > Edit Properties In-place (Classic) ili Edit > Restrictions (New Content Experience).
- Pod Release Conditions, kliknite Create.
- Izaberite Group enrollment ili Section enrollment, odaberite grupu/sekciju i sačuvajte.
Release conditions se nadovezuju na FastComments sopstveni role mapping. Studenti koji ne mogu da vide temu neće dobiti LTI launch.
What Students See on First Launch
Kada student klikne temu (ili učita HTML temu sa embed-om):
- Brightspace izvršava LTI 1.3 launch u pozadini.
- FastComments prima studentovo ime, e‑mail, URL avatara i LMS ulogu, i automatski ga prijavljuje. Nema FastComments zahteva za prijavu.
- Thread komentara za taj resource link se prikazuje unutar Brightspace iframe-a.
Role mapping pri launch-u:
- Brightspace
Administratorpostaje FastComments admin za thread (puna moderacija, brisanje, ban i pristup konfiguraciji). - Brightspace
Instructorpostaje FastComments moderator (pin, hide, delete, ban). - Sve ostale uloge (
Learner,TeachingAssistant, itd.) postaju standardni komentatori.
Komentari su pripisani studentovom Brightspace nalogu. Ako student izmeni svoje ime ili avatar u Brightspace-u, sledeći LTI launch sinhronizuje promenu.
Lock Down Public Access (Recommended)
Po podrazumevanju, FastComments podaci komentara su javno čitljivi. Bilo ko ko pogodi URL thread-a ili API endpoint može videti komentare, čak i izvan Brightspace-a. Za diskusije u kursevima gotovo sigurno želite ograničiti pregled samo na upisane polaznike.
Otvorite svoju stranicu za prilagođavanje widget-a i kreirajte pravilo sa omogućenom opcijom Require SSO To View Comments, zatim postavite nivo bezbednosti na Secure SSO tako da se thread-ovi mogu učitavati samo preko potpisanog LTI launcha.
Pogledajte Protecting Comment Threads With Single-Sign-On za kompletan vodič, uključujući kako da ograničite pravilo na jedan domen ili stranicu.
Iframe Height and Resize
FastComments emituje org.imsglobal.lti.frameResize postMessage pri svakom renderovanju threada i pri promenama sadržaja (novi komentar, proširi odgovore). Brightspace osluškuje ovu poruku i prilagođava visinu iframe-a tako da thread nije isečen i da se ne prikazuje unutrašnji scrollbar.
Ako iframe ostaje fiksno niske visine:
- Potvrdite da je kurs učitan preko HTTPS-a. Brightspace-ov postMessage listener odbacuje mixed-content frame-ove.
- Potvrdite da nijedno proširenje pregledača ne blokira postMessage kanal.
- Za inline embed-ove u HTML temi, okolni HTML ne sme da omota iframe unutar kontejnera fiksne visine. Uklonite bilo koji inline
style="height: ..."sa roditeljskog elementa.
Brightspace-Specific Gotchas
Tool not showing in the Add Existing picker. Deployment nije omogućen za org unit ovog kursa. Administrator treba da doda org unit (ili roditelja) u deployment-ovu listu Org Units. Sama registracija alata nije dovoljna; deployment određuje koji kursevi vide alat.
deployment_id mismatch on launch. FastComments TOFU-zakucava prvi deployment_id koji vidi za registraciju. Ako administrator obriše originalni deployment i kreira novi, launch-ovi sa novog deployment-a će biti odbijeni sa greškom neslaganja deployment-a. Rešenje je ponovo registrovati FastComments (generišite novu registration URL (get it here) i ponovo pokrenite Dynamic Registration); stari zapis konfiguracije će biti zamenjen.
Tool launches but shows "Invalid LTI launch". Kurs se nalazi u drugoj tenant/organizacijskoj strukturi nego što deployment pokriva, ili je deployment onemogućen nakon registracije. Ponovo proverite Admin Tools > Manage Extensibility > LTI Advantage > FastComments > Enabled prekidač i listu org unit-a za deployment.
Names and roles missing inside FastComments. Brightspace šalje LTI launcheve sa Names and Role Provisioning Services (NRPS) claim-ovima. Ako je kurs nadograđen sa starijeg LTI 1.1 linka, launch može da nema name i email claim-ove. Ponovo dodajte FastComments temu preko Add Existing (nemojte migrirati stari link) tako da launch koristi LTI 1.3.
Embed shows a login screen instead of auto-SSO. HTML tema je ubačena kao plain <iframe> koji pokazuje direktno na FastComments umesto putem Insert Stuff > LTI Advantage. Plain iframe-ovi preskaču LTI launch i korisnici dospeju na javnu FastComments stranicu. Obrišite taj iframe i ponovo ubacite putem Insert Stuff toka.
Dodavanje u sadržaj kursa (Moodle)
Ovaj vodič objašnjava dodavanje FastComments u Moodle 4.x kurs nakon što je administrator sajta registrovao alat i postavio da se prikazuje u izboru aktivnosti. Ako FastComments još nije registrovan, prvo pogledajte vodič za registraciju Moodlea.
Open the Course in Edit Mode
- Prijavite se u Moodle kao Editing Teacher (ili viši) za taj kurs.
- Otvorite kurs.
- Uključite Edit mode koristeći prekidač u gornjem desnom uglu zaglavlja kursa.
Moodle 4.x je zamenio stari padajući meni "Add an activity or resource" koji je koristio 3.x punoprekrivačkim dijalogom za izbor aktivnosti. Moodle 4.5 zadržava isti izbor, ali dodaje red sa zvezdicama/omiljenim na vrhu, tako da zakačivanje FastComments-a jednom olakšava pristup u kasnijim odeljcima.
Add the FastComments Activity
- Skrolujte do odeljka kursa (tema ili nedelja) gde diskusija pripada.
- Kliknite Add an activity or resource na dnu tog odeljka.
- U dijalogu za izbor izaberite FastComments. Ako ga ne vidite, pređite na odeljak sa problemima ispod.
Otvara se forma za podešavanja aktivnosti. Polja koja su bitna:
- Activity name (required). Prikazuje se na stranici kursa i u gradebook-u. Primer:
Week 3 Discussion. - Activity description. Opcioni uvodni tekst koji se prikazuje iznad niti komentara.
- Show description on course page. Označite ako želite da opis bude vidljiv bez otvaranja aktivnosti.
- Preconfigured tool. Podesite na
FastComments(automatski izabrano kada se pokreće iz izbornika). Nemojte menjati. - Launch container. Podesite na New window. Pogledajte odeljak sa problemima da biste razumeli zašto "Same window" ponekad pravi problem u nekim Moodle instalacijama.
- Tool URL, Public key, Shared secret, Custom parameters. Ostavite prazno. Dynamic Registration je ovo rešio na nivou sajta.
Skrolujte na dno i kliknite Save and return to course (ili Save and display da odmah otvorite aktivnost).
Aktivnost se pojavljuje kao red u odeljku sa FastComments ikonom. Studenti kliknu red da otvore nit komentara.
Embed FastComments Inline with the Editor
Za nit unutar Page, Book poglavlja, Lesson-a ili bilo kog drugog resursa koji koristi Atto ili TinyMCE editor:
- Otvorite resurs u režimu uređivanja.
- Postavite kursor na mesto gde treba da se pojavi nit.
- U traci alata editora kliknite dugme LTI / External tool. U Atto-u je označeno kao "Insert LTI Advantage content". U TinyMCE (podrazumevano u Moodle 4.3+) nalazi se u meniju More kao External tools.
- Izaberite FastComments iz liste alata.
- FastComments otvara picker za deep-linking. Potvrdite naslov niti i kliknite Embed.
- Editor ubacuje LTI placeholder blok. Sačuvajte resurs.
Svaka ugrađena instanca predstavlja posebnu nit koja je identifikovana deep-link content item ID-jem, tako da Page sa tri FastComments ugrađivanja ima tri nezavisne niti.
Restrict Access and Group Settings
Standardna Moodle podešavanja aktivnosti važe i za FastComments aktivnosti:
- Common module settings > Group mode. Podesite li ovo na Separate groups ili Visible groups ne deli automatski FastComments na niti po grupama. Moodle-ov group mode samo filtrira gradebook i listu članova. Da biste imali posebnu nit po grupi, dodajte po jednu FastComments aktivnost za svaku grupu i koristite Restrict access da ograničite svaku od njih.
- Restrict access > Add restriction. Podržava standardne Moodle uslove: Date, Grade, Group, Grouping, User profile, i ugnježdene skupove ograničenja. Koristite Group da zaključate FastComments aktivnost za jednu grupu.
- Activity completion. Podesite na Students must view this activity to complete it ako želite praćenje izvršenja aktivnosti. FastComments trenutno ne šalje događaj o izvršenju nazad u Moodle osim prilikom launch-a.
Role Mapping
FastComments čita LTI roles claim koji Moodle šalje pri svakom launch-u i mapira ga na sledeći način:
- Moodle Manager ili Site administrator -> FastComments admin
- Moodle Editing teacher ili Non-editing teacher -> FastComments moderator
- Moodle Student -> FastComments commenter
- Moodle Guest -> samo za čitanje
Administratori mogu da brišu bilo koji komentar, zabrane korisnike i uređuju podešavanja niti. Moderatori mogu da brišu i odobravaju komentare unutar niti u koju su pokrenuti. Prilagođene Moodle uloge nasleđuju mapiranje arhetipa od kojeg su klonirane.
What Students See
Studenti kliknu FastComments aktivnost (ili skroluju do ugrađenog bloka unutar Page ili Book). Moodle im šalje identitet FastComments putem LTI launch-a:
- Nema ekrana za prijavu. FastComments ih prijavljuje koristeći Moodle nalog.
- Njihovo prikazno ime, email i avatar dolaze iz Moodlea.
- Nit je ograničena na
(Moodle site, course, resource link ID), tako da ista aktivnost duplicirana u drugom kursu dobija novu nit. - Threaded odgovori, glasanje i notifikacije rade isto kao i u samostalnoj FastComments niti.
Lock Down Public Access (Recommended)
Po defaultu, FastComments podaci o komentarima su javno čitljivi. Svako ko pogodi URL niti ili API endpoint može videti komentare, čak i van Moodlea. Za diskusije u kursu gotovo sigurno želite da ograničite pregled samo na upisane studente.
Otvorite svoju widget customization page i kreirajte pravilo sa omogućenom opcijom Require SSO To View Comments, zatim postavite nivo bezbednosti na Secure SSO tako da niti mogu da se učitavaju samo preko potpisanog LTI launch-a.
Pogledajte Protecting Comment Threads With Single-Sign-On za kompletan vodič, uključujući kako da ograničite pravilo na jednu domenu ili stranicu.
Moodle Gotchas
FastComments missing from the activity chooser. Administrator sajta je registrovao alat, ali nije postavio Tool configuration usage na Show in activity chooser and as a preconfigured tool. Ispravite to pod Site administration > Plugins > Activity modules > External tool > Manage tools > ikonica zupčanika na FastComments pločici.
Launch fails or shows a blank frame when set to "Same window". Moodle sesione kolačiće podrazumevano postavlja sa SameSite=Lax, i neki pregledači ih uklanjaju pri cross-site POST zahtevu koji LTI 1.3 koristi za povratak iz FastComments-a. Podesite Launch container na New window za aktivnost. Ovo je striktan zahtev za ugrađeni FastComments unutar Page ili Book, jer putanja pokretanja iz editora uvek otvara novi prozor.
The iss claim is the Moodle site URL, not a tenant ID. FastComments koristi Moodle site URL (vrednost wwwroot u konfiguraciji) kao LTI issuer. Ako vaš Moodle premesti na novi domen ili promenite wwwroot, postojeće FastComments niti ostaju vezane za stari issuer i neće se poklapati sa novim launch-evima. Ponovo registrujte alat za novi URL i po potrebi migrirajte niti kroz FastComments administraciju.
Activity backup and restore. Pravljenje backup-a kursa i njegovo vraćanje u novi kurs kreira nove resource link ID-je, tako da obnovljene FastComments aktivnosti počinju sa praznim nitima. Originalni kurs zadržava originalne niti. Ovo je očekovano ponašanje, a ne greška.
Moodle 4.5 TinyMCE default. Moodle 4.5 dolazi sa TinyMCE kao podrazumevanim editorom za nove instalacije. Dugme External tool se nalazi u meniju More (...) umesto u glavnoj traci. Stariji sajtovi koji su nadograđeni sa 4.1 zadržavaju Atto osim ako administrator nije promenio podrazumevano.
Dodavanje u sadržaj kursa (Blackboard)
Kada je administrator registrovao FastComments kao LTI 1.3 Advantage alat i odobrio politike institucije, nastavnici ga dodaju u kurseve kroz standardne Blackboard tačke za postavljanje. Tačni koraci se razlikuju između Ultra Course View i Original Course View, pa su oba opisana ispod.
Ultra Course View
Ultra Course View je podrazumevani u Blackboard Learn SaaS od 2026.
- Otvorite kurs i idite na stranicu Course Content.
- Pređite mišem ili dodirnite mesto u strukturi gde želite da se nalepi nit komentara i kliknite ljubičasti + (Add content) dugme.
- Izaberite Content Market. Panel Content Market prikazuje svaki odobreni LTI alat i Building Block postavljanje za vašu instituciju.
- Pronađite pločicu FastComments i kliknite je. Blackboard kreira sadržaj na poziciji gde ste otvorili + meni.
- Stavka se po podrazumevanju pojavljuje u strukturi kao unos „Visible to students“ za nastavnike koji imaju ličnu podrazumevanu opciju Hide from students isključenu. Ako vam je podrazumevano Hidden, stavka se kreira kao skrivena i uključite selektor vidljivosti na redu stavke kada budete spremni.
- Da preimenujete stavku, kliknite naslov u strukturi i unesite novu oznaku. Naslov koji studenti vide u strukturi je nezavistan od FastComments identifikatora niti, tako da je bezbedno preimenovati u bilo kom trenutku.
Ako ne vidite Content Market kao opciju, vaša institucija ima to postavljanje sakriveno. Isti izbornik takođe možete otvoriti kroz More tools u istom + meniju pod grupom LTI Tools.
Original Course View
Original Course View je i dalje podržan u Learn SaaS i ostaje primarno iskustvo za samohostovane Learn 9.1 sajtove na Q4 2024 CU liniji izdanja.
- Otvorite kurs i uđite u Content Area (na primer, podrazumevani Information ili Content deo u meniju kursa).
- Uključite Edit Mode pomoću prekidača u gornjem desnom uglu stranice.
- Kliknite Build Content u traci sa akcijama.
- U podmeniju Learning Tools, kliknite FastComments. Podmeni Learning Tools popunjava se iz LTI 1.3 postavljanja alata nakon što administrator registruje alat. Ako ga ne vidite, pogledajte odeljak o problemima ispod.
- Na formi Create FastComments podesite:
- Name: oznaka koju studenti vide u sadržajnoj oblasti.
- Description: opcioni tekst koji se prikazuje iznad ugrađene niti.
- Permit Users to View this Content: prekidač za dostupnost Da/Ne.
- Track Number of Views: omogućite ako želite Blackboard statistiku pregleda po stavci. FastComments vodi sopstvenu analitiku nezavisno.
- Date and Time Restrictions: opcioni okviri Display After / Display Until.
- Potvrdite. Alat se pojavljuje kao klikabilna stavka u sadržajnoj oblasti.
Ugradnja unutar stavke ili dokumenta
U oba prikaza kursa, nastavnici ugrađuju FastComments inline unutar tela stavke, dokumenta ili bilo kog rich-text polja preko Content Editor-ovog LTI Advantage dugmeta.
Ultra Course View:
- Kreirajte ili izmenite Document.
- Kliknite Add content unutar tela dokumenta gde želite da se nit pojavi.
- U alatnoj traci editora, otvorite meni Insert content i kliknite Content Market (ulazna tačka za LTI Advantage / Deep Linking).
- Izaberite FastComments. FastComments vraća deep-link payload i Blackboard umeće ugrađeni blok u telo dokumenta na poziciju kursora.
- Sačuvajte dokument. Studenti vide nit prikazanu inline dok skroluju pored nje.
Original Course View:
- Izmenite bilo koju stavku sa rich-text telom.
- U alatnoj traci Content Editora, kliknite ikonu plus Add Content i izaberite Content Market (označeno kao Add Content from External Tool u starijim Q4 2024 CU izdanjima).
- Izaberite FastComments. Editor umeće rezervisani blok koji referencira deep-linked resurs.
- Predajte stavku.
Svaki deep-link embed proizvodi sopstvenu FastComments nit, tako da stavka sa dva ugrađena FastComments bloka ima dva nezavisna toka komentara.
Vidljivost, uslovi objavljivanja i ograničenja grupa
FastComments sadržajne stavke se ponašaju kao i bilo koja druga Blackboard sadržajna stavka u pogledu pravila pristupa koja se primenjuju na njih.
- Ultra: kliknite selektor vidljivosti na redu (Visible to students, Hidden from students, Conditional availability). Conditional availability podržava vremenske prozore, pravila zasnovana na performansama u odnosu na stavke u gradebook-u i pravila članstva u odnosu na grupe kursa.
- Original: otvorite kontekst meni stavke i izaberite Adaptive Release ili Adaptive Release: Advanced da ograničite alat po datumu, članstvu, oceni ili statusu pregleda. Koristite Set Group Availability na stavci da ograničite pristup na određene grupe kursa.
FastComments poštuje šta god Blackboard-ova kontrola odluči. Ako Blackboard sakrije stavku od studenta, LTI pokretanje nikada ne ide za tog studenta i on se ne pojavljuje u prikazu moderatora.
Ponašanje u Gradebook-u
FastComments ne izveštava ocene nazad preko LTI Advantage Assignment and Grade Services. Ni jedan kolona za ocene se automatski ne kreira za FastComments sadržajne stavke.
Ako je vaš Blackboard tenant konfigurisan da automatski kreira kolonu u gradebook-u za svaku novu stavku bez obzira na metapodatke za ocenjivanje, prazan kolona će se ipak pojaviti. Da ga sakrijete:
- Ultra: otvorite Gradebook, kliknite zaglavlje kolone, izaberite Edit, i isključite Show to students i Include in calculations. Ili koristite Delete ako vaša institucija dozvoljava brisanje kolona za neocenjene stavke.
- Original: otvorite Grade Center, kliknite chevron kolone, izaberite Hide from Users (on/off), i po potrebi Hide from Instructor View pod Column Organization.
Šta studenti vide
Kada student otvori FastComments stavku ili skroluje do ugrađenog bloka:
- Blackboard pokreće LTI 1.3 poruku ka FastComments. Student se prijavljuje putem SSO koristeći svoj Blackboard identitet (ime, email, avatar, uloga) bez prikaza forme za prijavu.
- Nit komentara se prikazuje u iframe-u. Threading, odgovori, pominjanja i reakcije su svi dostupni u zavisnosti od podešavanja komentarskog widgeta konfigurisanog u FastComments.
- Njihovi komentari su pripisani njihovom Blackboard nalogu. Ako student kasnije izmeni svoje ime ili fotografiju u Blackboard-u, sledeće pokretanje ažurira FastComments profil.
Mapiranje uloga iz Blackboard-a u FastComments:
- System Administrator i Course Builder mapiraju se na FastComments admin.
- Instructor i Teaching Assistant mapiraju se na FastComments moderator.
- Student, Guest, i Observer mapiraju se na FastComments commenter.
Moderatori vide kontrole moderacije (pin, hide, ban, delete) inline na svakom komentaru u niti.
Ograničite javni pristup (preporučeno)
Po podrazumevanju, podaci komentara u FastComments su javno čitljivi. Bilo ko ko pogodi URL niti ili API endpoint može videti komentare, čak i izvan Blackboard-a. Za diskusije na kursu gotovo sigurno želite da ograničite pregled samo na upisane studente.
Otvorite vašu stranicu za prilagođavanje widgeta i napravite pravilo sa uključenim Require SSO To View Comments, zatim postavite nivo bezbednosti na Secure SSO tako da se niti mogu učitavati samo kroz potpisano LTI pokretanje.
Pogledajte Protecting Comment Threads With Single-Sign-On za pun vodič, uključujući kako da ograničite pravilo na jedan domen ili stranicu.
Opseg niti
FastComments opseg svake niti određuje po (Blackboard host, course ID, resource link ID). Dve FastComments stavke u istom kursu proizvode dve niti. Ista stavka kopirana u dve školjke kursa (na primer, kroz kopiju kursa) proizvodi dve niti, jer Blackboard izdaje novi resource link ID tokom kopije. Da biste zadržali zajedničku nit preko kopija kursa, koristite Deep Linking sa eksplicitnim thread URN-om konfiguriranim u FastComments pre pokretanja kopije.
Blackboard-specifični problemi
FastComments pločica nedostaje u meniju Build Content (Original) ili Content Market (Ultra). Administrator je odobrio alat ali je ostavio institucionalnu politiku koja blokira odgovarajuće postavljanje. Idite na Administrator Panel > Integrations > LTI Tool Providers, izmenite FastComments unos i potvrdite da su omogućena postavljenja Course Content Tool (Original) i Course Content Tool - allow students / Deep Linking content tool (Ultra). Sačuvajte i osvežite stranicu kursa.
Greška "Tool not configured for this context" ili "Tool is not deployed" prilikom pokretanja. Opseg deployment-a registrovan tokom dinamičke registracije ne odgovara institucionalnom kontekstu kojem kurs pripada. U Blackboard-ovom unosu za provider alata, proverite da li se Deployment ID poklapa sa onim što FastComments prikazuje na svojoj LTI 1.3 Configuration stranici za ovog tenant-a. Ako se razlikuju, izbrišite postavljanje i ponovo pokrenite dinamičku registraciju sa svežim registracionim URL-om (nabavite ga ovde).
Visina iframe-a izgleda fiksno ili se sadržaj seče. Neki Blackboard tenanti koriste strogu Content Security Policy koja blokira podrazumevano LTI iframe-resize postMessage. FastComments emituje i Canvas-stil lti.frameResize poruku i IMS spec-formu org.imsglobal.lti.frameResize poruku kako bi se maksimizirala kompatibilnost, ali tenant-nivo CSP override blokira parent listener. Zamolite vašeg administratora da potvrdi da je *.fastcomments.com na allowlisti LTI alata i da nijedan prilagođeni CSP header ne uklanja postMessage događaje. Nakon toga resize funkcioniše bez dodatne konfiguracije.
Kopija kursa duplira niti. Blackboard copy kursa izdaje nove resource link ID-jeve za LTI postavke, pa kopirani kursevi počinju sa praznim nitima. To je očekivano. Ako želite da kopirani kurs nasledi originalnu nit, podesite Deep Linking sa eksplicitnim thread URN-om pre kopiranja, ili kontaktirajte FastComments podršku da remapiraju ID-jeve niti u bulk-u.
Student vidi generičku Blackboard grešku prilikom pokretanja. Uzrok je nedostajući ili zastareli email claim. Potvrdite da institucijska politika za FastComments ima omogućeno Role, Name, i Email Address pod User Fields to Send. Sačuvajte, zatim ponovo pokrenite u novoj sesiji pregledača.
Dodavanje u sadržaj kursa (Sakai ili Schoology)
Nakon što je FastComments registrovan na platformi, instruktori ga dodaju u sadržaj kursa koristeći standardne tokove za eksterne alate platforme. Ova stranica pokriva Sakai 23.x i Schoology Enterprise.
Zaključajte javni pristup (preporučeno)
Po defaultu, FastComments podaci o komentarima su javno čitljivi na obe platforme. Bilo ko ko pogodi URL niti ili API endpoint može videti komentare, čak i van Sakai ili Schoology. Za diskusije na kursevima gotovo sigurno želite ograničiti pregled samo na upisane studente.
Otvorite svoju stranicu za prilagođavanje vidžeta i kreirajte pravilo sa omogućenim Require SSO To View Comments, zatim postavite nivo bezbednosti na Secure SSO tako da se niti mogu učitavati samo kroz potpisano LTI pokretanje.
Pogledajte Zaštita niti komentara pomoću Single-Sign-On za kompletan vodič, uključujući kako da ograničite pravilo na jedini domen ili stranicu.
Sakai
1. Dodajte FastComments na sajt
Održavalac sajta omogućava alat na nivou pojedinačnog sajta:
- Otvorite sajt i kliknite Site Info u levom meniju.
- Kliknite Manage Tools.
- Skrolujte do liste External Tools i uključite FastComments.
- Kliknite Continue, pregledajte listu alata, zatim kliknite Finish.
FastComments se sada pojavljuje kao stavka u levom meniju na sajtu.
2. Promena redosleda stavke u levom meniju
Idite na Site Info > Tool Order. Prevucite FastComments na željenu poziciju i kliknite Save. Takođe možete promeniti naziv stavke u meniju i sakriti je od studenata sa ovog ekrana.
3. Umetanje unutar stranice Lessons
Da biste postavili FastComments direktno unutar stranice Lessons umesto kao samostalan alat u levom meniju:
- Otvorite alat Lessons na sajtu.
- Kliknite Add Content > Add External Tool.
- Selektujte FastComments sa liste.
- Ako je FastComments tokom registracije oglasio Deep Linking, Sakai otvara alat za izbor sadržaja tako da možete izabrati ili označiti nit. Ako Deep Linking nije oglašen, Sakai umeće podrazumevani link za pokretanje.
- Sačuvajte stavku u Lessons.
Svaka ugrađena instanca dobija sopstvenu nit, ograničenu na taj resursni link.
4. Podešavanja dozvola za pristup studenata
Sakai kontroliše pokretanja eksternih alata preko Realms. Da potvrdite da studenti mogu pokrenuti FastComments:
- Prijavite se kao Sakai admin i otvorite Administration Workspace > Realms.
- Otvorite odgovarajući realm (na primer,
!site.template.courseili specifični realm sajta). - Potvrdite da
accessuloga ima omogućenolti.launchi da su role permissions u grupi external.tools dodeljene. - Sačuvajte realm.
Za prepiske na nivou sajta, održavalac može podesiti vidljivost alata po ulozi iz Site Info > Tool Order tako što će sakriti ili prikazati FastComments po ulozi.
5. Šta studenti vide
Studenti kliknu na FastComments stavku u levom meniju (ili se skroluju do ugrađenog bloka u Lessons) i dolaze direktno u prikaz niti komentara. SSO je automatski: Sakai šalje identitet korisnika u LTI pokretanju i FastComments ih prijavljuje pod njihovim Sakai nalogom.
Role mapping:
- Sakai
Instructor-> FastComments moderator - Sakai
Admin(admin u Administratorskom radnom prostoru) -> FastComments administrator - Sakai
Student/access-> FastComments komentator
6. Mogući problemi u Sakai-u
- Alat nije vidljiv u Manage Tools. Ako se FastComments ne pojavljuje u listi External Tools, Sakai admin treba da otvori registar alata (Administration Workspace > External Tools > FastComments) i postavi Stealthed na
false. Stealthed alati su skriveni iz izbora za upravljanje alatima po sajtu. - Prekidanja pokretanja u pregledačima sa deljenom sesijom. Sakai-jev portal CSRF token je vezan za sesiju pregledača. Ako je student prijavljen na dva Sakai sajta u različitim tabovima ili ima zastarelu sesiju, pokretanje vraća 403. Rešenje: zatvorite druge Sakai tabove, odjavite se, ponovo se prijavite i ponovo pokrenite. Admini takođe mogu povećati
sakai.csrf.token.cache.ttlako se ovo dešava u klasteru. - Ugradnja u okviru (frame). Potvrdite da je
lti.frameheightusakai.propertiesdovoljno velik (600 ili više) kako nit komentara ne bi bila isečena unutar stranice Lessons.
Schoology
Schoology Enterprise ima dva scenarija instalacije. Potvrdite koji se primenjuje pre nego što dodate alat u kurs.
1. Dva scenarija instalacije
- (a) Instalacija na nivou preduzeća. Schoology System Administrator je instalirao FastComments na nivou organizacije i dodelio ga svim kursevima ili specifičnim šablonima kurseva. Instruktori preskaču instalaciju i idu direktno na "Add Materials".
- (b) Samostalna instalacija od strane instruktora. Instruktor instalira alat u pojedinačni kurs iz Course Options > External Tools > Install LTI Apps. Samostalna instalacija zahteva da je System Administrator prethodno odobrio FastComments aplikaciju na nivou organizacije.
2. Dodajte FastComments kao materijal za kurs
Unutar kursa:
- Otvorite kurs i idite na Materials.
- Kliknite Add Materials > Add File/Link/External Tool.
- Izaberite External Tool.
- Selektujte FastComments sa liste registrovanih alata.
- Postavite Name (ovo je ono što studenti vide u listi materijala) i opcioni Description.
- Ostavite Enable Grading (grade passback) OFF. FastComments ne šalje ocene nazad u Schoology, pa uključivanje slanja ocena pravi prazan stupac u knjizi ocena.
- Kliknite Submit.
Materijal se sada pojavljuje u listi materijala kursa i otvara FastComments nit kada se klikne.
3. Inline ugrađivanje putem Rich Text editora
Ako je System Administrator omogućio Deep Linking placement za FastComments tokom registracije, instruktori mogu ugraditi nit komentara unutar bilo kog Rich Text polja (instrukcije zadatka, tela stranica, razgovorne teme):
- Otvorite Rich Text editor na ciljnoj stranici.
- Kliknite ikonu External Tool (ikona slagalice) u traci sa alatkama.
- Izaberite FastComments.
- Konfigurišite ugradnju u dijalogu za deep-linking i kliknite Insert.
- Sačuvajte stranicu.
Ako dugme External Tool nije vidljivo u Rich Text editoru, Deep Linking je onemogućen za ovaj alat na ovom tenant-u. Pogledajte niže navedene probleme.
4. Vidljivost i dodela po sekcijama
Schoology ograničava dostupnost alata po sekcijama kroz Course Options:
- Iz kursa, kliknite Course Options > External Tools.
- Za svaku instaliranu LTI aplikaciju, kontrolišete da li je dostupna svim sekcijama u kursu ili samo određenim sekcijama.
- Da ograničite FastComments na određene sekcije, odčekirajte sekcije koje ne bi trebalo da vide alat.
- Pristup po sekcijama takođe kontroliše koje sekcije vide unos Add Materials > External Tool za FastComments.
5. Šta studenti vide
Studenti kliknu na FastComments materijal (ili se skroluju do inline ugradnje) i dolaze u nit diskusije. SSO je automatski putem Schoology LTI pokretanja pod njihovim Schoology nalogom.
Role mapping:
- Schoology
Administrator-> FastComments administrator - Schoology
Instructor-> FastComments moderator - Schoology
Student-> FastComments komentator
6. Mogući problemi u Schoology-u
- Samo za Enterprise. Lični i besplatni Schoology nalozi ne mogu instalirati LTI 1.3 alate. Ako je vaš tenant na besplatnom nivou, opcija External Tools je odsutna iz Course Options. Nadogradite na Schoology Enterprise da biste koristili FastComments.
- Deep Linking onemogućen po defaultu za tenant. Neki Schoology tenant-i ograničavaju Deep Linking placement na nivou organizacije. Kada je to slučaj, instruktori vide samo tok Add Materials > External Tool, a ne dugme External Tool u Rich Text editoru. Da biste omogućili inline ugradnju, System Administrator ide na System Settings > Integration > LTI 1.3 > FastComments i uključuje Content Item / Deep Linking placement, zatim sačuva.
- Preklapanje dodele po sekcijama. Ako je FastComments dodeljen na nivou preduzeća, ali instruktor ne može da ga vidi u Add Materials, sekcija kursa je isključena u dodeli na nivou organizacije. Zamolite System Administrator-a da doda sekciju u dodelu FastComments aplikacije.
- Naziv materijala naspram identiteta niti. Preimenovanje materijala u Schoology ne pomera nit komentara. Niti su vezane za LTI resource link ID, tako da preimenovanje zadržava istu nit; brisanje i ponovno kreiranje materijala stvara novu, praznu nit.
Otklanjanje problema
"Token za registraciju nije pronađen, istekao je ili je već iskorišćen"
Token u vašem registracionom URL-u (get it here) važi 30 minuta i može se iskoristiti samo jednom. Ako je vaš LMS potrošio više vremena od toga, ili je registracija ponovljena nakon uspeha, token će biti odbijen. Generišite novi URL na FastComments LTI 1.3 Configuration stranici i počnite ispočetka.
"Platform rejected registration"
Vaš LMS je odbio registracioni handshake. Najčešći uzroci:
- Tool already registered with the same client name. Neke platforme (posebno D2L) odbijaju drugu registraciju "FastComments" dok prethodna nije izbrisana. Uklonite stari alat u vašem LMS-u, zatim pokušajte ponovo.
- Wrong field in the LMS. Uverite se da ste zalepili URL u polje registration / tool initiation registration endpoint, a ne u polje launch URL ili login URL.
- The LMS doesn't actually support Dynamic Registration. Starije verzije Moodle-a i Blackboard-a oglašavaju LTI 1.3, ali dozvoljavaju samo ručnu konfiguraciju. Proverite dokumentaciju vaše platforme.
"Failed to fetch platform configuration"
FastComments nije mogao da pročita openid-configuration dokument vašeg LMS-a. Ovo je retko i obično znači da je LMS obezbedio neispravan ili nedostupan discovery URL. Kontaktirajte podršku vašeg LMS-a.
Launch shows "Configuration not found"
Ili je konfiguracija u FastComments obrisana, ili je pokretanje došlo od iss/client_id para koji ne prepoznajemo. Ako ste obrisali i ponovo registrovali, naložite vašem LMS-u da ukloni i ponovo doda FastComments alat kako bi dobio novi client_id.
Launch shows "Deployment not registered"
Pokrenuli ste FastComments iz Brightspace/Moodle/Blackboard deployment-a različitog od onog u kojem je prvi put pokrenut. FastComments zakači deployment_id pri prvom pokretanju kao bezbednosnu proveru. Da biste dodali novi deployment pod istim klijentom, kontaktirajte podršku — dodaćemo deployment ID u konfiguraciju.
Launch shows "Unsupported message_type"
LMS je poslao LTI poruku koju FastComments ne obrađuje (npr. LtiSubmissionReviewRequest). FastComments podržava samo standardni resource-link launch i deep-linking tokove. Obratite nam se ako vam je potreban dodatak specifičnog tipa poruke.
Iframe doesn't resize
Većina LMS-ova automatski prilagođava veličinu LTI iframe-ova. Ako vaš to ne radi, proverite da li podešavanja pokretanja u LMS-u omogućavaju alatu da šalje postMessage događaje roditeljskom okviru. FastComments emituje i Canvas-style (lti.frameResize) i IMS-spec (org.imsglobal.lti.frameResize) poruke za promenu veličine.
Princip najmanjih privilegija i minimizacija podataka
The FastComments LTI 1.3 integracija sledi princip najmanjih privilegija: koristi samo launch claim-ove potrebne da identifikuje korisnika, prikači komentare na odgovarajući kurs i resurs, i primeni dozvole zasnovane na ulozi.
Ostatak ove stranice mapira svaki claim koji integracija koristi, svaki LTI Advantage servis koji ne zahteva, i svaku kategoriju podataka koju ne prikuplja. Recenzenti za bezbednost i nabavku mogu direktno preuzeti odgovore iz tabela ispod.
Data Elements Received From the LMS
Svako LTI 1.3 pokretanje nosi potpisani JWT od LMS-a. FastComments izdvajaju sledeće claim-ove iz tog JWT-a i ne koriste ništa drugo:
| Polje | LTI claim | Svrha | Potrebno | Skladišteno |
|---|---|---|---|---|
| User identifier | sub | Dosledno identifikuje korisnika preko pokretanja tako da ista osoba odgovara istom FastComments SSO korisniku | Yes | Yes, as part of a stable internal SSO ID |
| Display name | name | Pripis prikazan pored korisnikovih komentara | Yes (falls back to "LMS User" if absent) | Yes |
email | Poklapanje naloga, notifikacije, moderacija, korespondencija podrške | Optional (the integration works without it) | Yes when provided | |
| Avatar URL | picture | Prikazano na korisnikovim komentarima | Optional | URL only; FastComments does not download or rehost the image |
| Roles | https://purl.imsglobal.org/spec/lti/claim/roles | Određuje da li je korisnik administrator, instruktor (moderator) ili polaznik | Yes | Derived isAdmin / isModerator flags on the SSO session |
| Course context | https://purl.imsglobal.org/spec/lti/claim/context (id, title) | Povezuje nit komentara sa odgovarajućim LMS kursom | Yes | Yes, as part of the resolved page identifier |
| Resource link | https://purl.imsglobal.org/spec/lti/claim/resource_link (id) | Povezuje komentare sa odgovarajućom aktivnošću ili pozicijom alata unutar kursa | Yes when present | Yes, as part of the resolved page identifier |
| Deployment ID | https://purl.imsglobal.org/spec/lti/claim/deployment_id | Usmerava pokretanje na odgovarajuću FastComments tenant konfiguraciju | Yes | Yes, on the FastComments LTI configuration record |
Claims and Scopes Declared at Registration
Tokom LTI 1.3 Dynamic Registration, FastComments se registruje sa scope: "" (bez dodatnih OAuth scope-ova) i deklariše samo ove OpenID Connect claim-ove:
iss, sub, name, email, picture
Registrovana su dva tipa poruka:
LtiResourceLinkRequest- standardno pokretanje kursa u FastComments.LtiDeepLinkingRequest- omogućava instruktorima da postave FastComments alat unutar kursa.
Nema zahtevanih dodatnih access token-a od LMS-a.
LTI Advantage Services Not Requested
| Service / scope | Requested? | Reason |
|---|---|---|
| Names and Role Provisioning Services (NRPS) | No | The integration does not need a course roster; user identity arrives with each launch |
| Assignment and Grade Services (AGS) - lineitem, score, result scopes | No | The integration is not gradebook-aware |
| Deep Linking beyond the standard placement return | No additional data | Deep Linking is used only for instructor placement of the tool; no course content is enumerated |
Data Not Collected
Pored samog LTI-ja, FastComments ne zahteva niti prima sledeće od LMS-a ili korisnika:
| Kategorija | Prikuplja se? |
|---|---|
| Student grades | No |
| Assignment submissions | No |
| Attendance records | No |
| Full course rosters | No |
| Government identifiers | No |
| Date of birth | No |
| Postal address or phone number | No |
| Financial information | No |
| LMS administrator credentials | No |
Access Boundaries
- FastComments prima podatke samo unutar autorizovanog LTI 1.3 pokretanja potpisanog registrovanim ključevima LMS-a. Integracija ne poziva LMS radi dodatnih informacija.
- Launch tokeni su jednokratni i kratkotrajni. Ponovo upotrebljeni ili istekli tokeni se odbacuju.
- Administratori LMS-a kontrolišu gde je alat postavljen unutar njihove platforme. D2L Brightspace, na primer, podržava per-deployment org-unit scoping i per-deployment security settings, što omogućava administratorima da ograniče alat na određene kurseve ili org unit-e umesto da ga učine dostupnim globalno. Moodle, Blackboard, Sakai i Schoology nude ekvivalentne kontrole po deploymentu u svojim LTI 1.3 implementacijama.
Storage and Retention
FastComments zadržava LTI-izvedene podatke tokom trajanja aktivne usluge komentarisanja i u skladu sa podešavanjima zadržavanja koja konfiguriše kupac. Podaci o komentarima se čuvaju u produkcijskom skladištu šifrovanom u mirovanju. Po prestanku naloga ili na pisani zahtev za brisanje, FastComments briše ili anonimizuje podatke kupca u skladu sa važećim ugovorom.
Za potpune detalje o skladištenju i rukovanju podacima, pogledajte Politika privatnosti FastComments.
Review Cadence
Svaka nova LTI funkcija koja bi zahtevala dodatne claim-ove, scope-ove, ili LTI Advantage servise se pregleda pre objavljivanja kako bi se potvrdilo da je traženi pristup neophodan i proporcionalan funkciji koja se isporučuje.
Short Statement for Security Questionnaires
FastComments primenjuje princip najmanjih privilegija i minimizaciju podataka za svoju LTI 1.3 integraciju. Integracija koristi samo LTI launch claim-ove potrebne za autentifikaciju korisnika (
sub,name,picture), određivanje njihove uloge, i identifikovanje kursa i resursa kome komentari pripadaju. FastComments ne traži Names and Role Provisioning Services, Assignment and Grade Services, podatke iz knjige ocena, evidenciju prisustva, potpune spiskove učesnika, niti administratorski pristup LMS-u. Administratori LMS-a zadržavaju kontrolu nad tim u kojim org unit-ima, kursevima i deployment-ima je alat dostupan.